Have you ever tried to play a Game Boy in the last 10 years? Screens have come a long way since the Game Boy was released way back in 1989, however, for a screen technology that is 30 years old it still holds up pretty well. Playing outside was pretty much a no go as sunlight would make the image washed out. Nintendo saw it fit to include a contrast dial to help, but it didn’t help a lot. If you want better contrast for your old DMG-01 Game Boy the best way is to install a bivert mod.
So, how do you bivert a Game Boy? Game Boy Bivert Mod: Biverting a Game Boy’s display involves soldering a bivert chip to the motherboard of the Game Boy. This chip inverts the display data outputted to the screen, you can use a polarizing lens to then invert that image again (Hence the ‘Bi’ in bivert) back to the normal configuration which will leave you with a much higher rate of contrast.
Why Bivert a Game Boy?
The main reason to bivert a DMG Game Boy is for additional contrast when using a backlight mod. Some people just prefer the inverted image the chip provides, and I have to admit it does look good in a few games and defiantly puts a unique spin on Tetris. Some games, like Links Awakening, look a little odd inverted, especially without the use of polarizing lens/film.
With the pixels flipped, what was once on is now turn off, light is dark etc. You get a much better contrast this way and it makes a big difference on-screen visibility.
So, lets Bivert my Game Boy. I have already installed a backlight mod but have yet to install the bivert chip so I thought I would walk you through it with me.
Installing The Game Boy Bivert Mod
Step 1.
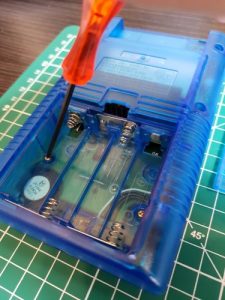
Make sure any batteries and games are removed and lay the Game Boy down face down. Remove the battery compartment door and inside you will notice two screws as well as the four screws outside on the Game Boy, these special screws are called tri-point screws and you will require a tri-point screwdriver to get them out. Nintendo uses these security screws in a lot of their products and they are similar to a Philips screw head but have three points rather than four. Grab your tri-wing or tri-point screwdriver and take out all six of them. Now, flip your Game Boy onto its back carefully.
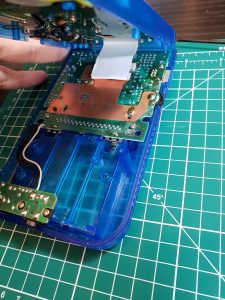
With the screws out, you will be able to separate your Game Boy but be careful! Both halves are connected by a ribbon cable which you will carefully need to wiggle or tease out. The cable may be a little stiff so be careful not to pull on it too hard.
Step 2. Polarizing Lens Orientation
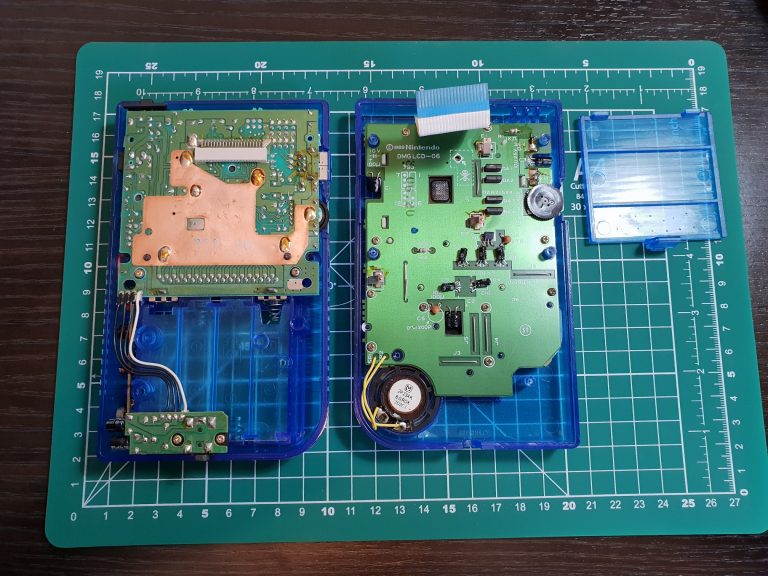
If you have a back-light mod installed (like me), you are going to want to change the positioning of your polarizing Lens installed under the glass of your screen. To do this we will need to remove all the Philips head screws holding the front board and screen to the shell.
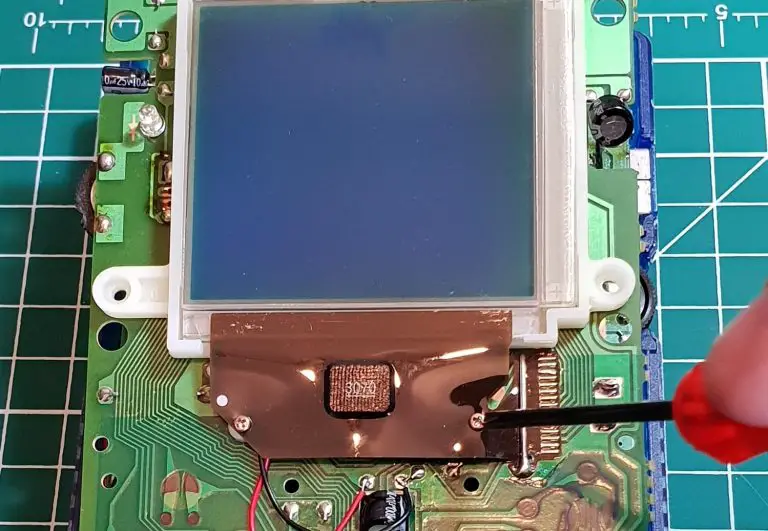
Next, we flip over the board and will need to remove the two tiny Philips head screws holding the LCD’s ribbon cable in place and carefully lift the screen and change the orientation of the polarizing film to 90 degrees. We want the screen to be dark.
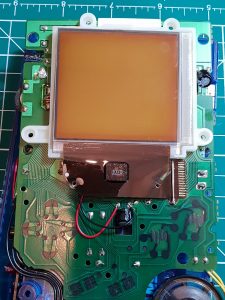
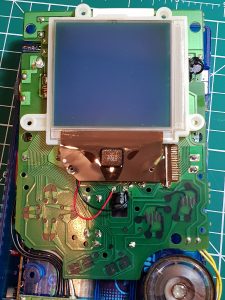
Please note that the screen does NOT fully lift up and is still attached via a ribbon cable! Be careful and only pry it up slowly
I’ve already got mine installed in the correct orientation but thought I would show you in case you need to do this yourself. This is also a good opportunity to remove your buttons and silicone pads and give them a gentle clean if needed.
Step 3. Lifting the Pins to facilitate Bivert Chip
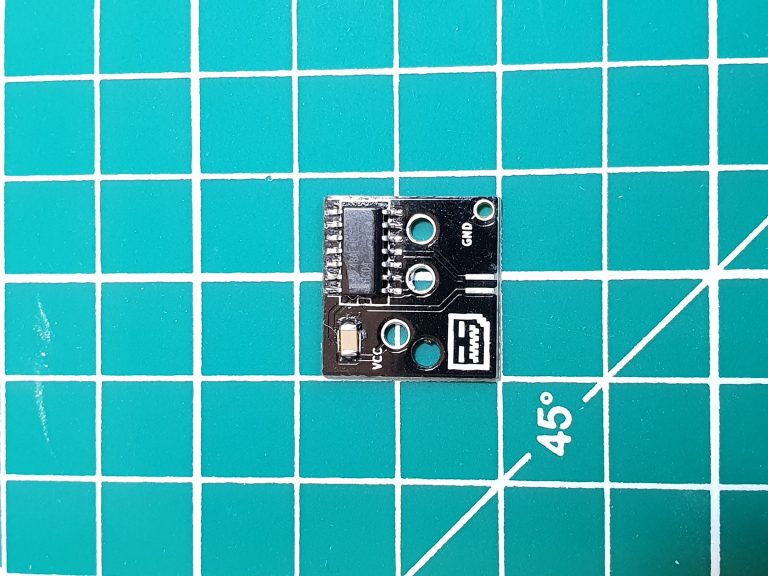
Now, on to the back half of the Game Boy. As you can probably tell from the Bivert chip we will need to solder two pins to the chip.
Counting from right to left we will need to lift pins 6 & 7 so the bivert chip can slide underneath.
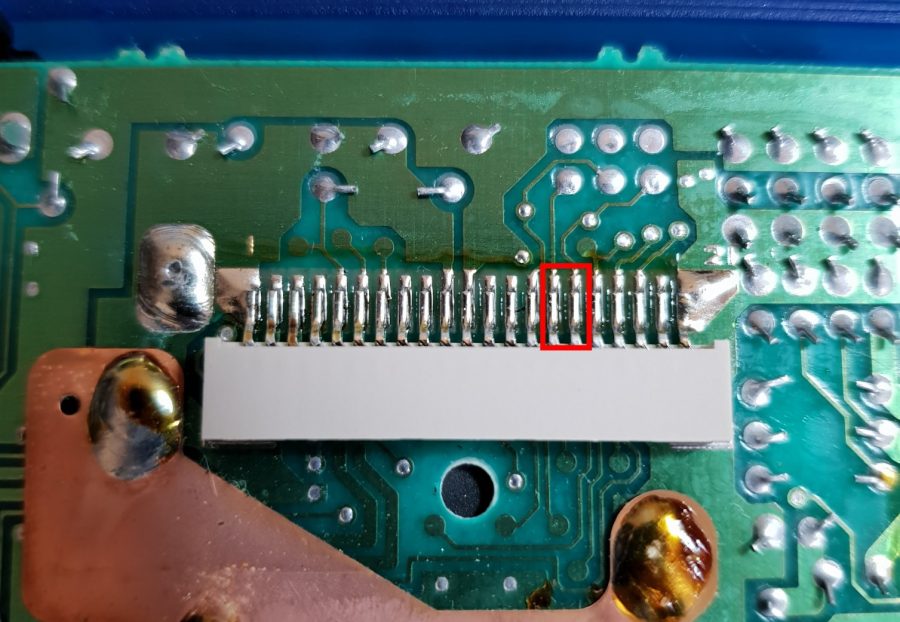
Heat up your soldering iron and apply a little heat carefully to the pins and gently use your tweezers or a craft knife to get under the pins and gently lift them up.
If you have some fine desoldering braid you can use that to wick up some of the solder, however, some will most likely be left behind under the pins. Just take your time and slowly you will get them up!
Step 4. Solder the Bivert Chip onto Game Boy
I guess it’s time to finally install the Bivert chip! Grab your soldering iron (Not by the top ofcourse!!) and get to work. As you can tell from my picture below I have terrible soldering skills, but we will gloss over that!
First, we slide the bivert chip underneath the lifted pins and line them up with the points to solder. The good thing about the Deadpan Robot bivert chip is that its cut-outs line up perfectly to where you need to solder, however, to make it a little easier on myself I used some flush cutters to remove the excess cable from underneath the left two holes.
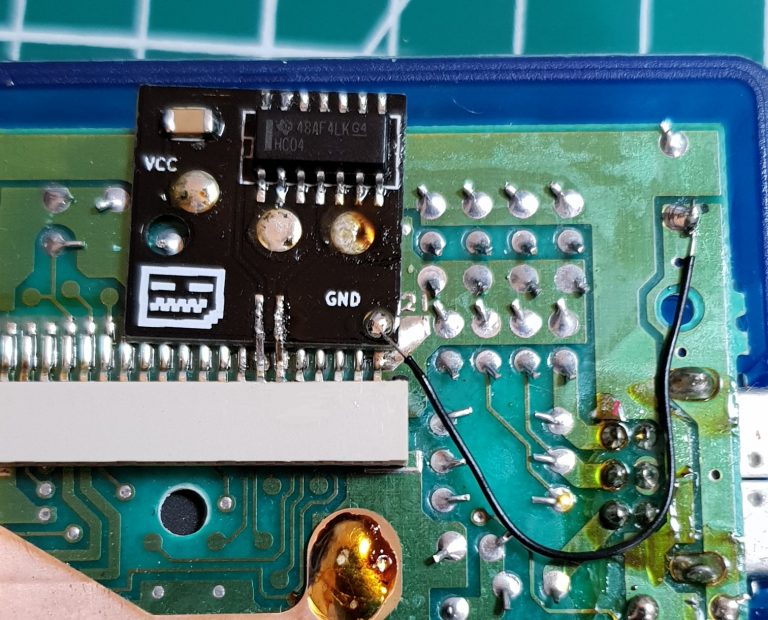
I soldered my points from right to left to anchor the chip into place. I then loaded up my soldering iron with a little solder and soldered the two pins into place. If I could have found my flux I probably could have made a much cleaner job of things! I would recommend using some.
You can see from the picture that I have soldered a wire for ground. Apparently, you do not need to do this as the solder at GND should ground it to pin 1. Well, you live and learn, better safe than sorry, right? (Also make sure to slightly move cable away from the screw hole or you will be in trouble!)
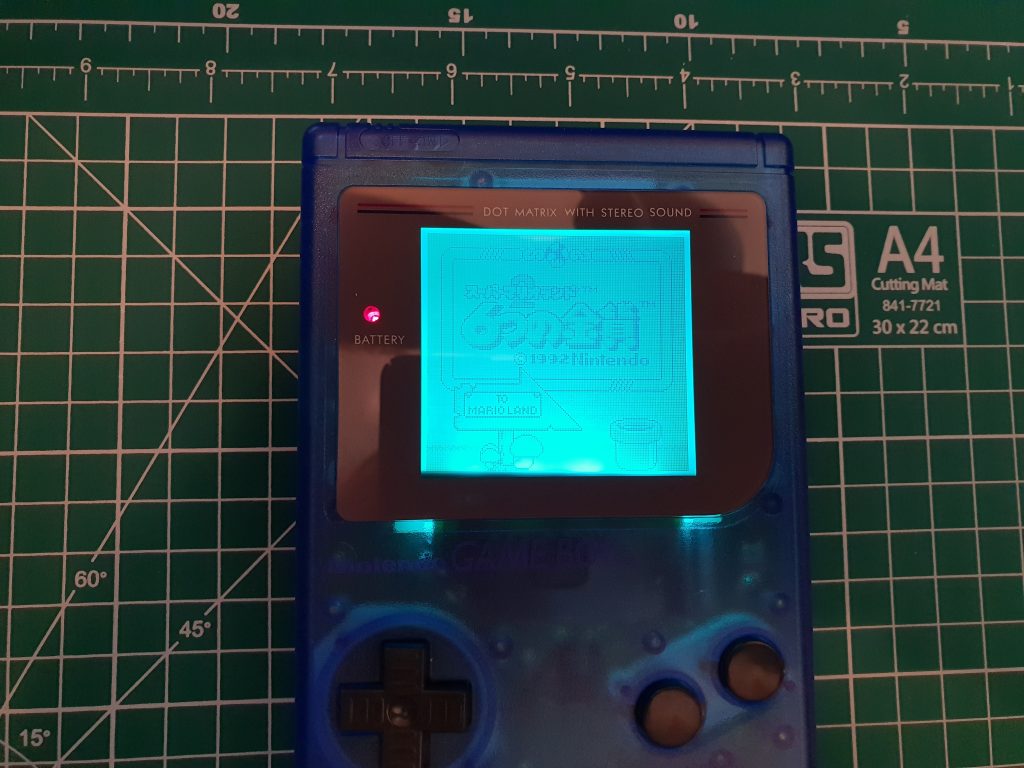
Step 5. Test your new Biverted screen
Although not likely an issue, there is nothing worse than putting everything back together only to realize that something is not working, or you have forgotten something. To test your Game Boy bivert mod is working, plug the ribbon cable back into the board, grab some batteries and test! You should be able to see the difference. If you have a back-light mod installed you can have a look at how it looks with the polarized lens in both orientations.

Step 6. Put your Game Boy back together
Put your buttons back into the front half of you Game Boy followed by your silicone pads. Reattach the front PCB back into the front part of the case. Remember to put back in all the Philips head screws. (including the tiny ones holding down the screens ribbon cable)
Carefully put back together the two halves of the Game Boy being vigilant of any cables of obstructions from the screw posts in the case. Screw back together the 6 tri-wing screws
Congratulations! You are now the proud owner a Biverted DMG-01 Game Boy and your Game Boy bivert mod is complete.
Resources
Here is where you can order your materials from: –
- Bivert Chip – Deadpan Robot
- Backlight Kit – Deadpan Robot
- Game Boy Shell – Amazon
- Real Glass lens – eBay
- Tri-wing Screwdrivers – Amazon
- Soldering Iron – Amazon
- Old Game Boy – I’ve had mine for a long time, give Amazon or eBay a try.
If you enjoyed this guide the Game Boy bivert mod, please feel free to check out my guide for installing a backlit screen into a Game Boy Advance.