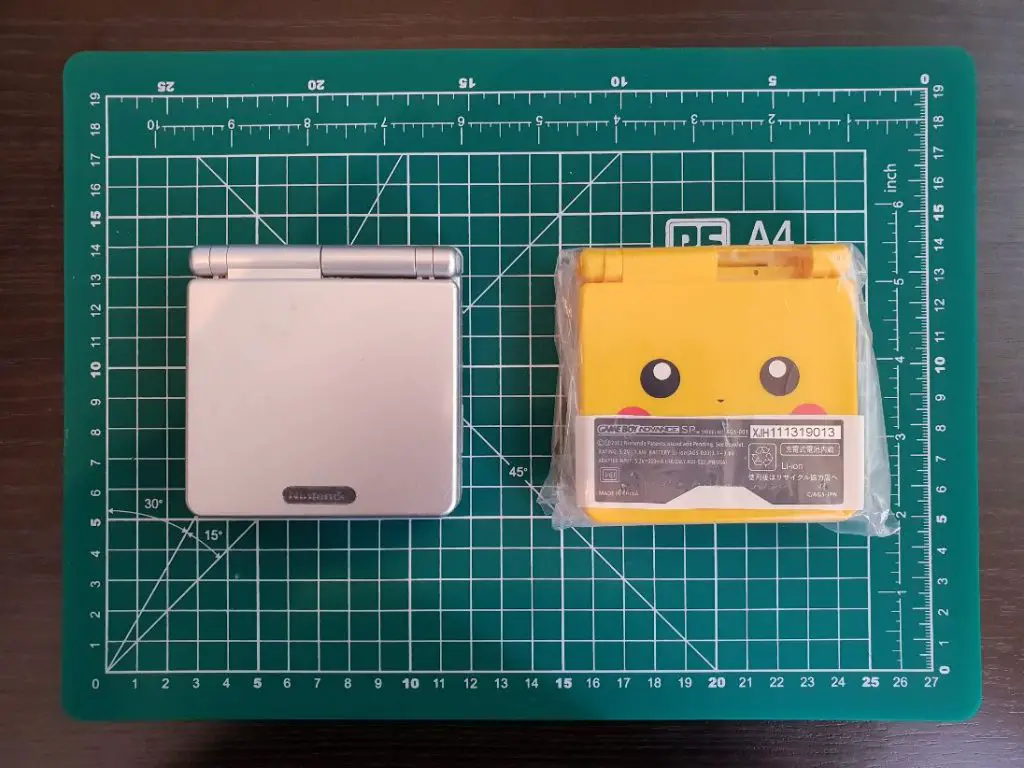
The Game Boy Advance is probably the one handheld console I have the fondest memories of. I even imported one of the original models from Japan when it was released. The thought of being able to play SNES like games on the go was a dream come true. For me, that dream is still alive and well and even to this day, I find myself playing through Final Fantasy V on the GBA.
A few years after the launch of the GBA, Nintendo decided it was time to update the console. In came the Game Boy Advance SP (“SP” stood for Special). Finally, we have a rechargeable battery! This was massive news, but even more importantly, we had a lit screen! No more unsightly worm lights or not being able to play outside at all. This SP has a great form factor and thanks to the clamshell design a lot of them are in great working order with minimal scratches to their screens.
So, Why should you reshell your Game Boy Advance SP? Over the years most GBA SP consoles are showing some sign of cosmetic wear and tear. Luckily, manufacturers still make replacement housing for this extremely popular console. This guide will help you with replacing your old GBA SP shell and freshening it up!
How to Reshell a Game Boy Advance SP
Steps
Step 1
Turn your Game Boy Advance SP over and get ready for the disassembly. The great thing about the SP is that it is relatively easy to disassemble. They don’t have too many parts and are attached to only one mainboard.
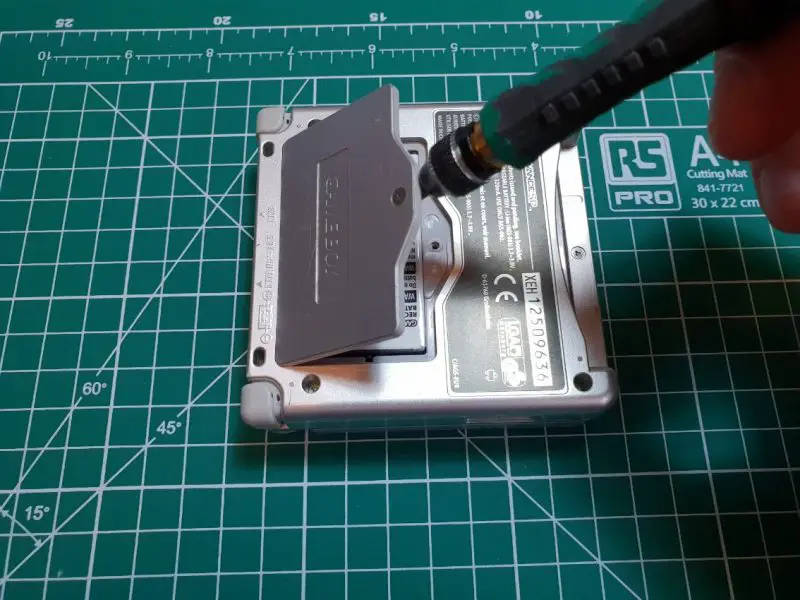
Remove any game plugged in and remove Philips head screw on the battery compartment. Remove the battery and put to the side. Once the battery is removed we will move onto the 6 tri-wing screws. Grab your tri-wing screwdriver and get busy!

There is one screw in the battery compartment, 4 four in the corners of the console and one just above where the cartridge slots in.
*Keep a note of these screws are some are slightly different sizes!*
Step 2
The bottom cover will now be able to be lifted off. Now, you will be able to see the motherboard. If needed ( or if you just want to) you can use a little isopropyl alcohol to give the power and volume slider a little clean.
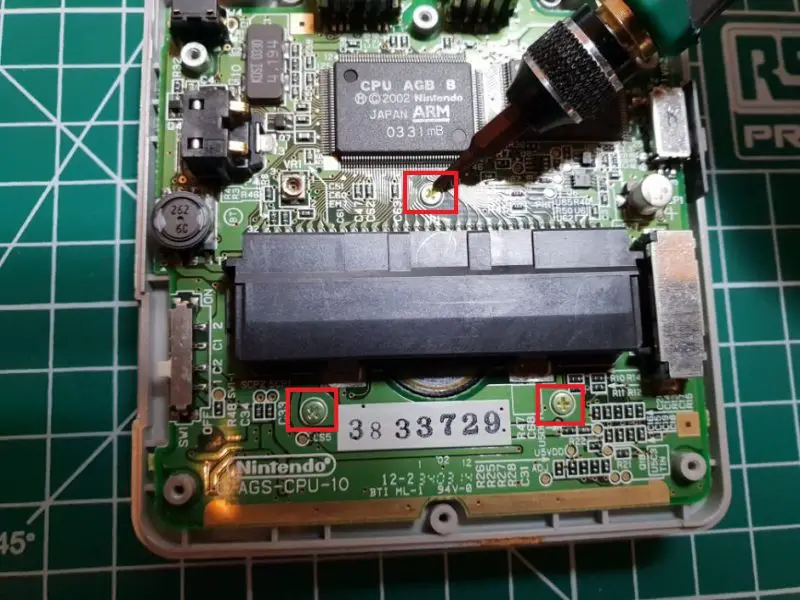

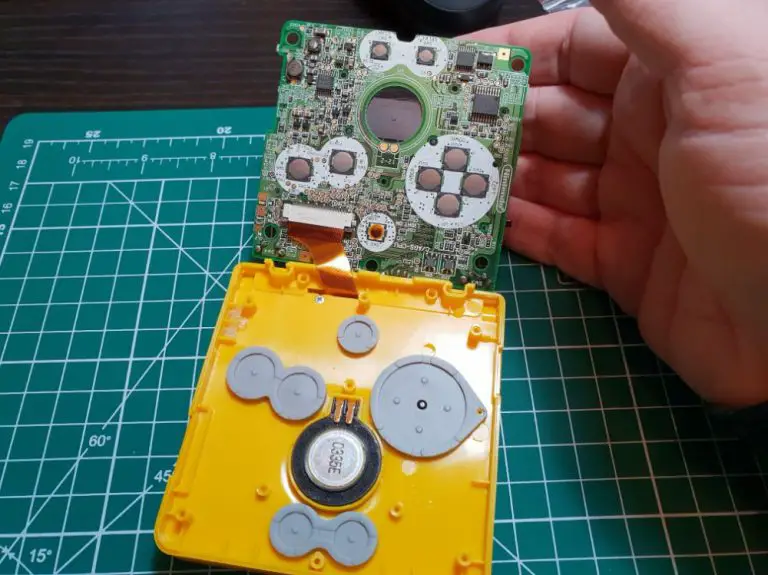
On the motherboard, you will find three Philips head screws that we need to remove in order to take out the motherboard from the case. Gently lift up the motherboard, the ribbon cable that is attached to the display is underneath and we will need to lift up the two clips holding the cable in place. gently pull them up and towards the cable.
You should now be able to take the ribbon cable out. You will now able to remove the motherboard completely from the case. The rubber membranes will likely come out with the board and it’s up to you if you would prefer to reuse them or use the new ones that came with the replacement shell. Unlike the Game Boy, the Advance SP’s buttons are tactile on the board meaning you will not have to clean any of the contacts here!
Step 3
Remove remaining pads, Buttons and speaker, the speaker just lifts up and comes right out. if your speaker is damaged or just junky in general you can pick up a replacement cheaply online.


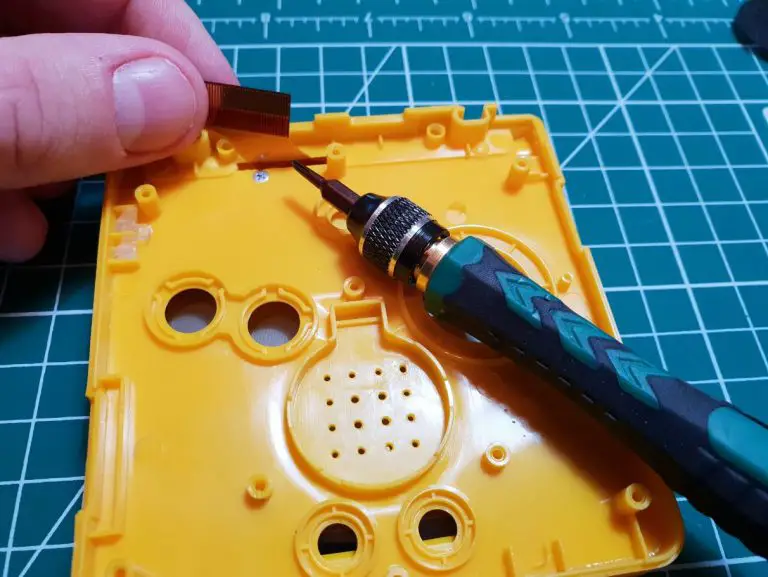
Now, we need to remove the tiny Philips head screw hiding underneath the ribbon cable. This screw holds the hinge cover of the top screen together. Once removed you can turn the SP over and simply pull up the in cover and it should lift.

Step 4
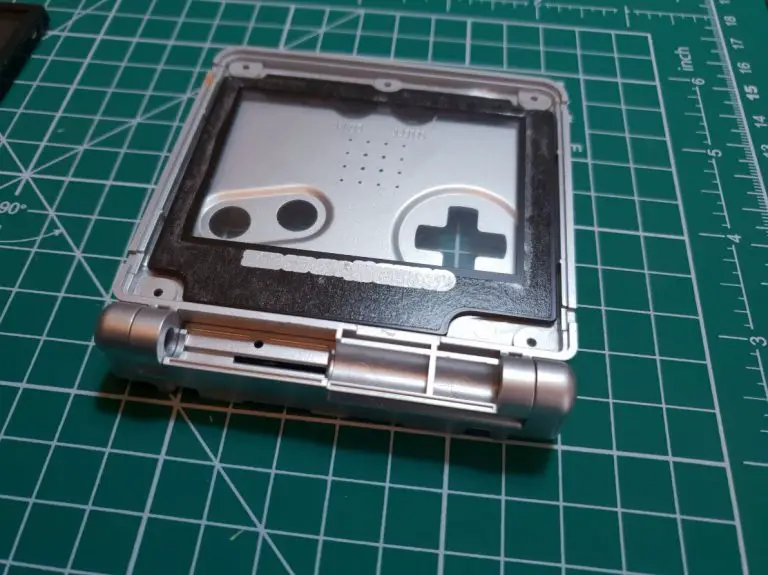
Open the screen of the GBA SP remove the rubber pads from around the screen bezel. We need to get at the screws hidden beneath them. Additional pads are included with the housing replacement so do not worry about damaging these. Once they are off, remove the 5 tri-wing screws holding the bezel in place. You should now be able to pry off the bezel from the screen.
*Be careful not to pull on the ribbon cable as the bezel comes off!*

Step 5
Step 5 is the hardest step in replacing the GBA SP shell, we need to remove the hinges from the original shell. Removing these hinges can be a pain, they are in very well and take a fair amount of force to remove.


The best way to remove them is to apply pressure with a screwdriver from the inside, pushing out. The hinges will most likely fly across the room but this is normal! Once they are off you will be able to remove the caps on the end of each hinge, they just slide off.
*WARNING!! be mindful of where your hands are while pushing these through. I had a close call with a screwdriver and my left hand which would have been painful!*

Step 6 - Optional
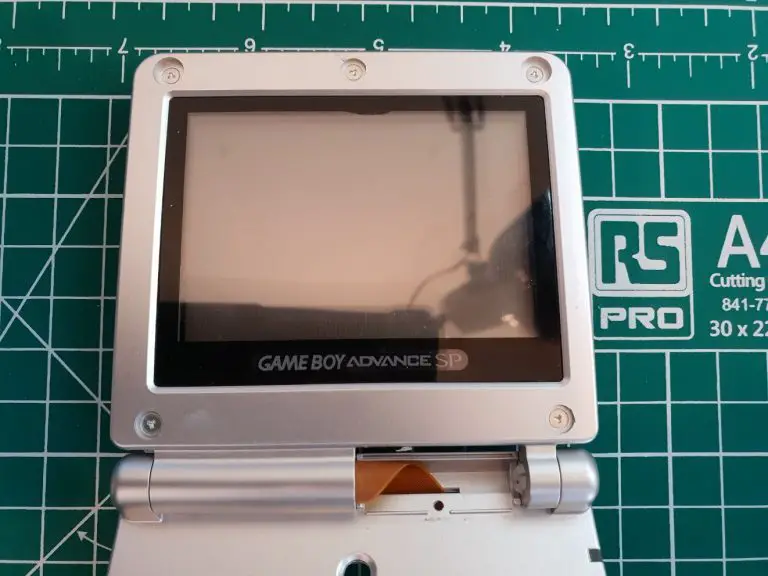
This step is optional and only necessary if you want to replace the GBA screens lens or to clean out any dust under the GBA SP screen. I am replacing mine with a scratch-resistant glass lens.
Holding the screen in one hand slowly work a spudger or similar tool underneath the original lens. its glued on pretty well, but if you keep working at it, it will eventually peel off. You can give the screen a spray with some compressed air to remove any dust that’s been trapped underneath.

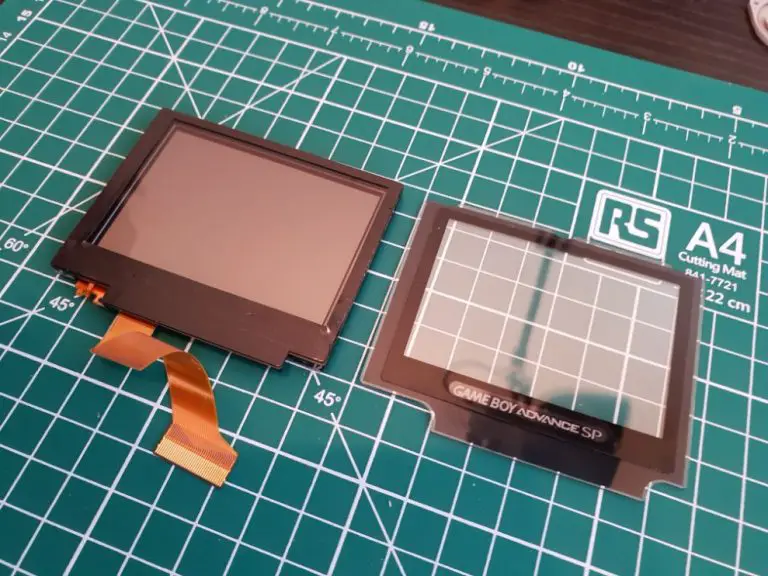
Peel the replacement screen self-adhesive tape off and line it up with the screen (You can use the GBA SP’s shell as a guide if you like, placing the screen in one half and the lens in the other. Close the case and this will ensure that everything lines up flush.)

Step 7
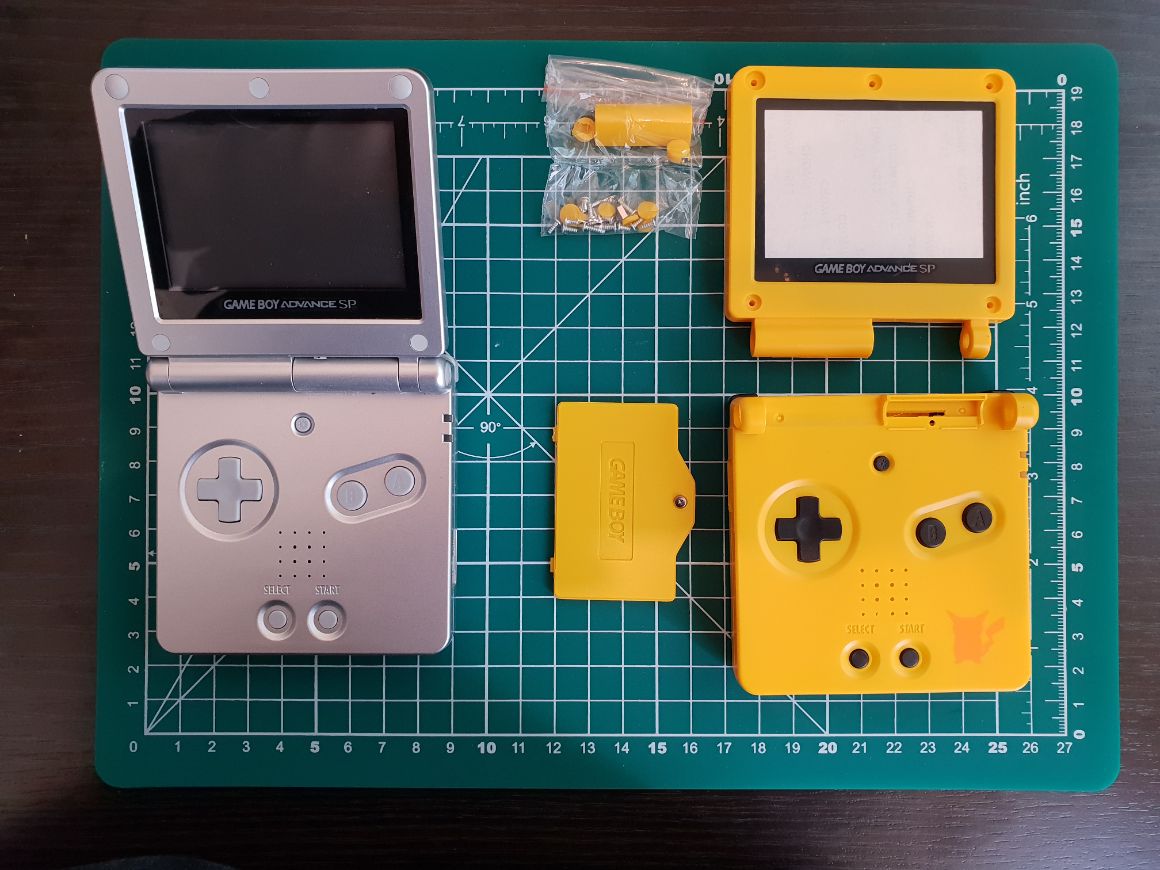
We can now move on to the replacement Shell. Inside we will find a bag which contains the ends caps for the hinges. We need to reattach these before the hinges are inserted.

Next up is installing the hinges. No matter how hard I tried I could not find any information on how to keep the orientation of the hinges while installing. After many attempts, I finally figured it out! So, how do you correctly install GBA SP hinges? I found the best way to keep the hinges lined up is to keep the shell closed and push them halfway in, they will naturally stop at this point. once halfway in, open the shell fully as if you were playing a game (the shell should click into place at this point) and you can push them out the rest of the way. This ensures that you get that nice ‘click’ and smooth closing motion with the hinges. I’ve seen many reshelled SPs from eBay with incorrectly installed hinges that do not snap shut in the past!


You will now be able to place your screen into the shell and attach the two halves, the ribbon cable should slide through the gap like before. It loops over once and drops down through the bottom.

You can now put the top part of the case in place and clip together. Some of these aftermarket cases don’t clip in as well as the original does. This is perfectly fine as it’s going to be held together with screws. Speaking of which, it’s time to screw in the 5 screws to hold the screen in place! You will want to put your replacement hinge cover back into place now also so screw that in. Make sure the ribbon cable is clear and out of the way.
Step 8
Reinstall all the speaker, Buttons and silicone pads. Carefully reinsert the ribbon cable into the motherboard and lock it in place. Guide the motherboard into the new case and screw it down with the 3 Philips head screws.

On the back of the shell, we need to now install the square threaded washer. This is where the battery compartments screw gets held in place, so try not to forget it!

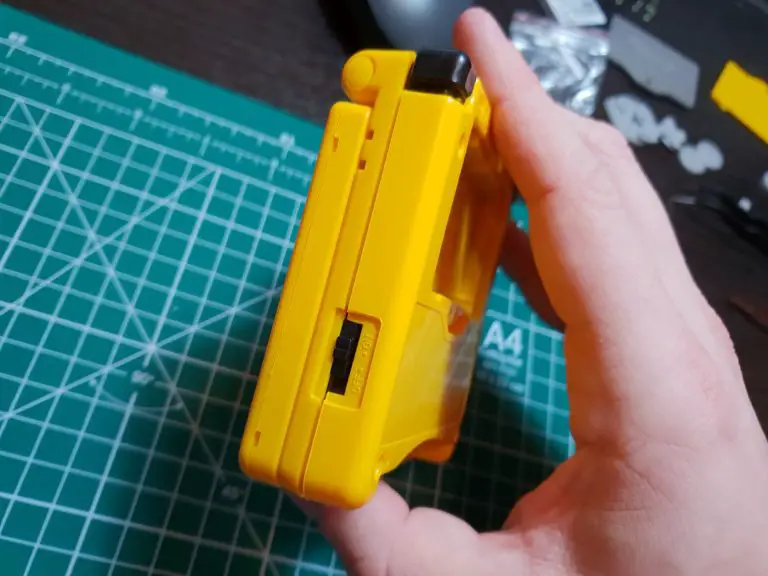
Before we put the back of the GBA SP shell into place we need to make sure our volume and power slider is in place.
Step 9
Put the back cover on and gently push everything back together. Once we are happy with it, we can screw the shell back together. At this point, we can reinstall the battery and test everything works!
Step 10
Last step! We can now install the rubber pads over the 5 screw holes around the screens bezel, these stop the shell from rubbing together on the inside. Find the ‘Nintendo’ logo replacement sticker and put into place. After this is done all that is left is to put the sticker into place on the back of the console.


Conclusion
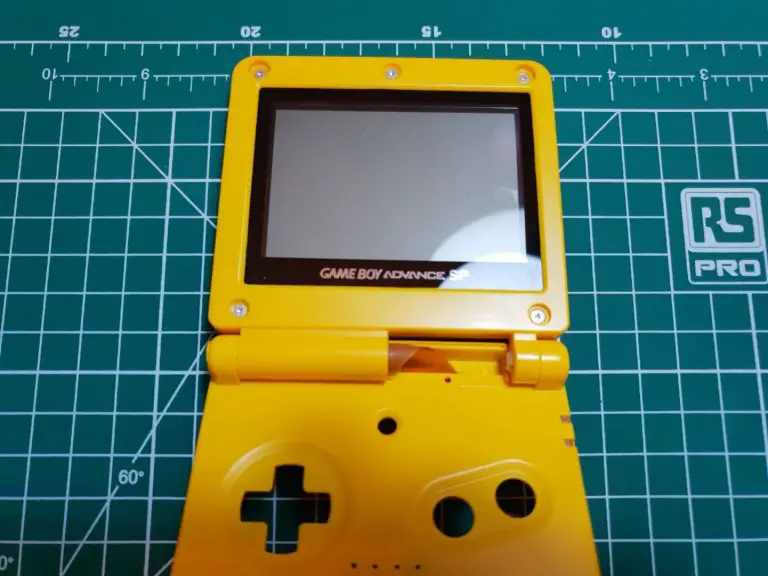
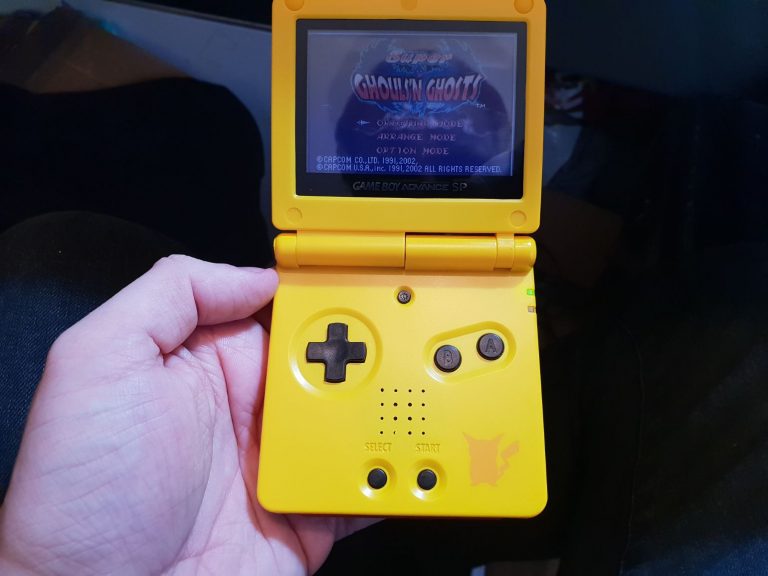
Rehousing your GBA SP is a fun project. It does not take too long to do and before long you can have something that looks nice (This is why I chose the Pikachu SP shell). Considering the cheap costs of the SP console and shell it’s well worth doing.
In the last picture of the guide, you may notice the slightly dim screen. This is because the model I reshelled is an AGS-001 and only had a front-lit LCD screen. If I had been lucky I might have ended up with an AGS-101 variant which comes with a proper backlit screen. You can buy the AGS-101 screens from Amazon or eBay, however, the AGS -101 motherboards may be a little harder to find. I would search eBay for a broken AGS-101 or try Aliexpress.
There is an option to install the AGS-101 screen into a standard 001 motherboard but, it’s not for the faint-hearted and involves a fair bit of soldering. I will try and put together a guide at some point.
If you are interested in the AGS-101 screen, please check out my other guide where I installed an AGS-101 screen into an original Game Boy Advance.
Overall, the Game Boy Advance SP is a fantastic console and the last official way to play original Game Boy & Game Boy Color games. The form factor is not for everyone and the lack of a headphone jack (fixed with an adapter) can put some people off, but to me, the SP truly is special.

Pingback: How to Install GBA SP IPS Screen | Full Guide
Pingback: Gameboy Advance Backlight Screen Mod | Helpful Guide with Pictures!
This walk-through really helped out and now I have a really dope clear GBA SP thank you so much.
Glad to have helped! Enjoy!
Hello, sorry to bother you! Everything was working fine thanks to your guide. I turned it on. Managed to turn it on and everything. No issue. Then I realised that I neglected to screw in the motherboard. I gently did so and now when I plug in the charger, the red light turns on for a second then off and refuses to charge. Has this happened to you or anyone else? I’m really frustrated with myself.
Hi Charlotte,
Does the SP turn on at all? Or just turns its self off?
It sounds like a blown fuse, the best way to check is with a multimeter.
Look for parts labelled F1 and F2 on the motherboard. If it is one of the fuses you should replace it, you can find replacements on eBay.
Another option (unrecommened, but would work) is to bridge the fuse with solder. Personally, I would replace the part.
Hi! I recently reassembled a GBA SP, but I had an issue with my AGS 001 screen. Once connected to the motherboard, the screen had wide vertical lines going through the middle & I could hardly see anything. Is this a problem with the AGS 001 screen I ordered, or is it that AGS 001 screens aren’t compatible with an AGS 101 motherboard?