In this guide, I will show you how to upgrade your Steam Deck’s internal storage without losing any data. This method will also work if you want to take your data from a regular Steam Deck to one of the OLED models. This is also a great option if you need to back up your data before sending your Deck off for repair or any potential RMA. There’s no need for an NVMe enclosure as all data is backed up to an external drive.
Before you start with this guide, it may be worth asking yourself do you really need an exact copy of ALL of your data? If it’s just Steam games you have installed on your deck, you may prefer to start with a fresh install of Steam OS and redownload your games and cloud saves. Steam Cloud is excellent and almost all Steam games support it.
This guide will result in a 1:1 copy of all your data, retaining all profiles, games, saves and additional settings such as Emudeck configurations and save files.
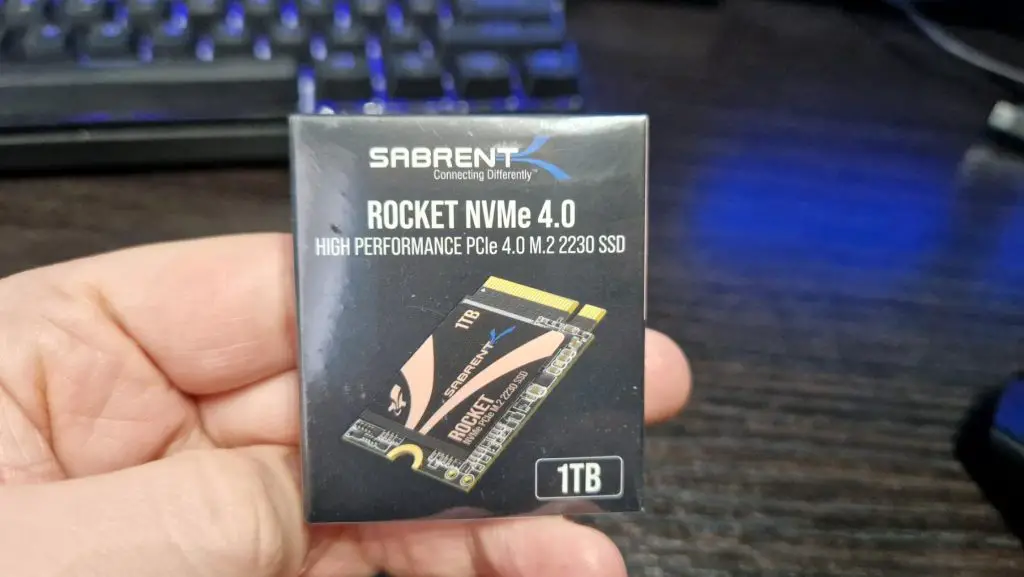
The following steps show me upgrading my 256GB model Steam Deck to a much larger 1TB internal storage. Since the below images, I have used the same steps to copy my 1TB drive to my 1TB Steam Deck OLED
Screwdrivers and opening tool: (If installing new SSD): To open your Steam Deck, you’ll need a screwdriver and a plastic prying tool/spudger. I use this kit from IFIXIT that has everything you need including the pry tool.
LCD model only: You’ll need a Phillips head screwdriver to open the Steam Deck. I found sizes 1 & 0 to work perfectly. A size 00 technically fits but might strip your screws.
OLED model only: You’ll need a Torx bit T6 or TR6.
USB-C hub or Steam Deck Dock: Most USB-C hubs should work but make sure they have Power Deliver. This model will work and is relatively affordable.
USB thumb drive (SD card and USB adapter will work) any size over 4GB should be fine.
External Hard drive: This will have to be equal or larger then the original SSD in the Steam Deck. I used a 1TB Toshiba drive to back up my 1TB SSD.
USB keyboard: Any will do.
Backing Up Your Steam Deck Data
Before we start the upgrade or transfer, we need to download some software to clone what’s already on our system. The easiest software to use for this in my opinion is Clonezilla.
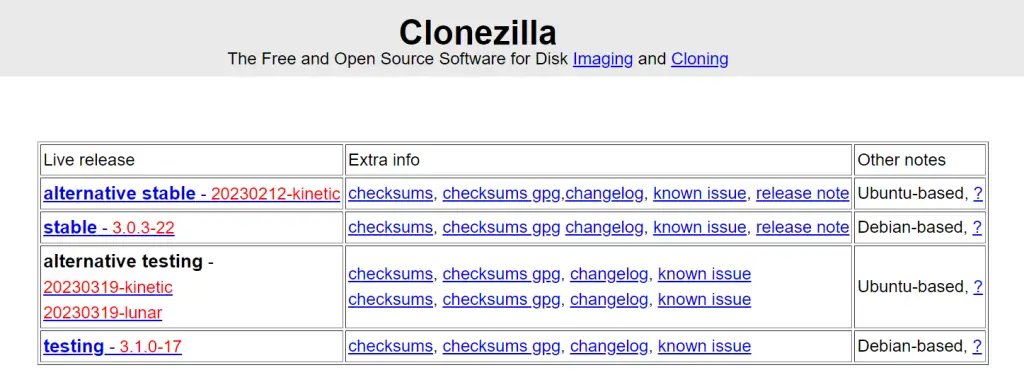
Head over to Clonezilla.org and download the latest version of Clonezilla Live. We will want to download the latest stable version https://clonezilla.org/downloads.php.
Click Stable and on the next page we will want to change the file type from zip to ISO from the dropdown box and click Download and your file will begin to download after 5 seconds or so.
Next, we need a program to put the Clonezilla ISO file onto our USB stick, for this, I recommend you use the program, Rufus. Head over to https://rufus.ie/en/ and download the latest version of Rufus.
If you haven’t already, insert your USB thumb drive into your PC. Rufus will delete all information on this drive so make sure you have backed up any important files as they will be unrecoverable.
Double-click the downloaded .exe file to run Rufus on your machine. When Rufus launches it should automatically detect your USB Thumb drive. Make sure this is correct under the first drop-down menu or you could risk wiping other drives. I’m using a 64GB SanDisk as that’s what I had on hand but even an 4GB or smaller drive should work just fine.
Click the Select button next to the Boot Selection drop-down and select the Clonezilla ISO file we downloaded earlier. Next, click start and Rufus will prompt which mode to use, choose ISO, and Click yes at the prompt about data deletion. Rufus will then start imaging the thumb drive with the Clonezilla software. Depending on the speed of your USB drive, this will take a few minutes to complete.
Once completed, eject the USB Thumb drive then head over to your Steam Deck and make sure your Deck is turned off. At this point, I would recommend connecting your Hard drive to your Steam Deck Dock or USB C hub along with your newly formatted USB thumb drive and Keyboard. These can go in any of the USB ports, order is not important.
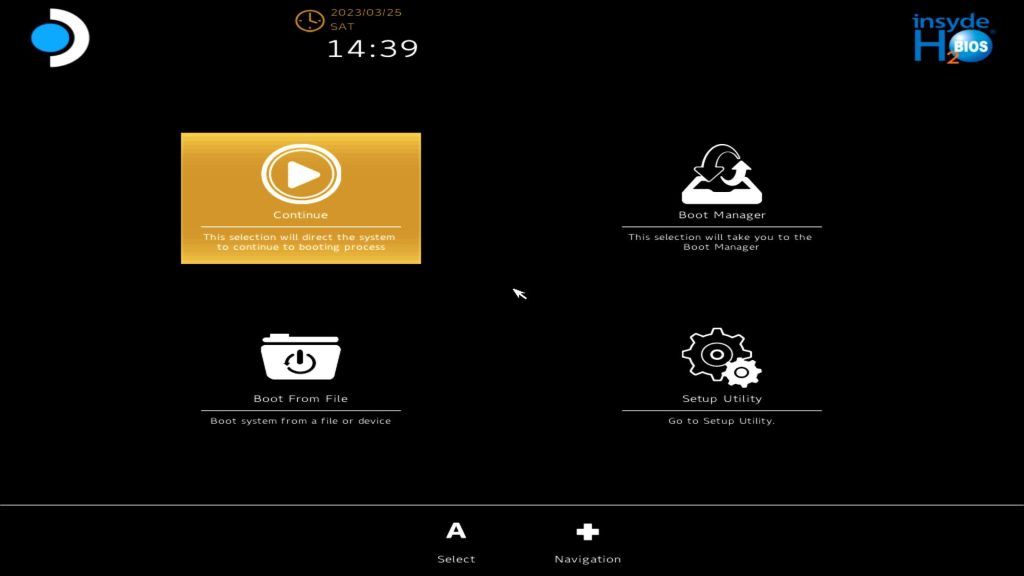
To copy the contents of the Steam Deck’s SSD we will need to enter the Steam Deck BIOS settings, specifically the boot loader. To do this hold the Volume up button on the Steam Deck and press the power button once, continue holding the Volume up button and the Steam Deck should boot into the BIOS screen.
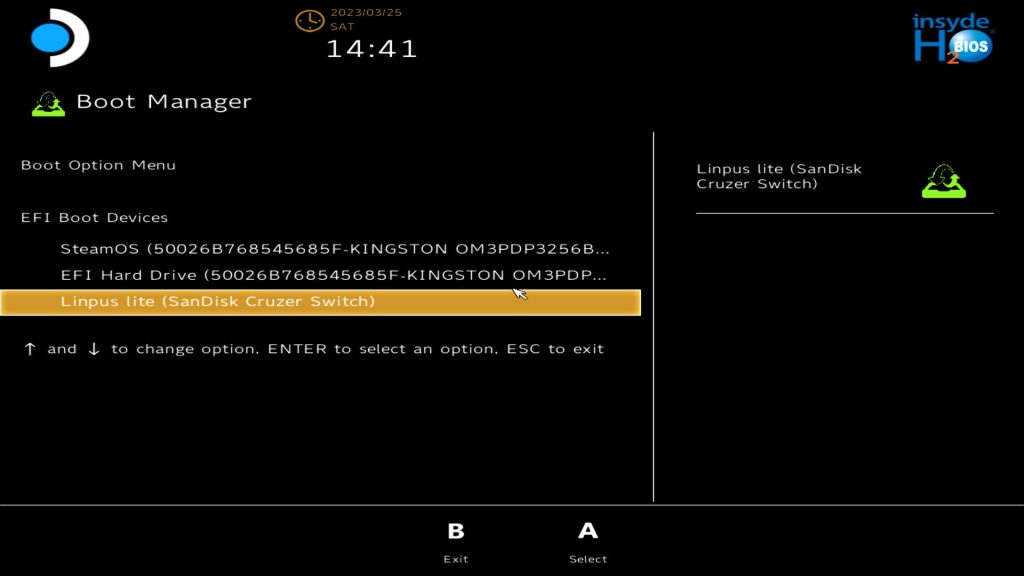
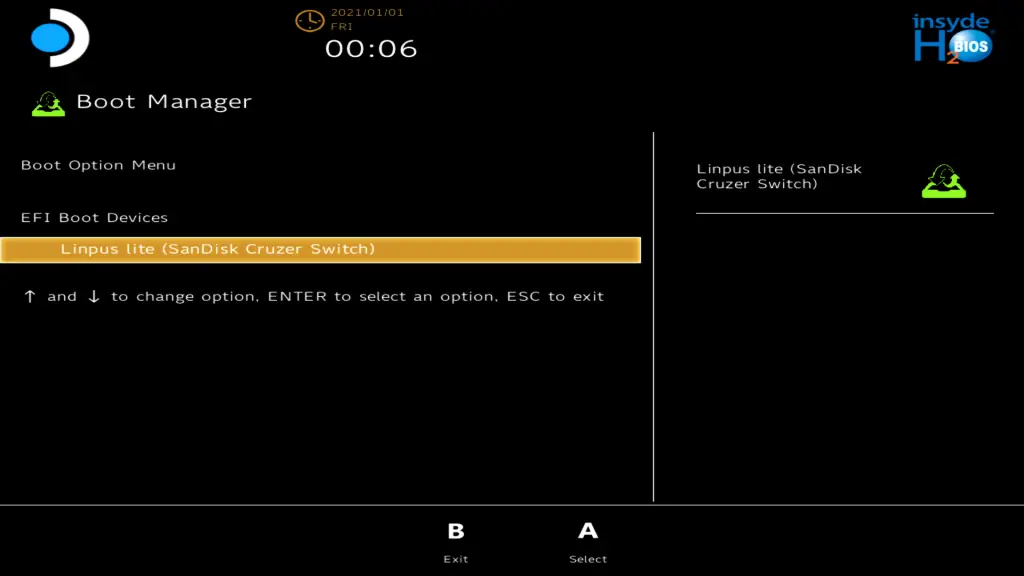
Select Boot Manager and Press A. This will list the bootable devices, navigate down and choose your Thumb Drive, It should say Linpus Lite or will have the name of the brand of USB used.
Press A to be greeted with the Clonezilla software and choose the first option available.
Note: This screen may sometimes be a 90 degree angle, this is fine. Still select the first option.
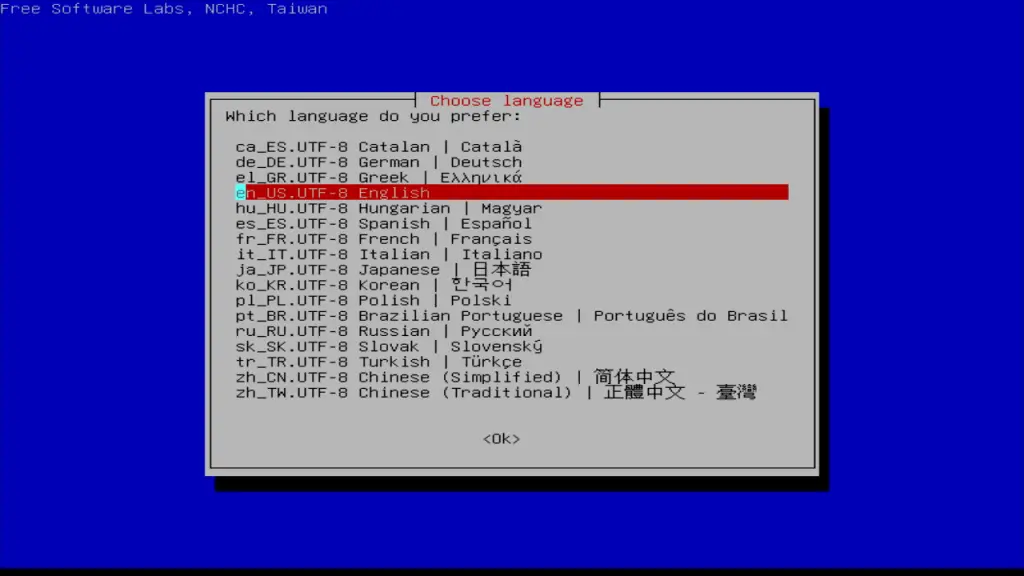
You’ll be asked what language you would prefer to use and Keyboard layout, select what you want and finally, you’ll be prompted to Start Clonezilla, Click enter to launch the program.
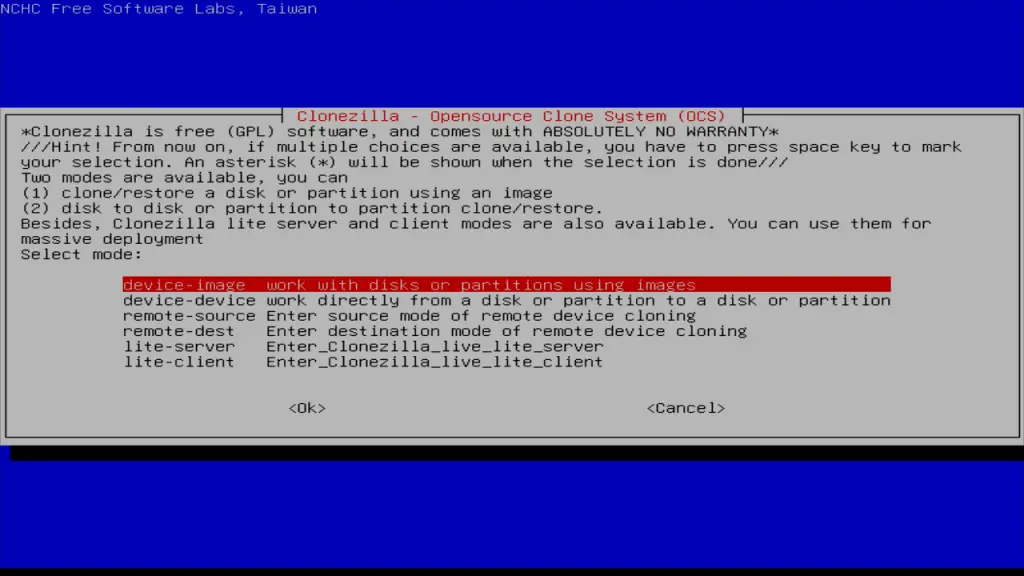
On the next page, choose ‘device-Image’ which should be the first option and then press enter to continue.
Next, we get to choose where our Steam Deck’s SSD data will be saved, Select the first option so we can use a local device and press Enter.
You’ll be prompted to insert your storage media (Hard drive). As we have already done this simply press Enter to continue. If you have not connected it, now is the time.
Clonezilla will scan your Steam Deck and list all of the drives available. Press Ctrl+C on your keyboard to close this prompt
Clonezilla will list all partitions and you’ll be able to select where you want to store your backed-up data.
The first device (mmcblk0p1) is my MicroSD card, technically you could dump it on here and bypass using a hard drive altogether providing you have more space than your internal SSD free.
The nvme0n1p partitions listed are all from the internal NVMe SSD.
The last entry, sdb1 is my Hard Drive and that is what I will be selecting to dump my data onto.
The next prompt will ask you if you want to check your file system before mounting, it’s good practice to do this and I do recommend you do this, however, I’m not going here.
The directory browser screen will allow you to store your files in a specific location on the disk. Simply pick the parent directory or abort and done. Press enter to continue and choose beginner mode on the next prompt.
Next, choose savedisk, which will save the local disk as an image then Enter a name for our backup, I just added ‘deckbackup’ to mine but you can called it anything you want. Select ok and press enter.
The next screen will list which device to use as our source. Select the nvme0n1 and press the space key to put an asterisk next to it then select ok and press enter to continue.
Select the first option on the next screen and have another option to check and repair the filesystem, once again I am going to skip that as it takes too long.
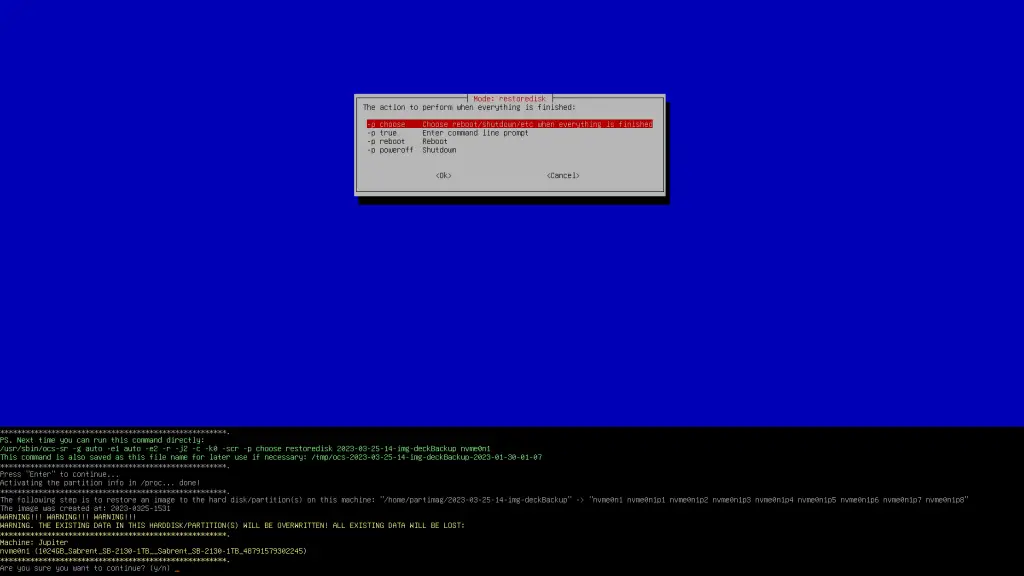
Next, we will be prompted about encryption, select the first option (Not to encrypt) and press enter, and finally choose what action to perform once finished. Select the top option that will allow us to manually choose what to do after the copying is complete and press enter. You need to press enter one more time to load all the partitions.
Once all the partitions are listed, we must type ‘Y’ and press enter to continue and the SSD will finally start to copy to our Hard Drive.
The time it takes to copy will depend on your Hard drive speed and the size of the backup, a 512GB or 1TB model will take a lot longer to back up than a 64GB or 256GB. Feel free to leave this running and can come back a little later.
Once completed you can choose power off. This will shut down the Steam Deck, it’s worth mentioning this should be done before removing any hard drives etc from your dock.
Installing the Steam Deck SSD
If you are switching to a new Steam Deck, or just copying data from a regular Steam deck to an OLED model, you don’t need to open your console at all and can completely skip this step. Please proceed to the section below titled Restoring your data.
First, make sure your Steam Deck is turned off and the MicroSD card is removed. This is VERY important as I’ve seen people who have managed to snap their MicroSD cards in half by forgetting to remove them.
You’ll want to turn over your Steam Deck so we can access the 8 x screws on the back of the deck. The easiest way to do this is to use the official case that came with the deck as it will protect the screen and the thumb sticks.
There’s a total of 8 screws to be removed which differ in size. On the LCD model, the four inner screws are 5.8mm in length and the outer screws are 9.5mm so be sure to keep track of which go where. The OLED Deck only uses screws with are 5.8mm so you do not have to worry about getting them muddled up.
LCD Steam Deck owners will need to use a Philips head size 1 or 0 screwdriver to remove the screws.
OLED Steam Deck owners need to use either a T6 or TR6 Torx driver or bit.
Now that the screws are all removed, it’s time to take the backplate of the Steam Deck. The Deck’s shell is held together by a series of plastic clips so we will need to use a spudger or pry tool to get in between the two halves of the shell. I would highly advise that you do not use any metal tool as you may risk scratching and damaging the shell.
I used a pick-style spudger included in the IFIXIT kit and slid it between the two halves of the shell near the Right trigger. You want to forcefully but carefully get the spudger between the two halves and run it downwards and across the Deck finishing at the Left Trigger. You’ll hear a lot of popping/cracking sounds as you do this, do not worry this is perfectly normal and is just the clips unclipping from the back plate. You may need to run your tool across the deck more than once if a few of the clips are being stubborn.
With the clips released, we’ll now be able to lift off the backplate.
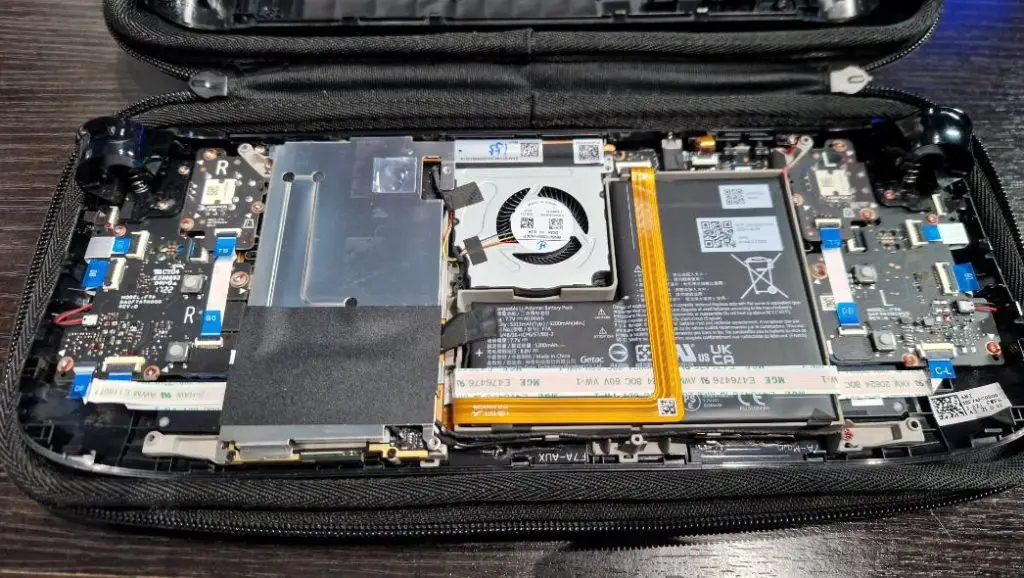
Your internals may look a little different depending on what revision Deck you have. What I have here is the LCD model, The OLED model will have a black covering instead of the metallic silver one here along with a slightly different board layout.
For the LCD Deck, we need to remove 3 Philips head screws from the metal shroud, there’s one at the top and bottom left of the shroud and another hidden under a piece of metallic tape that you can peel back with tweezers. This ‘hidden’ screw is a very slightly different size so be sure to keep a note of it. (If you have one of the later revisions of the LCD Deck with the black shroud, there’s no third screw to worry about)
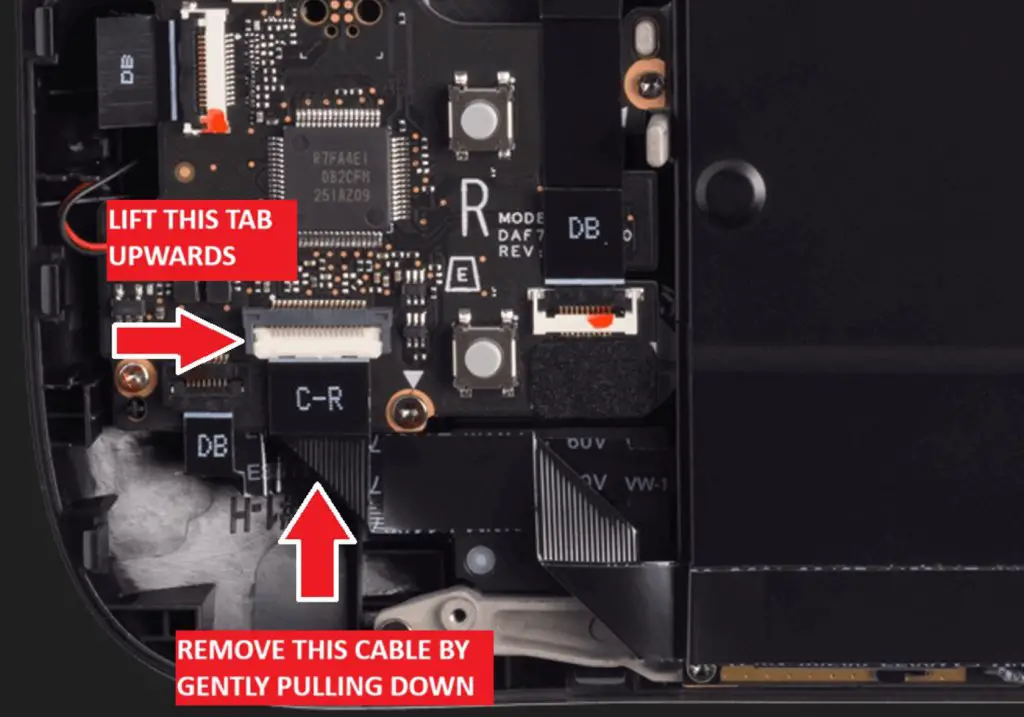
The OLED model has an additional step before we can remove the shroud. We’ll need to disconnect a ribbon connector, this is really easy to do, you just need to gently lift the white tab to unlatch the connector and gently pull the cable downwards out of the connector using a pair of tweezers or your fingers with the provided tab that’s labelled C-R. Be careful with this cable as they can be pretty fragile.
There are only two screws on the OLED Deck to remove and both are T6 in size. Both are on the left side, top and bottom. The bottom screw may be slightly obstructed by the ribbon cable we just disconnected. There’s a thin amount of adhesive glue holding it in place, you can use your pry tool or spudger to gently remove the cable and access the screw.
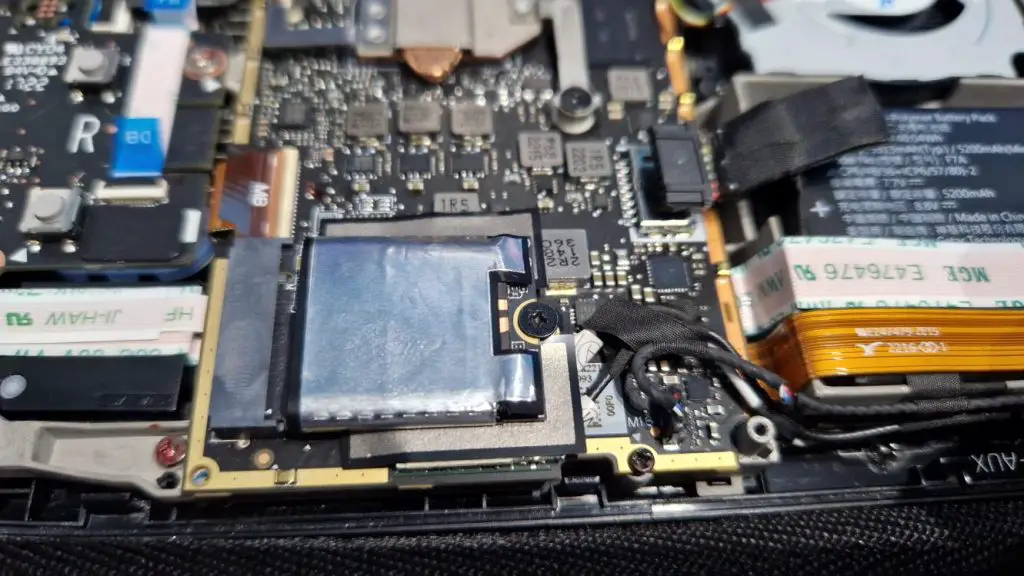
With the shroud removed we can now access the internal SSD. Before attempting to replace this NVMe drive, we first want to disconnect the Steam Deck’s battery. We can do this by wiggling the connector towards the battery. It can be a little stiff so you may have to wiggle it back and forth.
Next, we need to remove the SSD. In the LCD Deck, this is held in by a Philips head screw and the OLED is held in place using a T6 screw.
Remove the screw and you should be able to easily remove the Steam Deck’s SSD. You’ll notice NVMe drives spring up at an angle.
You’ll notice the drive has a little jacket that can be removed. You should try and fit this onto the replacement NVMe drive.
Insert the new NVMe drive into the slot and screw it back into place.
Reinsert the battery cable and the ribbon cable (OLED only) then reinstall the shroud.
With the internals all sorted, place the back half of the Steam Deck shell in place and gently push down. You should hear all plastic clips clipping back into place. Press around each edge of the deck to make sure that everything is clipped and then finally put the screws back into the Deck.
Restoring your data to a new SSD or Deck
To restore your Stead Deck’s SSD to the new drive or Steam Deck we will once again be using our Clonezilla USB. Insert your Steam Deck back into the dock or USB hub along with the USB thumb drive, Hard drive and Keyboard and press the Deck’s power button while holding down the Volume Up button.
You’ll once again be at the Steam Deck BIOS screen. Select Boot Manager and press A. Select the bootable drive and press A.
Once loaded Choose the first option to load Clonezilla and follow the same steps as before setting the Language as English, opting to keep the keyboard layout and then choose to Start Clonezilla.
Next, choose the option ‘device-image’ and then choose Local_dev to search for a local device. When prompted press Enter to continue and Clonezilla will scan each available drive.
You’ll once again have to press Ctrl+C on the next page to proceed.
On the next screen we will be greeted with a full list of drives available, we need to choose the drive where our backup was made earlier when backing up the drive. (It will most likely be the drive at the very bottom of your list)
Press enter or ok and you’ll be asked if you would like to check the filesystem before mounting. Select ‘no-fsck’ to skip this step and press enter.
On the next screen, we need to choose the directory where we saved our backup. You should see your backup listed below with the date. You don’t need to select this; this just lets you know you are in the right directory. simply head down and select Done then when prompted, press enter.
Choose beginner mode then on the next screen choose ‘restoredisk’ and press enter.
You’ll then be shown a box with our image to restore. Select it and press enter.
On the next screen, we will be asked where we want to restore the image. We want to choose nvme0n1 for this as that is our SSD. mmcblk0 must not be chosen as that is the Steam Deck’s MicroSD card. Press enter to select the nvme0n1 drive and select ‘ -scr no’ on the next screen to skip checking the file.
Finally, you can choose what you want the Clonezilla to do once the files have finished copying over. I’d recommend choosing ‘-p’ to Shutdown the deck and press enter.
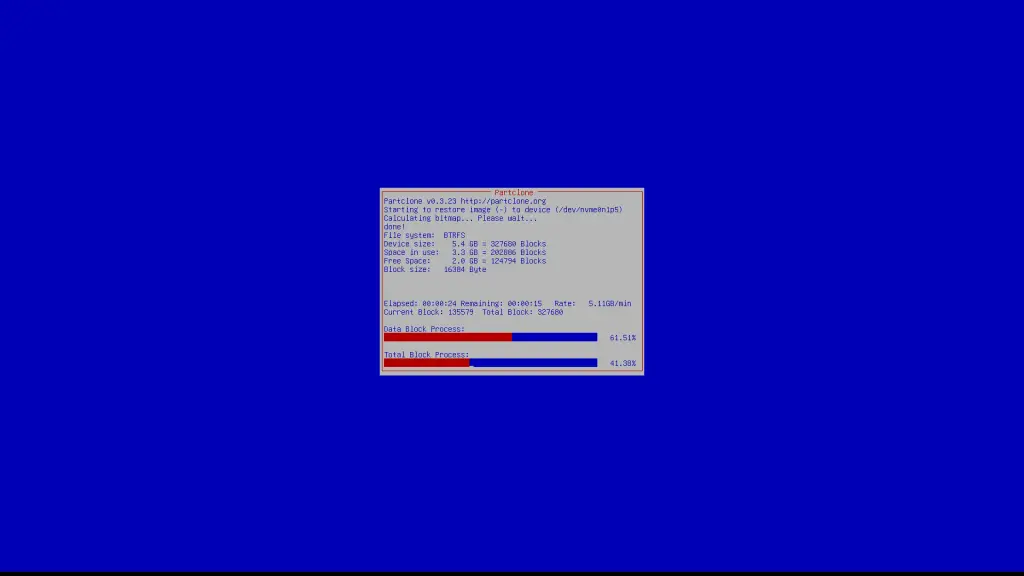
Clonezilla will start the restore process creating partitions on the NVMe drive and will begin restoring our image. This can take some time which will depend on drive speed and size etc. In my tests, I have found that a 256GB restore took around 50 minutes and a 1TB restore took just slightly over 2 hours.
Once completed, your Deck should be identical to the previous backup. We can navigate to settings and storage within SteamOS we should now see all that extra space in our Internal Storage.
I hope you found this guide helpful & please feel free to reach out to me if you have any questions.