
In this guide, I will be showing you how to clean your game consoles and restore them back to roughly how they should be.
Over time and heavy use, games consoles can accumulate quite a lot of dust, grime, fingerprints and various other blemishes. Cleaning them is often something I get asked about.
After years of restoring and cleaning console, I have found the best way to clean a games console is to dust down the console, then clean it with warm soapy water using a nylon/toothbrush. Dry off the console and remove any stubborn stains & marks with 99% Isopropyl alcohol.
Why Clean Your Console?
Apart from the unsightly look of a dirty console not keeping you console clean can lead to drops on performance and even damage your console.
As with all electronics, gaming consoles produce a lot of heat. This is especially true with consoles from the PS2 era and onwards, in fact, you have probably noticed that these consoles have various vents around the body of the console and now all include fans to pull the heat out from the components inside. If these vents and fans get clogged with dirt and debris, your console will have a much harder time keeping cool. With the extra stress on your machine’s motherboard, you might start to notice performance issues like frame drops and freezes, automatic shutdowns even permanent damage to the console itself as seen with overheating PS3’s and their infamous yellow light of death.
How to Clean Your Consoles Exterior
This will vary somewhat depending on what kind of console you have but most rules will apply to all consoles. Here I have my PS2 Slim: –

As you can see, my poor PS2 has been left at the bottom of a cupboard after moving to a new house around 4 years ago. Since then we have had our new house renovated with all kinds of dust particles flying around the place. This console is particularly dusty, the type of dust that has become almost solid, truly grimy stuff and I hate it.
Our first step here is to dust down the console as much as possible. I took an old cloth and got to work removing as much dust as I could. I used a soft brush around any of the more troublesome areas, such as the USB ports and SONY logo. Sometimes, even just dusting your consoles can make a huge improvement, Sadly, this is not the case here, the dirt and dust are ingrained in the housing of the PS2.

A lot of consoles have a mottled, matte finish which almost seems to attract dirt from across the room! Nintendo Consoles such as the SNES and Game Boy, in particular, all feature this texture on their console housing. The best way to clean this type of housing is to use a small amount of warm soapy water (I use a little squirt of dish soap). To apply this, you will want a clean toothbrush, a toothbrush is perfect to apply just enough abrasion to remove ground-in dirt without leaving scratches all over your console.

First, make sure your console is completely turn off and unplugged. Once you have confirmed this dip the toothbrush into warm soapy water, you only need a little, we are after a damp brush instead of a wet brush.
Take the brush to your console scrubbing in tiny circles. Be sure to not let any water into your console.


Once you have made one full pass of your console, remove excess water and dirt using some kitchen towel/paper towel, you’ll probably be surprised by just how much dirt comes off!

Repeat this process numerous times, changing your water if it gets too dirty. Remember to take your time really scrub in any crevasses and indented parts of your console like the sony logo here: –

Now our machine should be resembling something a little more normal. There are still quite a few little areas that scrubbing with warm water and soap doesn’t seem to help. For these areas I like to use 99% Isopropyl Alcohol, this is a VITAL product for any retro gamer: –

You can apply some Isopropyl alcohol to a cloth or rag and rub over the area, this will usually help lift out most blemishes, you may need a few passes in some areas.
The good thing about 99% Isopropyl alcohol is it evaporates so quickly, making it perfect for working with electronics. If you still have stubborn marks at this point, decant some IPA into a small container and use your clean toothbrush to scrub the area. I find this to be the most effective way of removing stubborn dirt.


** Be sure to careful with IPA around printed on Logos, I find official printed logos, as used by Sony or Nintendo, are fine, but some third-party products, like replacement Game Boy housings, use cheaper methods to print onto plastic. Too much scrubbing and IPA can remove these Logo’s entirely so be careful! **
Now, there are still a few marks a little dent here and there, but we have to accept that some marks just won’t come out. Cleaning, unfortunately, will not get rid of these gouges.

Now, I don’t need to do this with this PS2 but for a deeper more though clean, you can remove the housing of your console and leave it to soak in warm soapy water. This helps to loosen up the dirt so you can follow the above steps. If you attempt to do this be careful of any factory stickers and be sure to completely dry your housing before reassembling.
To open most consoles, you will need a combination of Philips head, Game Bit security and tri-wing screwdrivers. I suggest picking up a full screwdriver set which comes with everything you need.
Each console uses slightly different screws, but as a rough rule, Nintendo’s handhelds use a mix of Philips and Triwing screws, Nintendo Home consoles use Game-bit and Philips, Sega also uses the Game-bit, Philips combo and Sony tend to use regular Philips head, with an occasional TS security screw thrown in for good measure.

There’s plenty of guides you can find online on how to open your console, as each console is different, I won’t go over that here.
Cleaning Inside Your Console
With your console open, it may be worth having a little dust around the insides and motherboard. You’d be surprised just how much dust can accumulate inside these machines (I even found some coins inserted by my nephews in my PS4 recently, so what was nice!).
Some people swear blind by compressed air, and although I do agree that it does help, I find it just tends to move the dust around. What I would suggest is using a soft bristle brush, like a makeup or paintbrush and dust down and around as many of the components as possible, being careful not to put any considerable force on any individual component. Once all your dust is loose and floating about, get a vacuum cleaner out with some breathable cloth over the nozzle and proceed to pick up as much dirt as possible. This way, if you have managed to knock something loose or a screw gets caught it won’t get sucked up, but the dust is fine enough that it should.
To clean your motherboard, do NOT use soapy water. As you can guess, water and electricity are not friends… well, technically speaking they are VERY good friends and that is the problem. If you need to clean any part, consider using a toothbrush with Isopropyl alcohol and gently scrub around the area that needs attention. If there are any batteries installed on the motherboard do consider removing them before attempting this, we do not want any conductivity to be taking place. The good thing about IPA is it dry’s very quickly, this is why you want to make sure your IPA is the good stuff (99%), lower percentage like 70% is diluted with water which we do not want in our console.
How to Clean Your Controllers and Joy-Cons
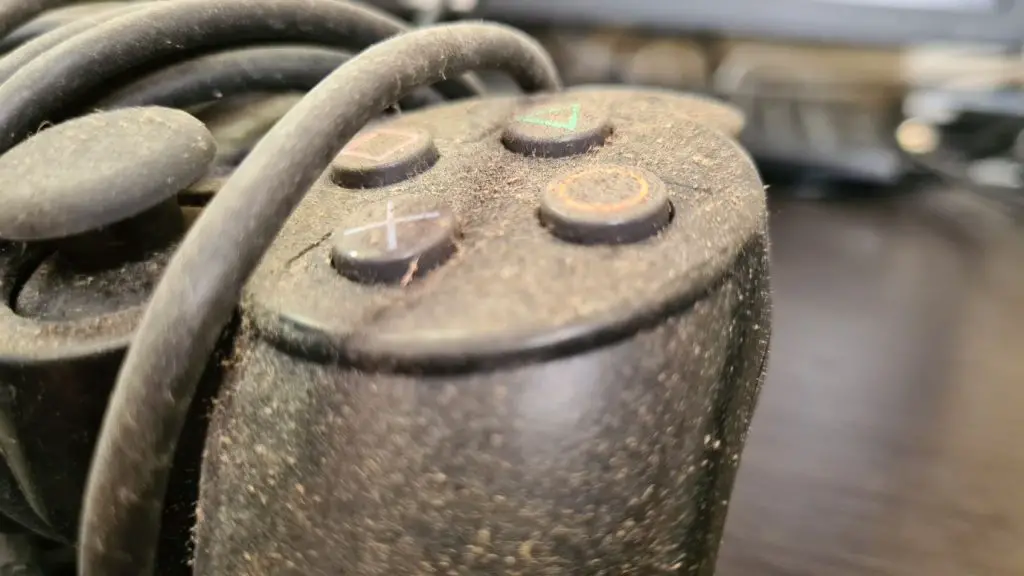
The same principles apply here from the console, first, you will want to dust down your controller or Joy-con as much as possible. This PS2 controller has seen better days: –

Wipe down the controller the best you can. My controller here is caked in dirt! It might take a few passes to get off all of the loose dust and grim.

After this take a cotton swab/ Q-tip /Cotton bud and we can use this to get to some of the harder to reach places on the controller. These are very good for cleaning the inside of screw wells and around analog sticks once dipped in a little IPA.

Now, back to the body of the controller, we will be getting some clean warm water and a toothbrush. Gently scrub around the controller with a damp toothbrush. We don’t want this wet, especially with the number of button wells and other places for water to collect. Underneath most buttons, you will find a rubberized membrane which protects the board underneath and makes the buttons spring back into place once pressed. If you let too much water get in here it will take a long time to dry out. Less is more!

As a quick side note, if you find your buttons are sticking and not as responsive you can take apart your controller and remove these rubberized membranes. To restore them gently clean them off with a toothbrush then drop them into a cup of really hot water, just below boiling point. Leave them in there for a few minutes and this will help to restore some of the elasticity to the membranes making you buttons feel a lot nicer.

I gave my controller here a final pass using a little IPA. Be careful with printed logo’s etc like on the face buttons of the PS2 controller. A lot of IPA could potentially erode these. You do not have to worry about this on the Joy-Cons as the buttons are injection moulded with the XYAB all the way through the button, pretty cool, right?
For the cables, dust down then soak either a cloth of some paper towels in a little IPA. From top to bottom run the paper towel down the length of the cable, this will remove a LOT of dirt and you may need to repeat this many times until you are happy with how clean it is.


To clean your accessories like memory cards, follow the same steps as above being extra careful not to remove any of the printed writing on them, especially these unofficial ones I have.

How to Clean Your Analog Sticks
Finally, with your IPA toothbrush gently clean around the base of your analog stick while rotating them. We want these as clean as possible. Dust and debris are the main cause of drift with controllers, cleaning this out can fix it.
An analog stick is basically a box inside your controller with a stick coming out of the top, we only see the top part which is designed to move in all directions, however, if any dust manages to get in here it can cause problems.
Here’s a picture for example from a video I made replacing PS4 Analog sticks, it will give you a better understanding.

Once clean, movement will feel much for fluid. I would recommend giving your controllers a pass with the IPA toothbrush on a regular occurrence if possible.
Fixing Joy-Con drift
As above, most cases of Joy-Con drift are caused by dirt and grime getting under the analog stick and interfering with the movement of the stick itself. At the base of the Joy-Con’s stick, you will find it has a small rubberized skirt around it. This is where the dirt and debris usually get caught.

With some kind of flat tool, we want to gently lift this up and get a toothbrush under there with a little IPA on it and scrub gently. Make sure you work your brush all around the stick and this should eliminate Joy-Con drift. It really is that simple in most cases.

Open up the settings on your Switch, they have a nice little tool to calibrate your sticks which will tell you if you are suffering from Joy-Con Drift.


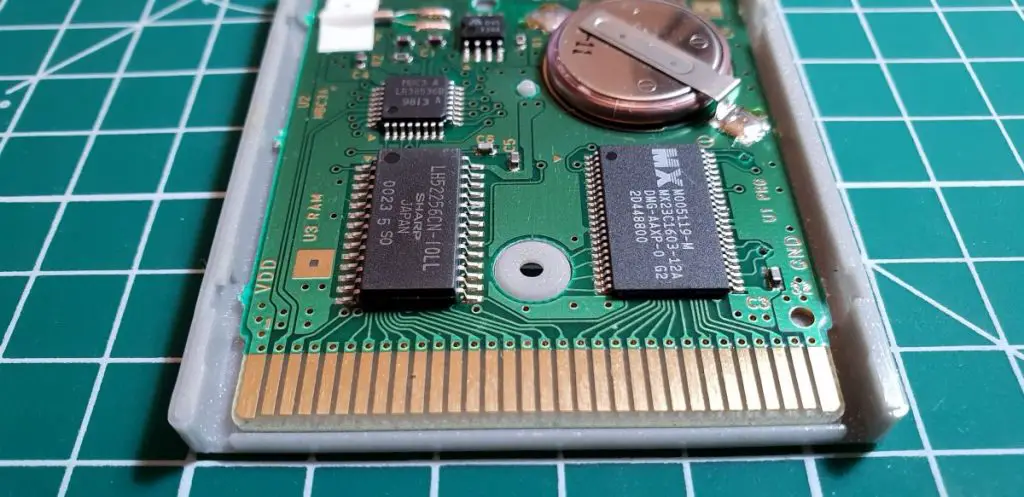
How to Clean Your Game Cartridges
Cartridges are prone to getting a little dirty over time. The above still applies if your cart’s shell is dirty but be careful of the labels when cleaning them up.
The main area you want to focus on for cartridges is the pins. If your cartridge is not working, it is usually the pins.
To clean your cartridge pins you are going to want to grab some IPA and cotton swaps, you can use this to gently pass up and down the length of the pin. Never go side to side as sometimes the cotton can get caught between then pins, which in turn could get caught inside your console’s cartridge port.

Another method that can have great results is to wrap and old store card, or credit card in some cloth and soak this in Isopropyl alcohol. This can be used to clean not only the pins on your cartridge but also inserted directly into the cartridge slot of your machine, this will help to clean the connectors which might just fix your cartridges not reading properly.
If the pins are particularly soiled you may want to consider using something mildly abrasive. I find a pencil eraser usually does the job but for the more stubborn carts, you can use a fibreglass pencil which has just enough abrasion to help.
Two things you should never use to clean your cartridges are sandpaper, I can see the logic here, but you are doing far more harm than good. This will damage your cart and the PCB.
**The other thing you should never use is a metal cleaner like Brasso, you would be surprised by just how many people I have seen recommend this to people. NEVER USE BRASSO to clean pins, it’s caustic and may eat away at your pins, not only this but it tends to leave a residue damaging your pins and consoles cartridge slot over time. Please share this info with people!**

If your cartridge still does not work, please check out my repair guide for Game Boy games, most cartridges are quite similar inside and it may help!
How to Clean Game Discs
The best way to clean your game discs is with a soft cloth and a little water. You will want to work from the inside of the disc to the outside in straight lines.
You may instinctively think to rub the disc in a circular motion, do not do this! This can damage the disc putting more stress on your console’s laser. Work your way from the inside of the disc to the outside.
If cleaning the game disc does not help, try a very small amount of Isopropyl alcohol diluted with water. Only do this as a last-ditch resort.
Always handle your discs by the edges and try to never touch the actual surface of the disc, it only takes one small scratch in a vital area to render a disc useless and always remember to put them back into their original case when not in use.
For scratched disc you may have heard people about smearing bananas or toothpaste all over your discs, once again do not do this, please. If the disc is so scratched it will no longer work you will need to buff out the scratches, the best way to do this is with a disc resurfacer.
This will not work if the disc has really deep gouges out of it, this will buff down and repair minor scratches but nothing too extreme. I have heard of some people having success with very high finition glass paper but that’s something I am not willing to try myself.
How to Prevent Your Consoles From Getting Dirty
Prevention is better than a cure, sadly this true for most things in life and consoles are no different. Unless you live in some kind of industrial cleanroom, you are going to have some contaminates, It just can’t be helped.
There’s nothing more satisfying than having all your consoles and games out on display but we must remember to keep these areas dusted. It doesn’t take that long for a console to end up like my PS2. A lightly dusting weekly is all it takes to keep the ground-in dirt forming all over your collection. A cool trick I use here is to keep a consoles controllers and cables in large capacity freezer bags. This keeps your controllers’ dust free and means I’ve always got the right power supply, RGB cables etc on hand.

I hope this guide helped you out. If you are stuck with anything, feel free to comment or email me (Address below) and Remember, prevention is the key for maintaining a clean gaming set up and also never underestimate the uses of 99% Isopropyl alcohol!