Has your Game Boy Game stopped working? Is there a problem saving, garbled display or just a plain white screen? In this guide I have listed all the methods I know on how to resurrect failing and broken Game Boy cartridges. The good news is most CAN be saved! In this guide I will show you how to fix Game Boy games that don’t load.
So, how do you repair a Game Boy cartridge? To repair a Game Boy cartridge, you will need to open your cartridge, clean the board and contacts and if that doesn’t help them you can move onto reflowing the solder around the Mask ROM and SRAM chips.
How do you open a Game Boy Cartridge?
To open a Game Boy Cartridge, you will need a 3.8mm Game-bit. These are cheaply picked up online I recommend that every game enthusiast picks up a set of both 3.8mm & 4.5mm bits as these are the most commonly used bits in retro game carts and consoles. You can check the prices on Amazon here

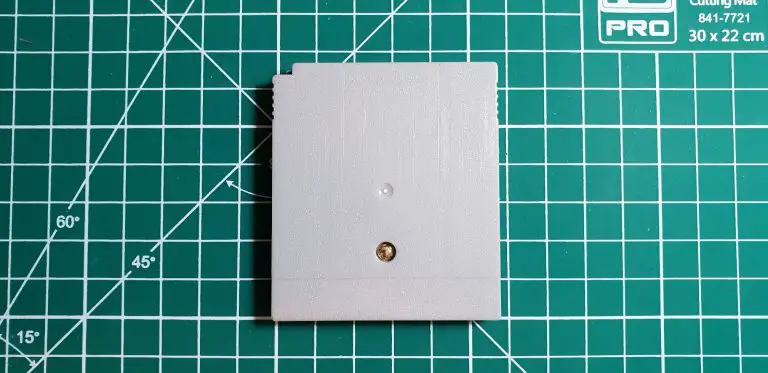
The screw is on the back of the Game Boy cartridge and once out the game shell slides apart for access to games PCB.
How to Fix Your Game Boy Games
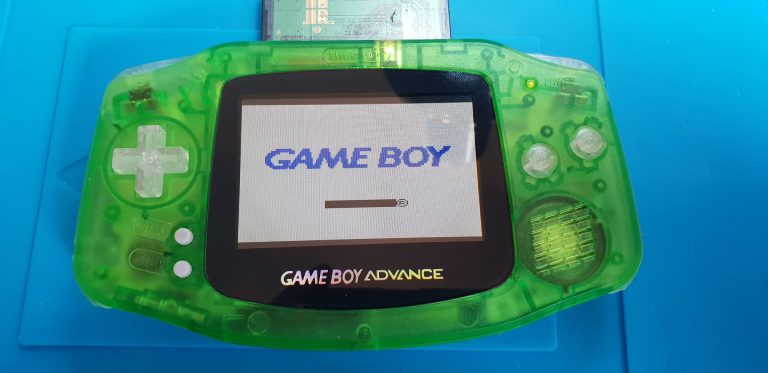
GameBoy game not working (Nintendo logo)
How do I fix my Gameboy cartridge? If the inside of your Game Boy cartridge is completely filthy, then that could be your problem. Your non-loading Game Boy Game may look clean, but the pins can get a little dirty over time. Clean the board the best you can with isopropyl alcohol and a cotton swab paying close attention to the metal pins at the bottom of the cartridge. If they are very grimy you can use an artist’s eraser to gently rub up and down along the pins. 9 times out of ten this will fix the garbled text or back bar instead of the Nintendo logo on startup.
If this doesn’t help, then you can also try to clean out the Game Boy’s cartridge slot. This can be done using a cotton swab or an old t-shirt covered in a small amount of isopropyl alcohol. You can use an old store card to simulate a cart being inserted.
I’ve seen some people suggest using Brasso to clean cartridges before. Never use products such as Brasso to clean the pins on your game cartridges. Brasso is caustic and may eat away at your pins, it will leave a residue on your pins damaging them over time. Please share this info with people!
This black bar or jumbled text means the Game Boy is having a really hard time reading the game data and the game won’t initialize in the bootrom. It runs the code against what is stored in the BIOS ROM and if it matches it boots the game and if it doesn’t the game won’t boot.
Overview of a Game Boy Cartridge
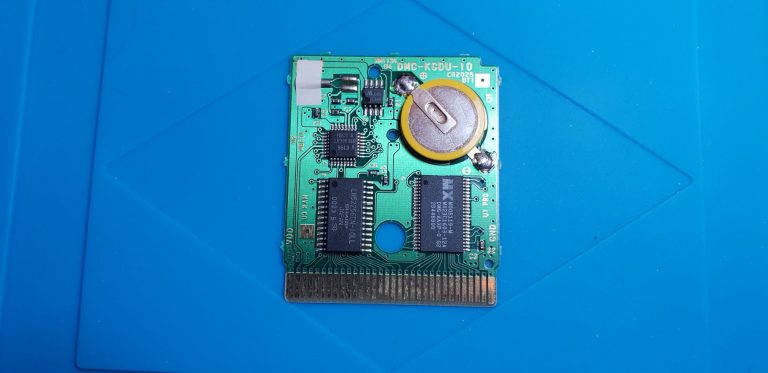
If you are still having problems, then it’s worth having a look at the board. The picture below is from Pokémon Silver, some other games will look different inside, but most are similar. Let’s have a look at the function of each part of the Game Boy cartridge, this will help us to understand whatever problem we are facing.
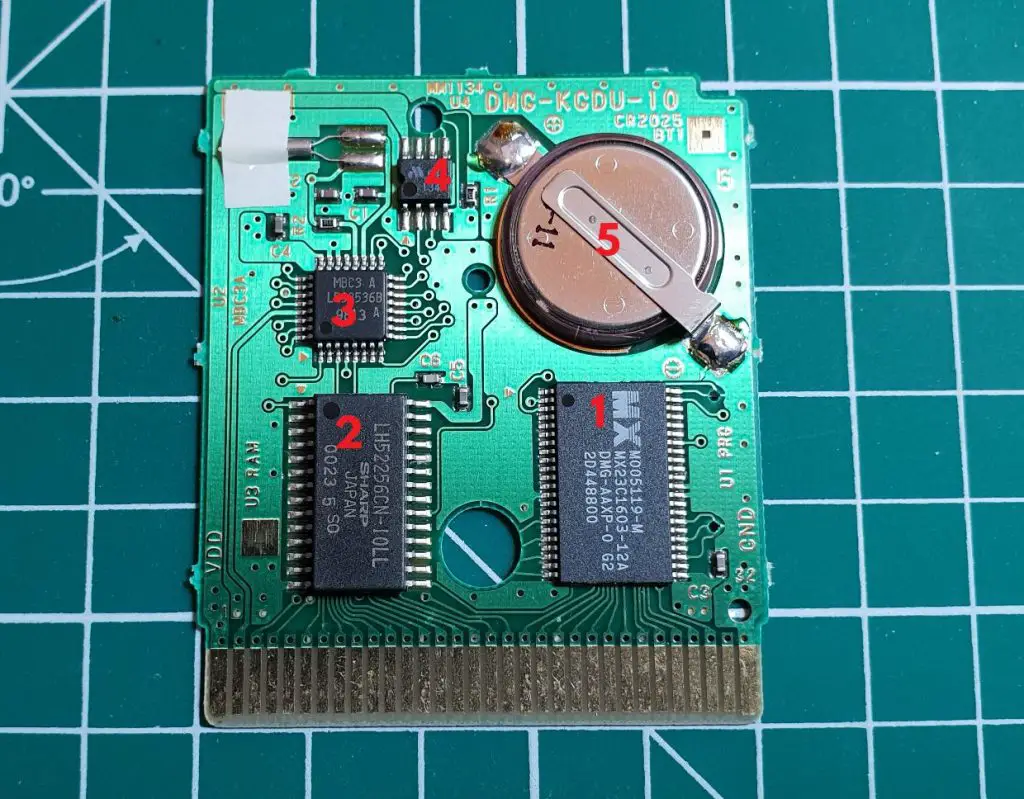
1. Mask Rom
The Mask Rom is where the game data is stored. You may have heard people mention game ROM’s before, this stands for read-only memory and is the actual file containing all the code of your game. This is usually the cause of games that have glitchy graphics, text and music. This would be the first thing I would check if the Nintendo Logo was not displaying correctly on boot.
2. SRAM
The SRAM is where your save file is stored. The SRAM requires constant power to keep your save ‘Alive’. These days save data is handled by Flash memory keeping your data safe regardless of power.
3. The MBC3 Chip
MBC stands for Memory Bank Controller. Originally, the Game Boy could only access 32KB of ROM data at a time. Any additional data would need to be moved into MBC using a method called Bank Switching. This allows the game data to be read in smaller chunks. Various MBC chips exist depending on the size of the game. In Pokémon silver, we have the MBC3.
The MBC3 chip is what controls the Real Time Clock, Pokémon Gold, Silver and Crystal use this to keep the games day and night cycle functioning. To have a working RTC the cart must also have an external 32.768 kHz Quartz Oscillator (Found in the top left corner of the cart). One more requirement is that the cartridge contains an external battery, this ensures the RTC can continue ‘ticking’ even when the game is not in a console turned on.
If you are having issues with the RTC your best bet would be to reflow the solder of the MBC3 paying special attention to pins 19 & 20 as these are where the signal is brought in from the oscillator. If that doesn’t work, you can try to resolder the resistor labelled R2 just below the oscillator.
4. MM1134 Chip
The MM1134 chip controls when the SRAM is powered from the Battery or draws power from the Game Boy. If you are experiencing a white screen on boot, then the MM1134 chip is usually the culprit. A simple reflowing of the pins around the chip should fix most white screen issues.
5. Save Battery
Before Flash memory became the standard, we used to use lithium batteries. (How barbaric.) This provides constant power to the SRAM and will last around 15 or even 20 years, in some cases. Games like Pokémon Silver, gold etc, or any that use a Real Time Clock will drain the battery much faster. My Pokémon red copy is still going strong! If your game cannot hold a save anymore then this will need to be replaced.
How to tell if a Game Boy Game’s battery has died?
Game Boy Game Not Saving?
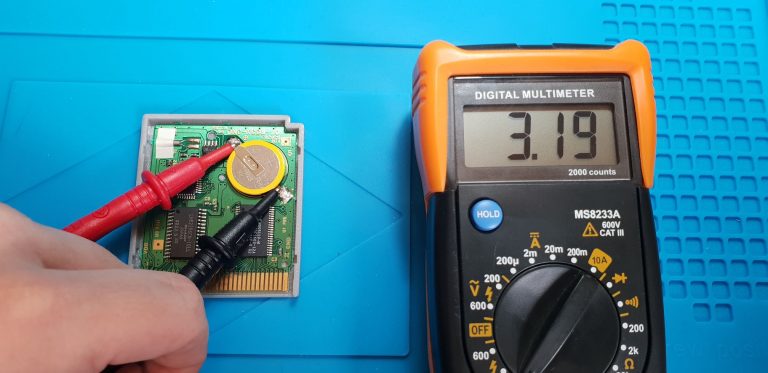
If you have any problems with saving the game your battery has most likely died. On the Pokémon games, I find the Real Time Clock starts to act up just before total battery failure. To be sure the best way to check is to use a multi-meter to see if there is any power coming from the battery. The standard battery is 3V so you should expect to see ranges from 3v – 3.3v.

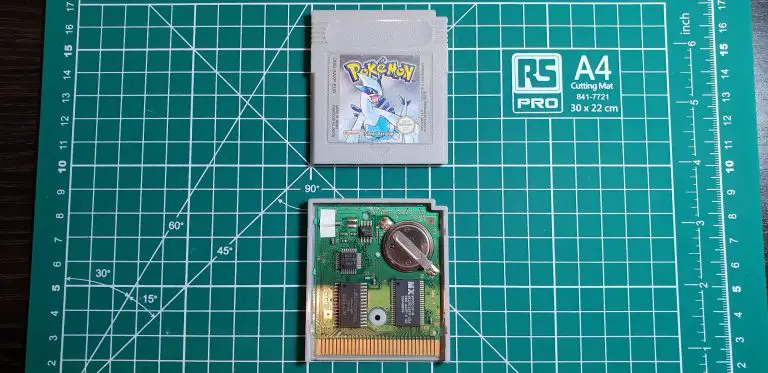
As you can see from my copy of Pokémon Silver the battery is completely dead. (RIP Celebi from August 29th 2001 Toys R us event!)
How to replace a Game Boy cartridge battery? The correct way.
I have seen some degenerates using knives, tape and all sorts of craziness to switch the batteries in Game Boy carts. Don’t be that guy.
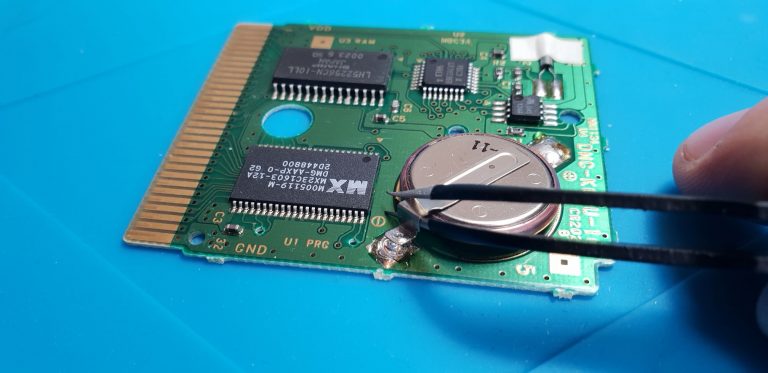
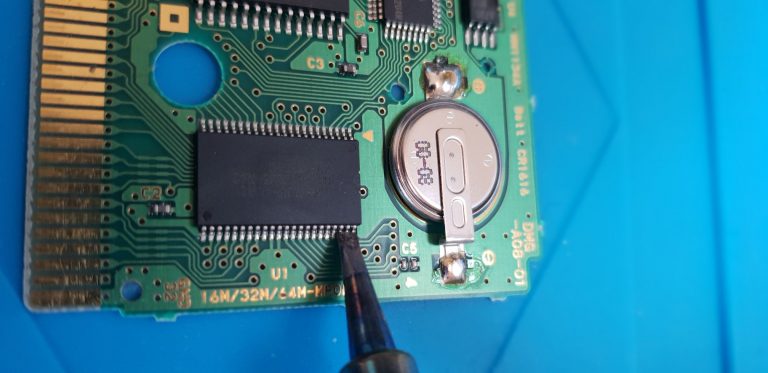
The correct way to replace a Game Boy cartridge battery is with a soldering iron. You simply heat up the solder on either side of the battery and lift the battery up using some tweezers.

Go over to Amazon or eBay and grab yourself some replacement cell batteries with tabs. (Make sure they have tabs!). Most Game Boy cart batteries are CR2025 & Game Boy Color usually have the slightly smaller CR1616 installed. Make sure you check the type you need before picking any up. The board usually has the size listed above the battery.
Once your battery is in place you can load up with a little extra solder to secure your new battery in place. Make sure the battery is oriented the correct way. The + & – symbols are on the board in case you forget!

Optional: There is no reason that you cannot replace a CR2025 with a bigger CR2032. Both output 3V, the 2032 is a little bigger than the 2025 at 3.2mm which will still allow enough clearance to close the cartridge. This will provide a much longer battery life so is well worth doing. Unfortunately, I am out of CR2032, so I will have to make do with a 2025.
How can I back up my Game Boy saves?
Removing the battery will sadly delete whatever you have stored in you SRAM (Losing you save file basically!). There are ways of circumventing this, however, if your save is already gone then you’re out of luck!
The first method would be to purchase a Mega Memory Card or a GBxCart RW by InsideGadgets. The Mega Memory card will let you plug in your cart and make a back up of your save. This is the safest and easiest way to back up your save file.
The GBxCart RW is more full-featured and allows you to dump your Mask Rom, SRAM and even actually allows you to write data to certain types of carts. It also supports GBA & GBC games.
I’ve written a full guide for using the GBxCart RW here: how to backup game boy gba saves.
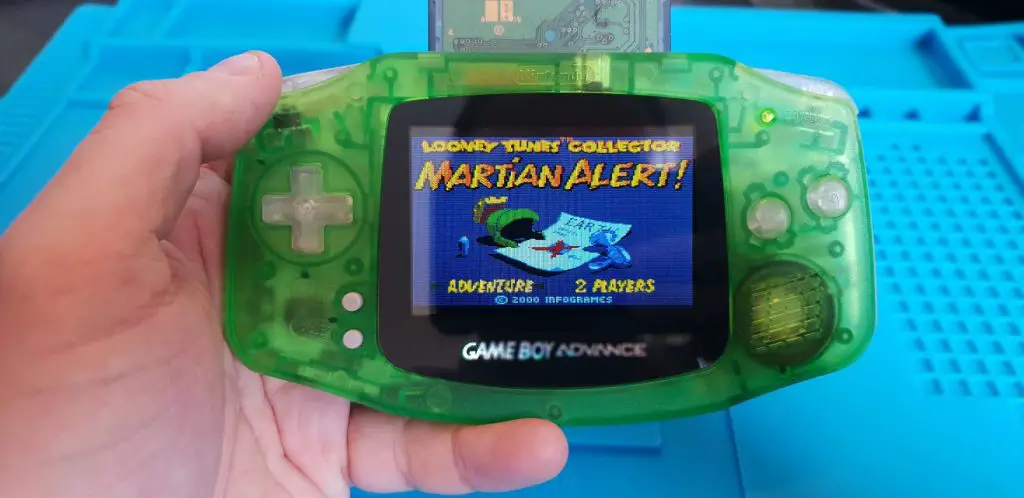
Secondly, it is possible to unsolder and resolder a new battery why the game is plugged in and console turned on. Please take the utmost caution if using this method. You will need a GBA or GBA SP to have clearance on the back of the cart. Insert your cartridge half-assembled as shown below and de-solder your old battery, then re-solder a new battery.

Wait a minute or so for the solder to cool and see if you can save, if all has gone well you will be able to save. Turn the console off for 30 seconds or so then back on and see if you have managed to save your game. Obviously, this method is for lunatics and I do not recommend it. The chances of something going wrong are much higher when messing around with live electronics, try this at your own risk.
One last method would be soldering an ‘Interim’ battery in parallel to ensure that no power is lost to the SRAM while removing the failing battery and installing a new one. Doing this on a Game Boy cart is VERY difficult, you usually only have two points of contact being the solder pads where you will be removing the failing battery from. You could connect some cables and run them from the interim battery, but personally, I wouldn’t even recommend trying this method.
The game won’t save at all and there is no battery?
This happened to me. Way back in August 1999. I was thirteen years old on holiday with my parents in the Canary Islands, I, of course, had my Game Boy Color with me I was gifted for my birthday earlier in the year. While walking around a shady Spanish mall we stumbled upon a video game / electronic store, inside was a display cabinet of Game Boy & Game Boy Color games. One of the games was Pokémon Blue. Now, I had been following the gaming news in magazines about this Pocket monsters game for some time and was eagerly waiting for it to be released in the UK (Was released until Oct.5 1999, 3 and a half years after Japan).
Immediately spent my ‘holiday money’ on Pokémon and went back to our rented villa and had a great time. Played past the second gym, saved my game and called it quits. The next day I turned on my Game Boy Colour and couldn’t seem to find the save?
Turns out the copy I purchased was not an American import like I had assumed but in fact a very convincing bootleg game. The game had a box, insert but no manual. Also, the game cart was grey, which I didn’t know at the time that all Pokémon games came in coloured carts.
To save on costs some counterfeit games don’t come with batteries soldered. Be careful about what you are purchasing. Most ‘modern’ bootlegs are obvious as they usually have the word ‘GAME’ written on top of the cart instead of ‘Nintendo GAME BOY TM’

How to repair the Mask Rom of a Game Boy Game
If you load up a game and it won’t boot, try to clean the pins first as listed above, but if its one of the rare cases where that will not fix then we will need to look at the game’s PCB directly.
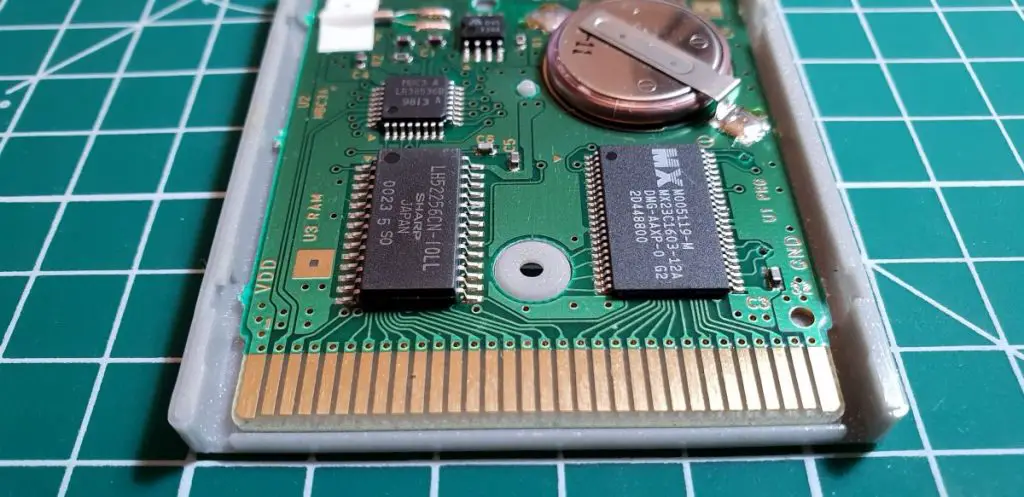
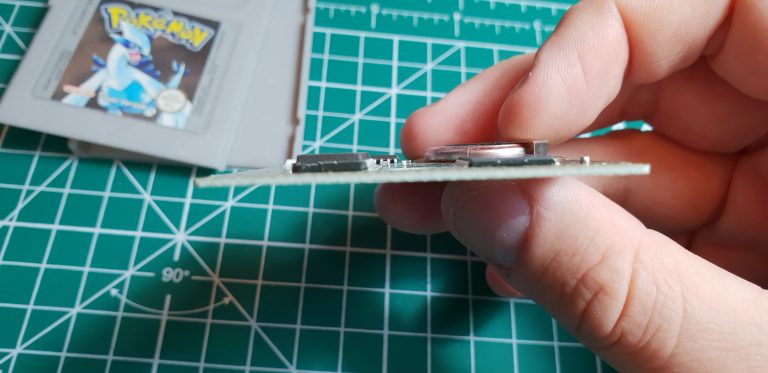
Game Boy games are two layered PCB which is less than 1mm thick. What can happen is that constant flexing of this very thin PCB, from cycling the games in and out of the cartridge slot, can cause microscopic breaks in the solder around the legs of the Mask Rom and SRAM. You can fix this by reflowing or adding a little more solder to the legs.
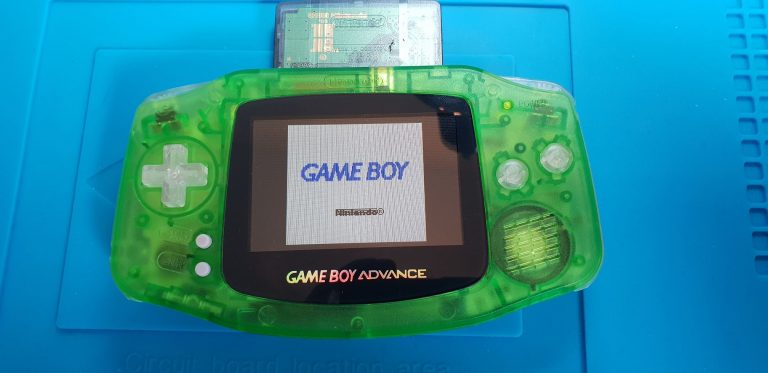
As you can see I have this problem with this Game Boy Color game. Initially, the game wouldn’t read at all and displayed a black bar, after cleaning the pins the game almost loaded but was still showing corruption of the Nintendo Logo (Read error). Fun fact: the more jumbled and distorted the logo is, the harder time the Game Boy is having reading your cartridge.
To repair this, I opened the game and applied some flux to the pins. I added a tiny bit of solder to the tip of my soldering iron and dragged it down the legs of the game. I did both sides and thankfully did not have to do the SRAM.


Let the solder dry for a moment before putting the game back together. This is the same method I would use if the game was displaying glitchy graphics or text etc.
Amazing read and guide bet my pokemon death squad have bit the bullet already though and are beyond saving 🙁
The mm1134 chip no longer works.
The games are saved while the game boy is on.
I would replace the mm1134. A work around would be to solder a diode from the battery terminal + with the cathode towards the last pin of the SRAM chip (vcc).
The problem is, if the chip has fully failed then, it won’t be able to tell the SRAM to enter a lower power state and drain the battery really quick! It is possible that this part of the chip remains fuctional, but to be safe I would replace the mm1134.
Pingback: How to Backup Your Game Boy & GBA Saves. | Guide with Pictures
Hi there,
I’m in bit of a pickle trying to save my Pokemon Crystal Game. In the beginning of my repair journey, all I wanted to do was to replace the dead battery to bring the game back to life. Replacing the battery was successful and I was able to play the game for about a week until I notice it started to freeze, reboot to the intro screen, or display the Pokemon Gameboy color error message. After that issue, I decided to clean any corrosion that may have been on the cartidge pins, the ROM chip, the MM1134 chip, and any leftover flux around the battery itself. The cleaning seemed to have help for a little while but again, the game after an odd period of running, freezed, rebooted, and eventually became a whitescreen after the Nintendo logo. My next choice was to reflow the ROM chip because it looked like it had some poor connections to the board and see if that showed any improvement, no dice. Next, I tried reflowing the MM1134 chip because the pins looked old needed to be reflowed, the game came back on for a little while but then freezed (no rebooting this time). Currently, my Crystal game boots up and shows the Nintendo logo but afterwards shows a whitescreen and even a faint buzzing sound when plugged into my Gameboy. I’m not sure what else to do but ask how to test my ROM chip to see if it’s damaged beyond repair? Is there any schematic or datasheet online Pokemon games so I can diagnose what pins of the chip are causing issues. I’d appreciate any help I can get before I call it quits.
Hey TJ,
It sounds like you’ve tried pretty much everything. Some schematics can be found over here:-
http://www.devrs.com/gb/files/hardware.html
You could try reflowing again, sometimes a few passes help.
It might be worth wicking off all old solder, cleaning with IPA before adding new solder.
The Game Boy logo appears so that should indicate your rom chip is being read correctly.
let me know how you get on!
Hey Greg,
So I tried reflowing the ROM pins again after I got a little bad feedback with the Nintendo logo (the logo showed either black bar or choppy letters so a bad connection was detected) and I was able to get back to the regular Nintendo logo screen, however still whitescreen after the logo! I think I’m going to call it for fixing the game tonight and see what happens tomorrow. When I usually test my game again after many hours later, it starts up normal and actually plays good for either a solid couple of minutes or a few days. So hopefully I’ll see if that happens tomorrow morning and keep you posted.
Hi TJ,
I bought a Pokemon Silver a couple of weeks ago and I’m having the same problem as you with the whitescreen. I opened the cartridge and the board has no MM1134 chip, I thought the problem was the lack of the chip, so I took off the chip from another game(Crystalis) and tested that game without the chip, hoping to have the same problem as Pokemon Silver but didn’t show the whitescreen. It started normally without the chip, so looks like without the chip any game should start normally and it isn’t the root cause of the whitescreen.
Hi TJ, excellent tutorial.
I’m having a problem with my Pikachu edition. Save function still not working, I just replaced the battery and when I do a soft reset my save is there, but when I turn the console off and then turn it on 30s after, it asks to star a new game. What could it be?
The battery is new and I checked out with a multimeter and it measures 3.3V.
Could it be that I’m using a 2025 battery? And the game says that I need 1616.