In this guide PS2 modding guide, I will take you through the steps needed to soft mod your PS2. I will show you how to use a DVD to launch Homebrew and install Free McBoot to your memory card, how to back up your Games and how to run PS2 game backups on your PS2.
This should work on all models of the PS2 and PS2 Slim besides any that are model number 9xxxx, you can spot these easily as they have a glossy top half on the console. Slim consoles with a gloss band running up the middle are fine.
Please check what version of DVD firmware you have, if you have an incompatible DVD firmware you will need to install Free Mc Boot to your memory card another way or buy one preinstalled from Amazon
You can find out what version firmware your PS2 has below.
Why Mod Your PS2?
Soft modding your PS2 has several benefits including the ability to play backups and emulators. You will be able to load your games from USB, internal HDD (Fat model only) and over the network.
This will help save your PS2’s laser as well as wear on your game discs.
Preparation
These are the things you will need to hack your PS2: –
PS2 (I will be using a PS2 slim for this guide)
PC or Mac (to burn our DVD-R)
Optional – Raspberry Pi and Micro SD card
How to Mod Your PS2 - Method
The first thing we need to when modding our PS2 is to determine what firmware our PS2’s DVD Player has. To do this we need to boot up our PS2 with no disc inserted. Once at the screen with options for ‘Browser and System Configuration’ press the triangle button to be taken to the version information screen. We are interested in our version of DVD player: –
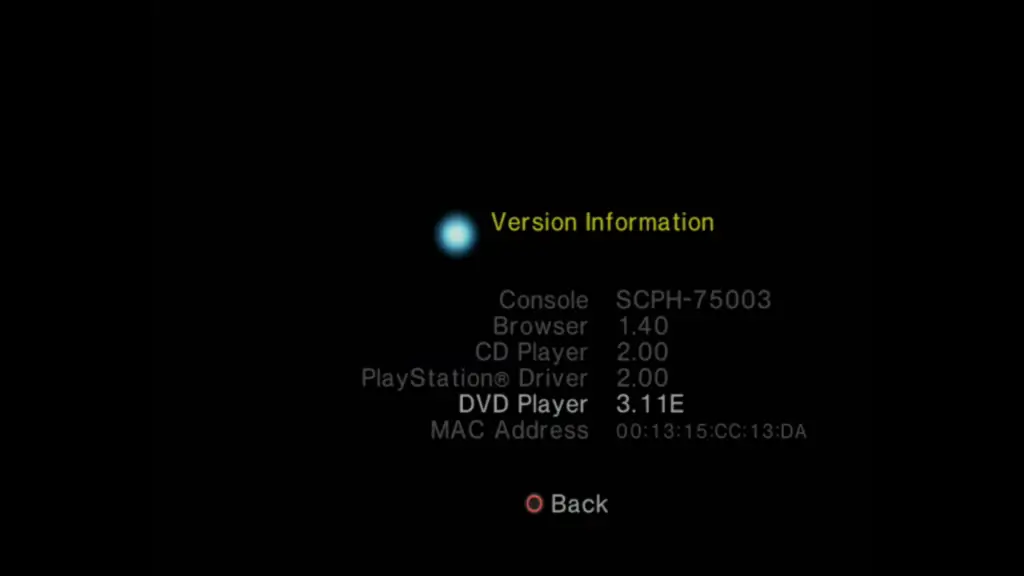
As we can see, my version is 3.11E. Take note of that as we will need to make sure we download the correct files for our version. Head over to CTurt’s Github to download the latest version of FreeDVDBoot, we will be using this an entry point which will allow us to install Free Mcboot on our memory card.
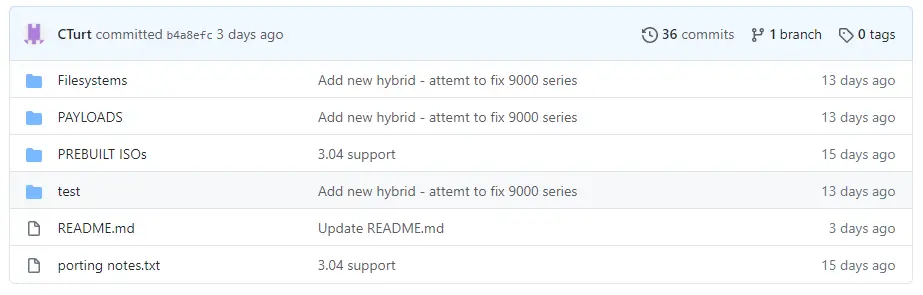
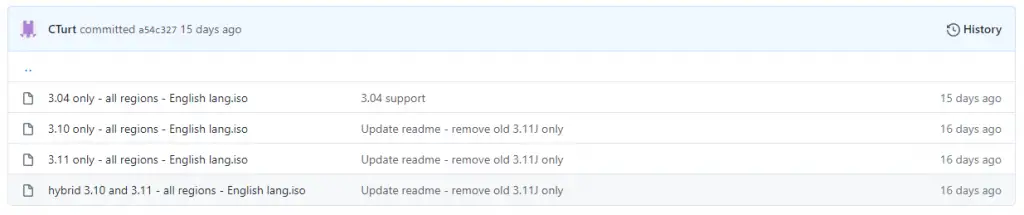
Over at the FreeDVDBoot GitHub, navigate to PREBUILT ISOs and select the appropriate version for your PS2. As mine is 3.11E, I click on 3.11 to download the ISO. If your version is not yet listed, I am afraid you will have to wait until it is supported or seek out another method as I mentioned above.
Now we have our ISO image downloaded, move it into a folder to keep it safe. We will now be burning this ISO file to a DVD-R. I recommend using Verbatim, they are reliable disc’s that I have been using for years.
You can burn your ISO to disk with any program you like, I prefer to use ImgBurn which you can download from one of the mirrors here.
Once installed, insert your blank DVD-r into your PC’s drive and open up ImgBurn. From here choose ‘Write Image file to disc’ and then click the yellow folder icon to select our ISO file. PS2 drives like low speeds for discs, so with our ISO file selected, change the write speed in the bottom right corner to the lowest your drive can go.

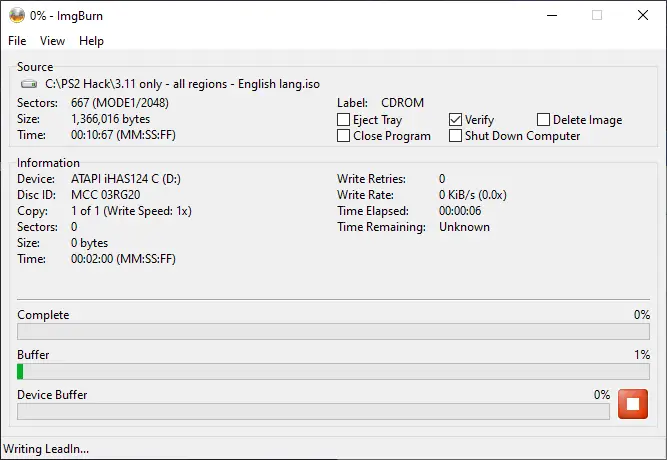
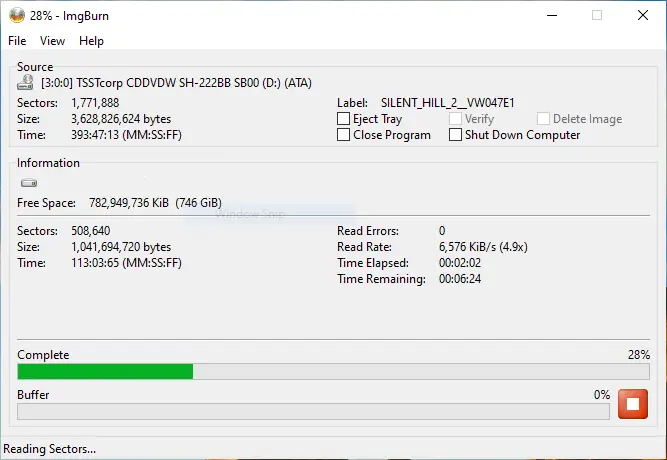
Make sure the ‘Verify’ box is ticked and click the image below to start burning FreeDVDBoot to our DVD. This may take a few minutes, leave the disc in until the file contents have been verified, you will know when this is completed as a jingle will sound on your PC. Eject your burnt DVD from your PC and insert it into your PS2.
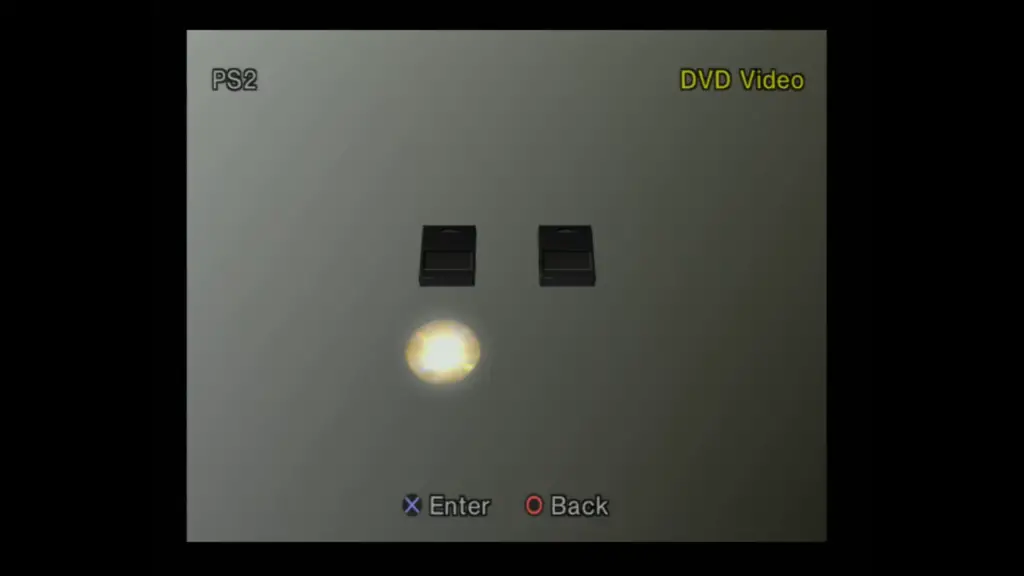
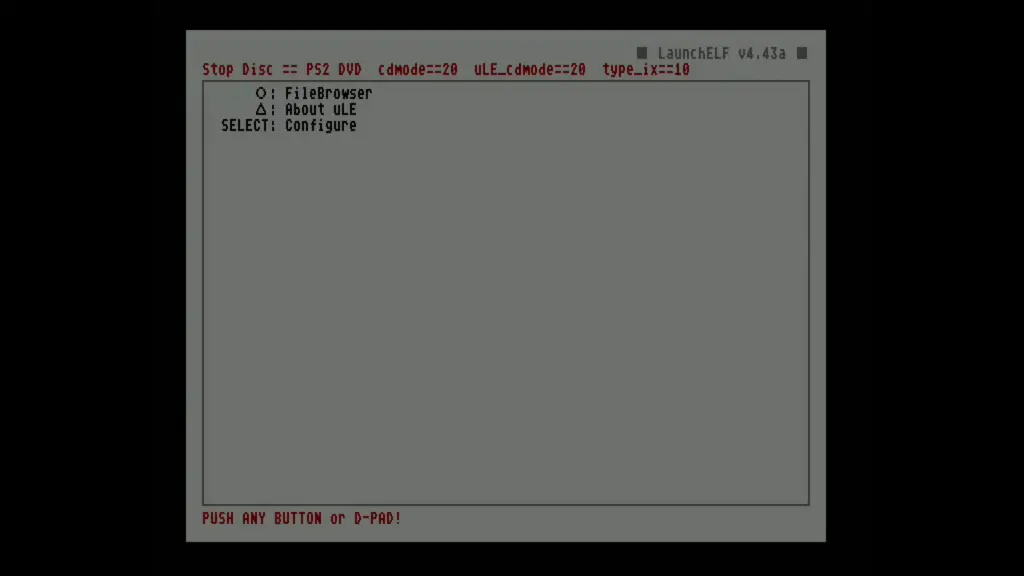
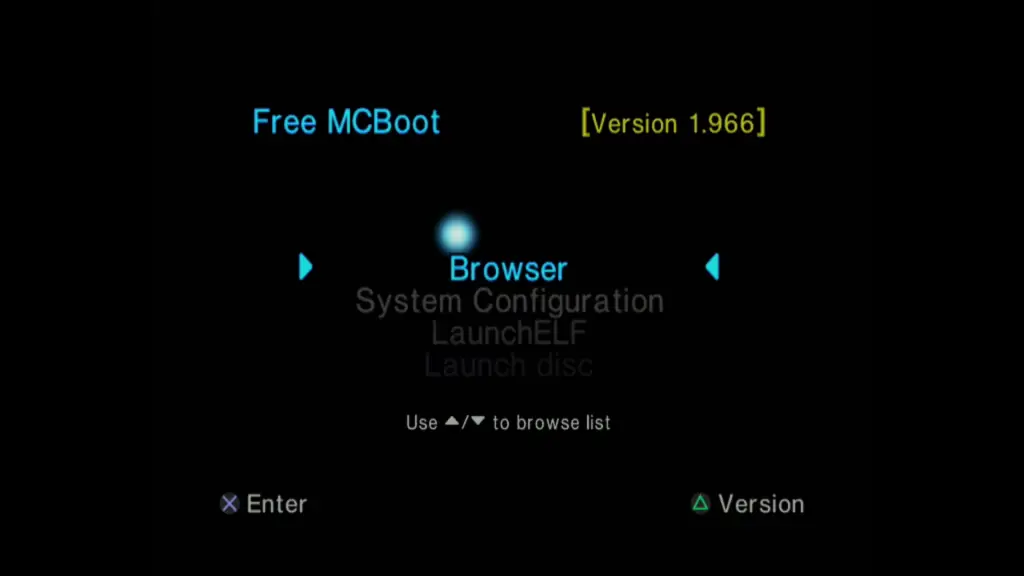
Our disc will appear as a DVD in the browser, select it to load up FreeDVDBoot. This may take 30 seconds or so to load, so please be patient. If all goes well, we will be booted into LaunchELF, from here we can install Free McBoot, but first, we need to head back over to our PC to grab a few files and put them onto a USB Thumb drive.
Installing Free McBoot to Your Memory Card
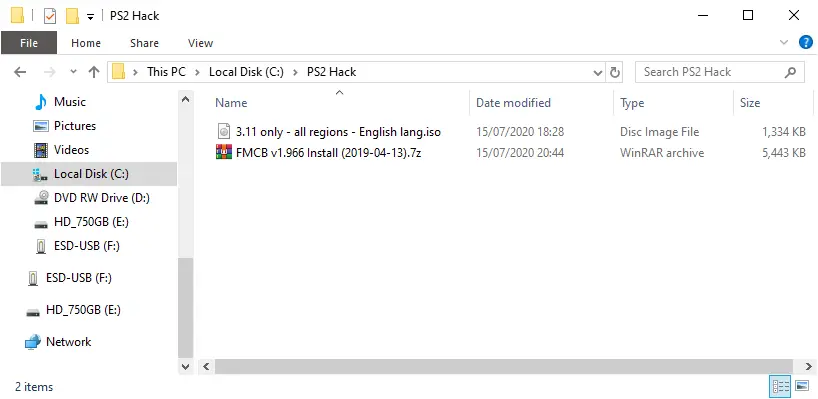
We will be installing the latest version of Free McBoot to your memory card. Download the latest version of Free McBoot from here and move this over to a folder on your PC.
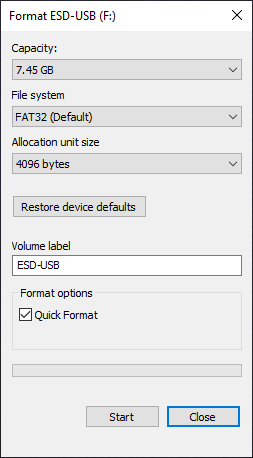
Insert your USB drive and format it to be FAT32, to do this right-click on the drive in windows explorer and click ‘Format’. Make sure FAT32 is selected under the file system and click start.
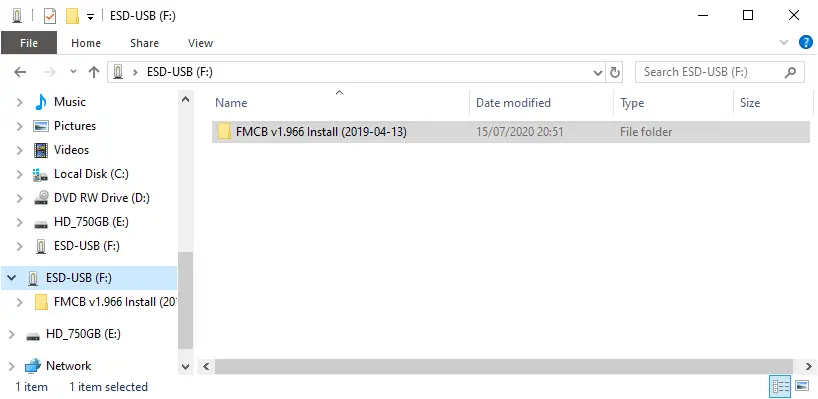
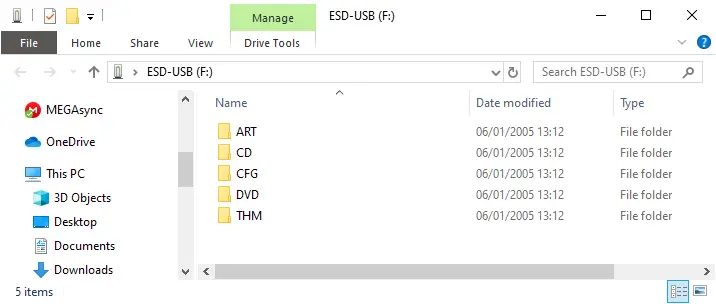
Extract the contents of the FMCB-xxxxx.7z using a program like WinRAR OR 7-Zip. Drag or copy of the folder over to your USB drive. It should look something like this: –
Eject your USB drive and insert it into the USB port on your PS2.
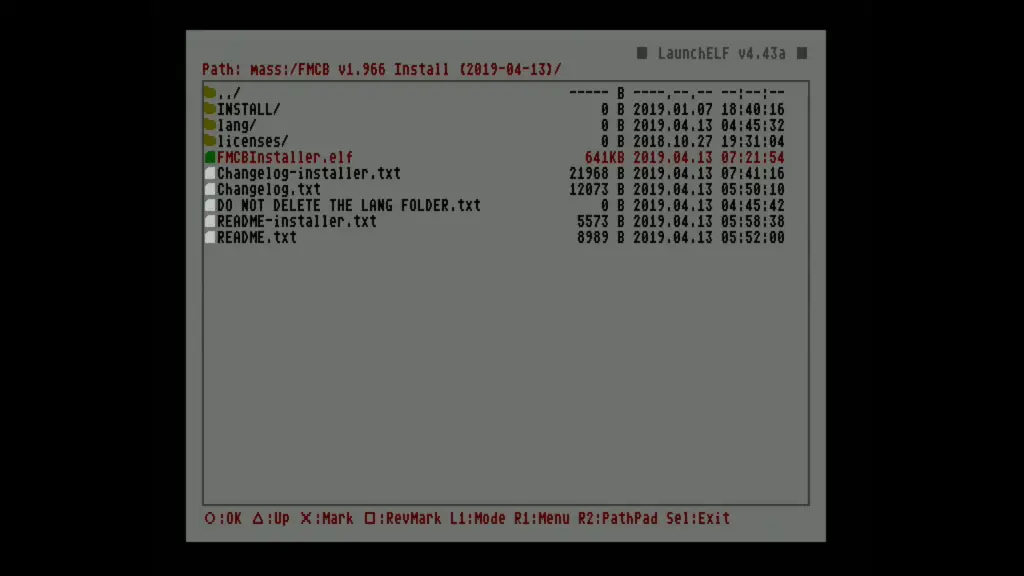
Load up LaunchELF using your FreeDVDBoot, press circle to enter the file browser and navigate to ‘mass:/’ (for USB mass storage) and press circle once again. Inside the FMCB folder, we will find a file named ‘FMCBInstaller.elf’, press circle one last time to launch it.
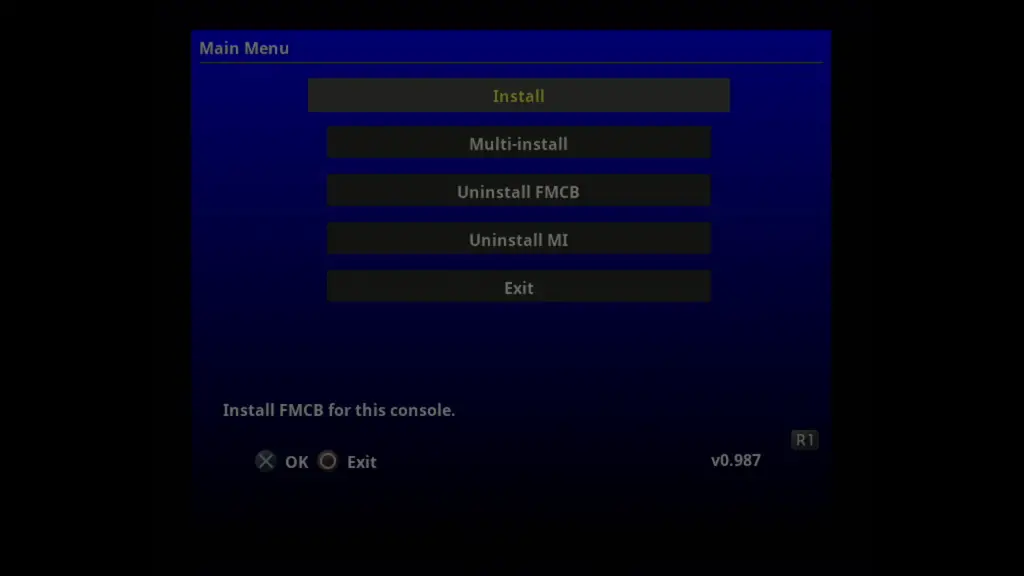
We will then be inside the installer for Free Mc Boot. This time, pressing X, choose Install. Choose what memory card slot you want to install Free Mc Boot to and press X once again.
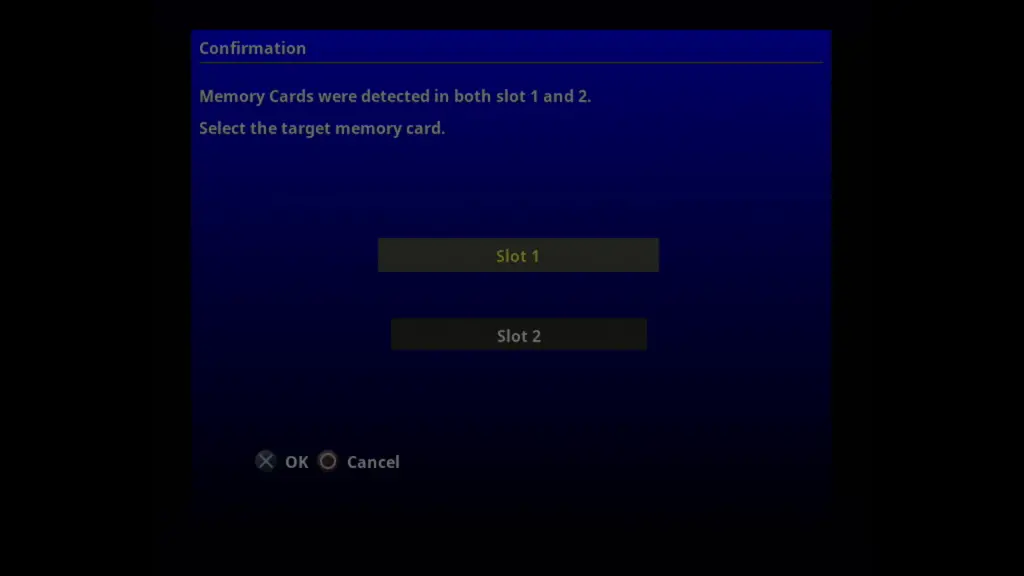
You will be prompted for what type of installation you want, Normal, Cross-regional or Cross-model. Unless you intended to use this Free Mc Boot installation on another console, choose Normal.

Free Mc Boot will begin to install to your memory card. Once completed press X to select OK and head down to exit. This will take you back to the PS2’s browser and we can take out our DVD now.
Tap the power button to reset the console and Free Mc Boot should now automatically launch from the memory card. We no longer need the disc anymore!
The good thing about Free Mc Boot & FreeDVDBoot is neither program makes permanent modifications to your system. If you want your PS2 to launch stock simply take out the Memory Card.
How to Load PS2 Backups
Now that we have FMCB stored on our memory card it is a lot easier to load homebrew, in fact, you already have loaded LaunchELF using FreeDVDBoot which, in turn, you used to install FMCB to your memory card.
To launch PS2 game backups we will need to install another homebrew called OPL. To do this we need to download and extract the files just like we did with the FMCB installer. You can download OPL from here.
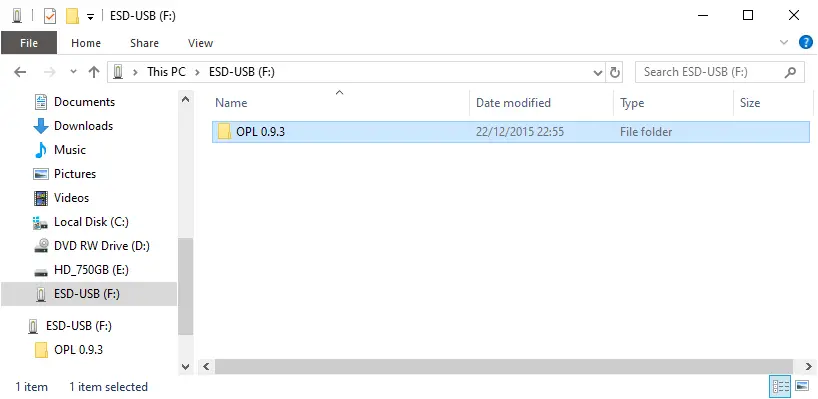
Once downloaded, extract the folder and look for the ‘OPL 0.9.3’ folder inside (or whatever the latest release is) and copy this over to your USB drive.
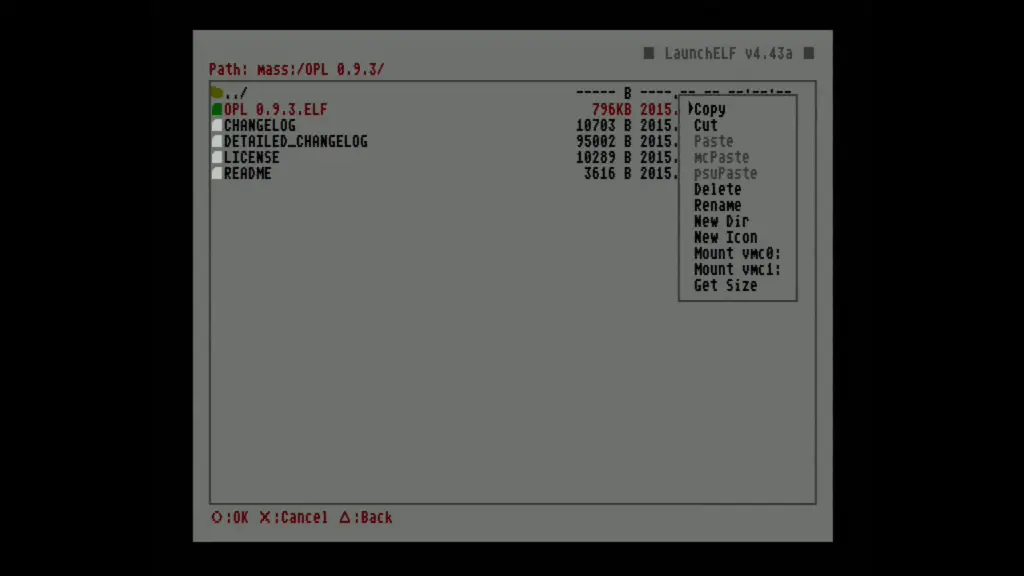
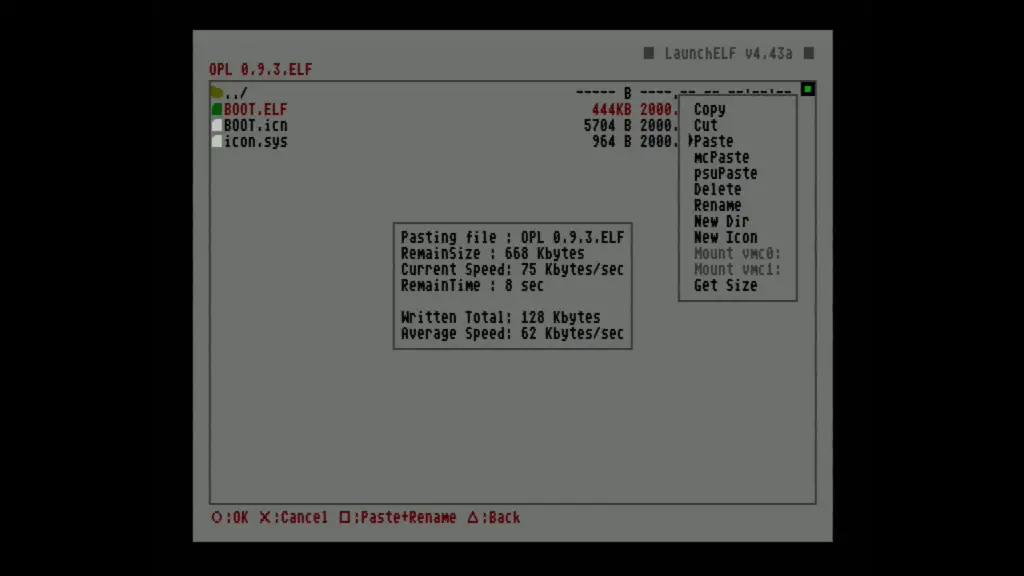
Insert your USB drive back into your PS2, let FMCB launch and head down to ‘LaucnhELF’ and press X to Launch it. once loaded press O to enter the file browser, from here navigate to Mass:/ and into our folder ‘OPL 0.9.3’. Inside head down to the .ELF file, while over it press R1 to open the menu, select ‘copy’ and press O.
Press Triangle a few times to return to the main part of the file explorer, from here head into ‘mc0:/’ and head into the ‘Boot’ folder. In here press ‘R1’ but this time select Paste. This will take a few seconds to copy across from your USB card to your memory card.
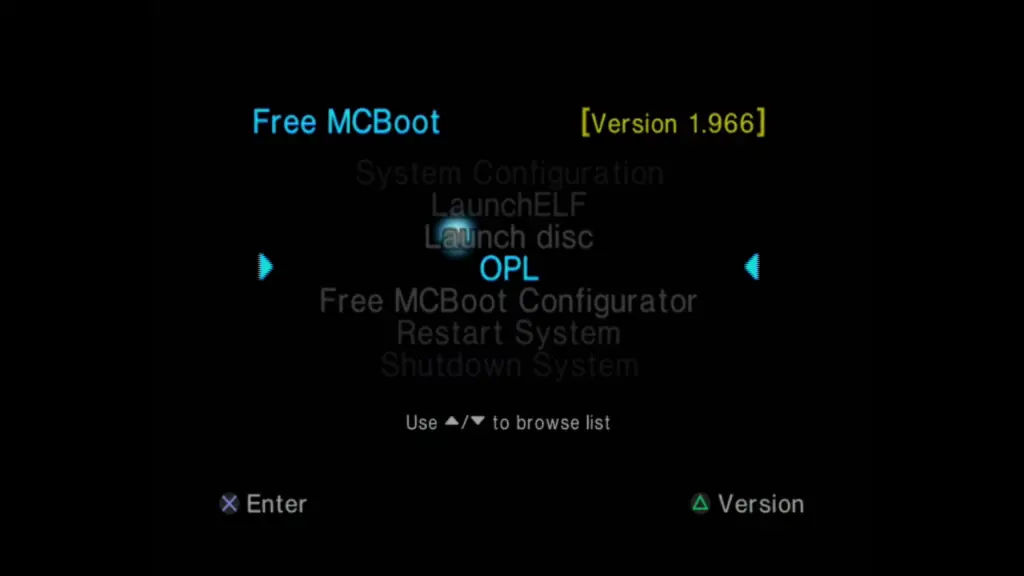
Now that we have OPL on our memory card we will configure FMCB to have a shortcut from its menu. Press reset on your PS2 to load up FMCB and head down to ‘Free MCBoot Configurator’
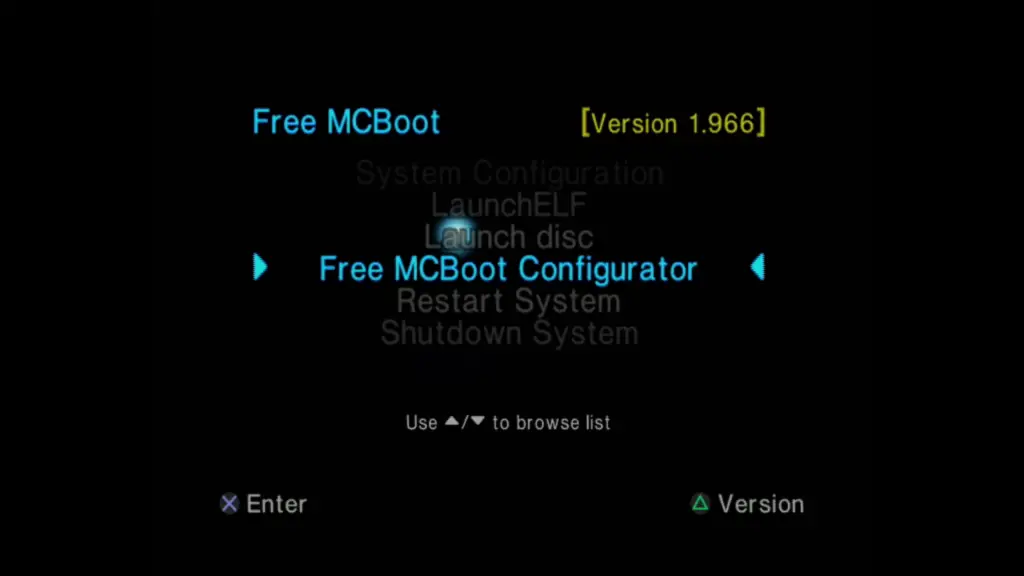
Press X to open this menu, you’ll be prompted to select your button layout, simply press X. After that head down to the option ‘Configure OSDSYS options…’ and press X.
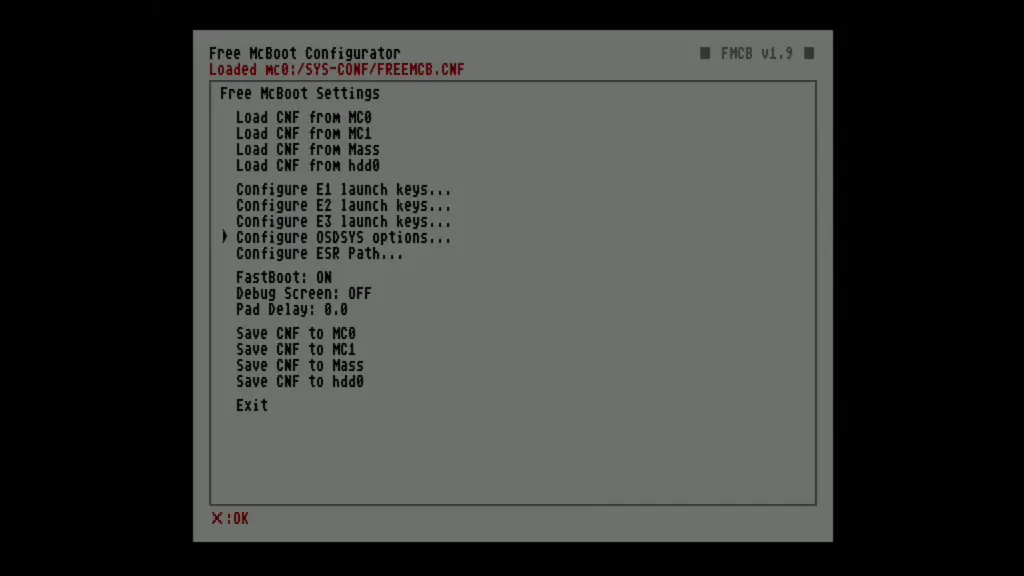
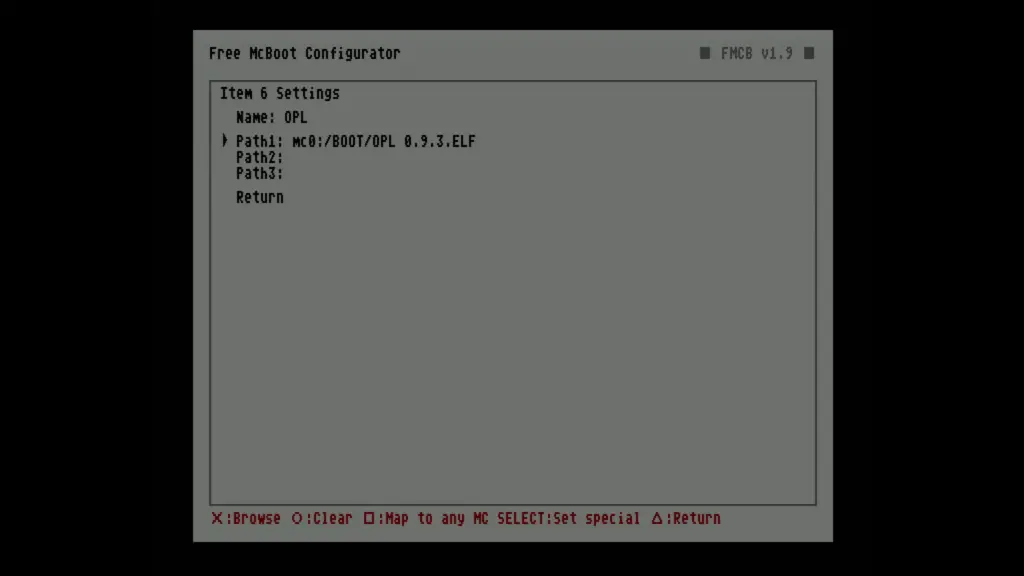
Chose ‘configure Item’ and press right until you find a blank space, mine here is number 6.
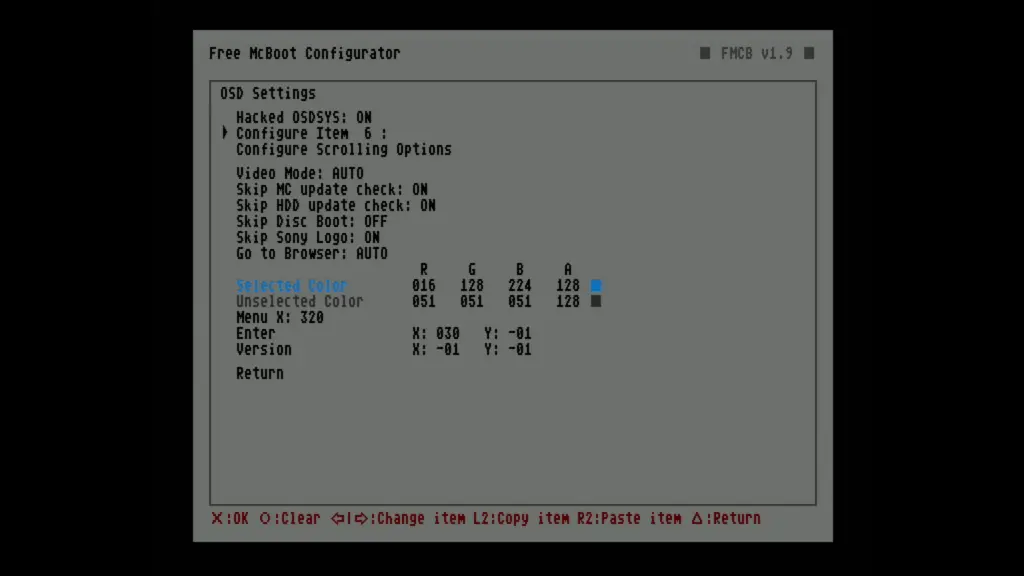
Press X once again and in the next page, we want to set a name and also set the path of where we put our OPL file.
Press X with Name selected and input whatever you want to call the shortcut. I’ve gone with OPL.
Under path, we want to navigate to mc0:/BOOT/OPL 0.9.3.ELF and press X.
Press triangle twice and head down and select ‘Save CNF to MC0’, some red text will appear at the top of the screen if the configuration is saved successfully.

Head down to exit and press X. This will take you back to the PS2’s browser. Press O to go back, scroll down and you will now notice we have successfully installed OPL to our memory card.
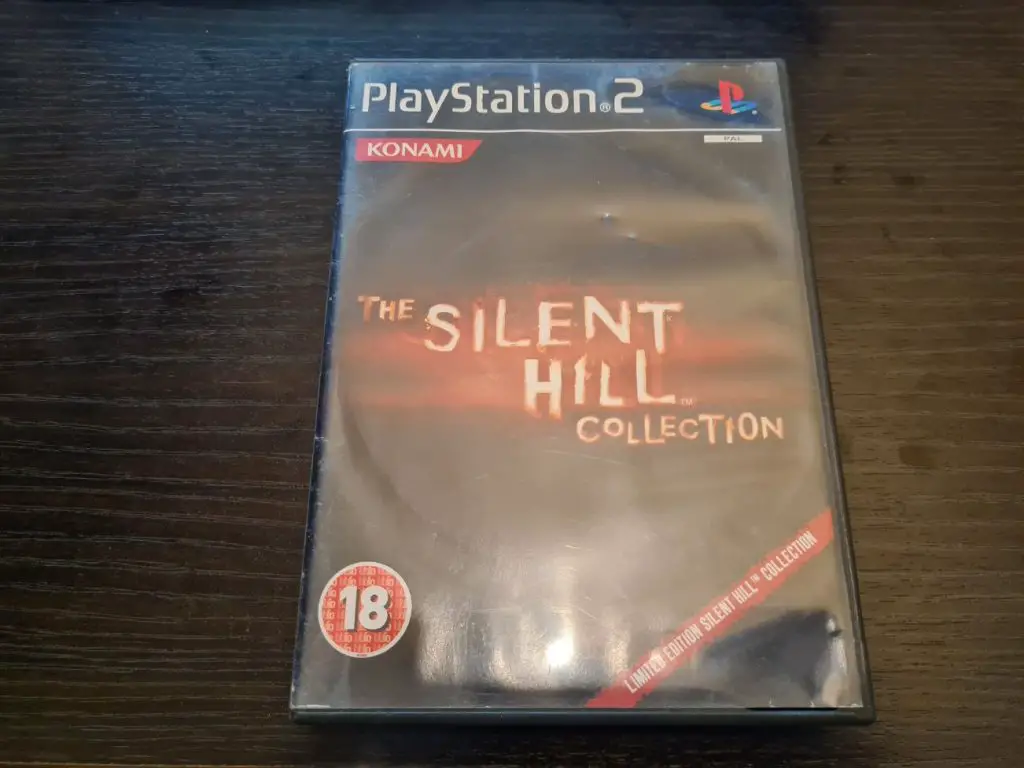
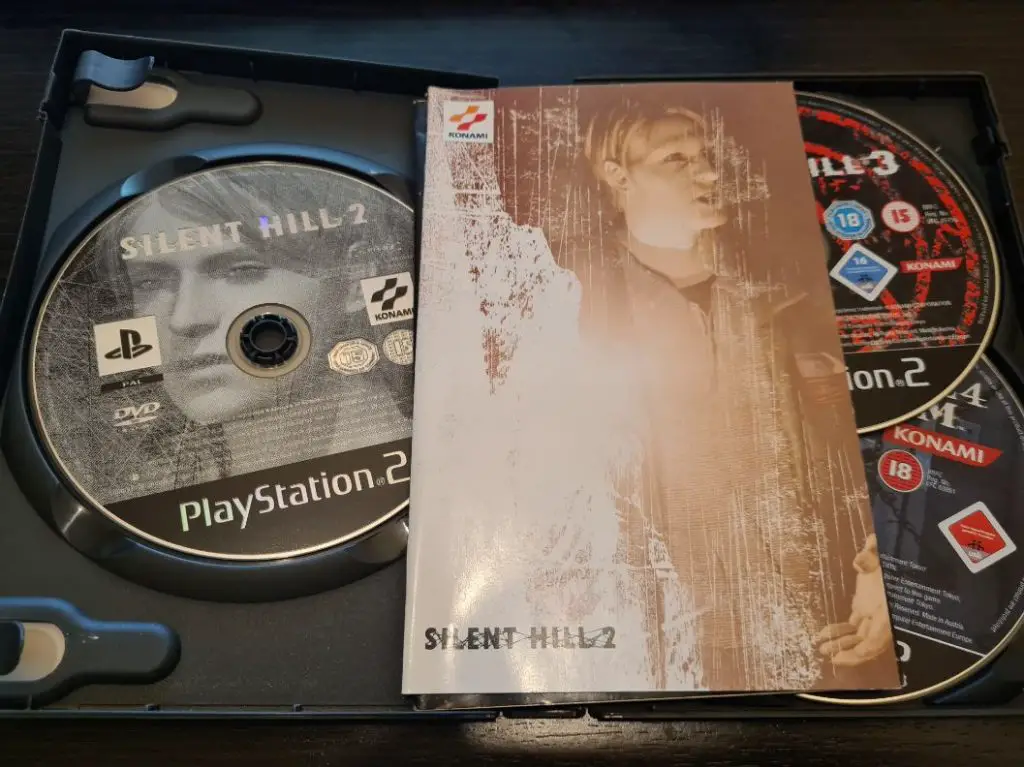
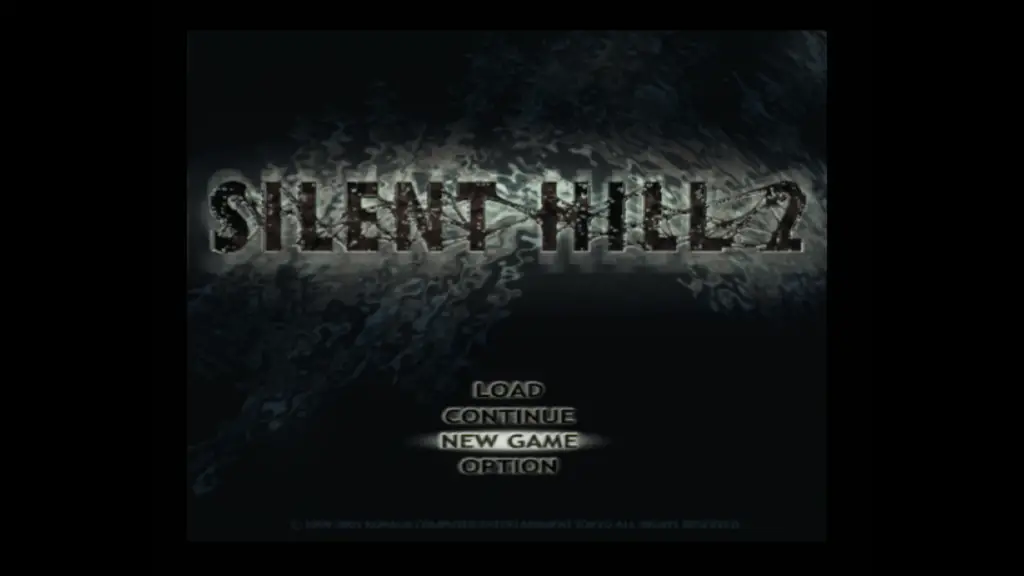
Now we have OPL installed we can get some games running, but first we are going to need an ISO file of the game we want to load. For the sake of this tutorial, I will be making a backup of the second-best Silent Hill game, Silent Hill 2.
Playing Imported and Game Backups
To play your imported games and make your PS2 region free we need to use a piece of software called MechaPwn.
I’ve made a small video demonstration which can be found here.
MechaPwn essentially turns your PS2 into a development unit and allows you to play games from all regions such as Japan and Asia. MechaPwn allows you to also play all regions of PS1 games natively and will even let you play burnt game discs for both PS2 and PS1 games. Just note that MechaPwn will not work on late PS2 Slim models such as the 900xx series.
How to Back up a PS2 Game
To back up a PS2 game I recommend using ImgBurn. Open ImgBurn as we did before, but this time select ‘Create Image File from disc’.
Make sure your PS2 game is in your PC’s drive and it should be auto-detected. Click the icon in the bottom left corner to begin copying the game.
The amount of time this will take varies on the speed of your drive. For Silent Hill 2, this took my machine about 8 minutes.
Once your ISO is ready you may want to rename it, I went with ‘Silent Hill 2.iso’. Try not to make the name too long or use any special characters as OPL may not like this!
** As we are formatted in FAT32, there is a file size limit of 4GB. Any ISO’s that are bigger will need to be split with a program such as USBUtil which can be found here. **
Now we have out ISO file, copy it to your USB drive and you’ll be able to load it in OPL. With your ISO copied over, head into OPL. We need to quickly change a couple of settings.
OPL should have automatically created the following folders on your USB drive. If they are not there then create them manually. Silent Hill 2 is a DVD I put the ISO into the DVD folder. Any game that has a blue-ish / purple bottom is a CD, the first Timesplitters for example would be put into the CD folder.
Head into OPL’s settings and change USB device start mode to Manual and change Default Menu to USB Games.
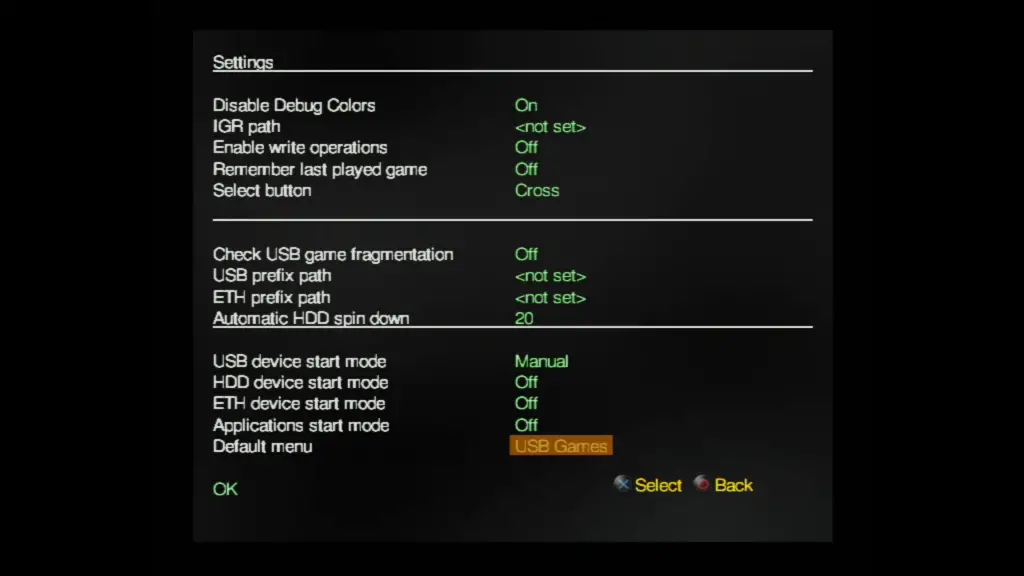
Press OK and then head down to Save changes which will save your config file. Press O to take you to the USB Games folder, then press X to Start your USB device. From here OPL should see your game.
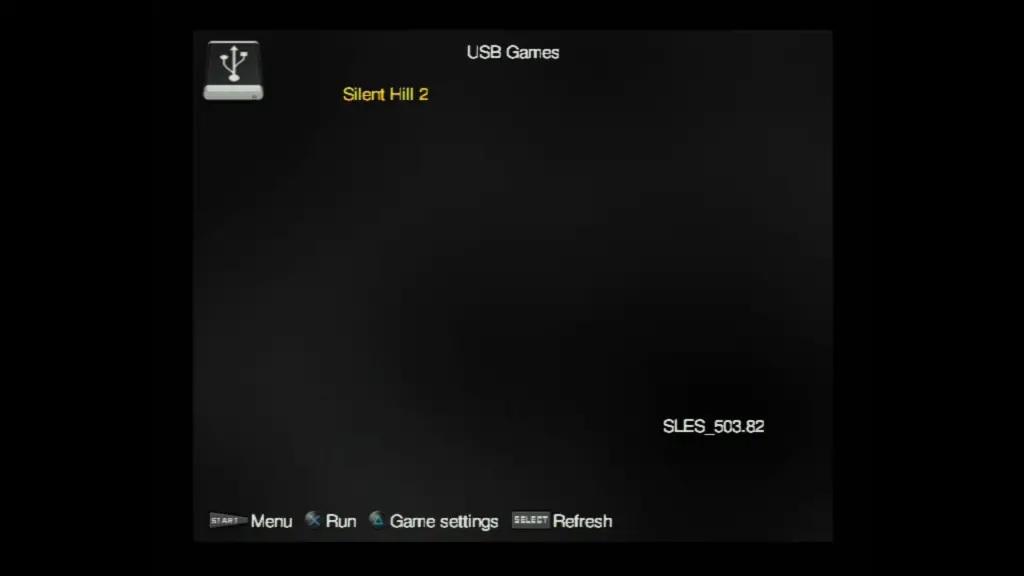
To start your game press X and the game will begin to load. As the game is loading from a USB 1.1 port this may take 30 seconds or more.

Now, as the PS2 only has USB 1.1 some FMV heavy games will stutter, and loading will take a lot longer than usual. There are a few solutions to this.
If you have an original PS2 (Fat model) you can install an internal hard disk drive that has much faster loading speeds. You can use a program called HDloader to manage and copy your games to your HDD.
For this you will need a PlayStation 2 Network adapter, this allows you access to an ethernet port as well as the internal IDE connection for older compatible Hard driver.
Luckily, some companies make a SATA version of the PS2 network adapter quite cheap and allow for HDD’s of up to 2TB to be installed.
I don’t have one on hand to demonstrate, but installing HDLoader is the same process as to how we copied over OPL earlier and you can download it from here and it’s very user friendly and intuitive.
This next method is my preferred method, if you want to use it on a Fat model PS2 you’ll need to pick up a network adapter like mentioned above to have an Ethernet port.
How to Load PS2 Games over Ethernet
Slim PS2’s do not have an option to install a hard disk driver, however, they do come with an ethernet port built-in. The good news is we can send games over ethernet which is much faster than the USB 1.1 ports on the PS2. This means all your FMV’s will run perfectly and loading times will be dramatically decreased.
To send games over to my PS2 Slim I will be using a Raspberry Pi.

To do this we need to download some additional software for our Raspberry Pi. Download the latest version of psx-pi-smbshare from toolboc’s Github page. Extract this image to your PC.
We will be writing this to our Raspberry Pi’s Micro SD card. To do this I recommend the program WIN32diskimager.
With your micro SD connected to your PC, launch Win32Diskimager and select the drive is mounted as. Mine is mounted as ‘F:/’ Click the blue folder icon and select the psx-pi-smbshare image to write.

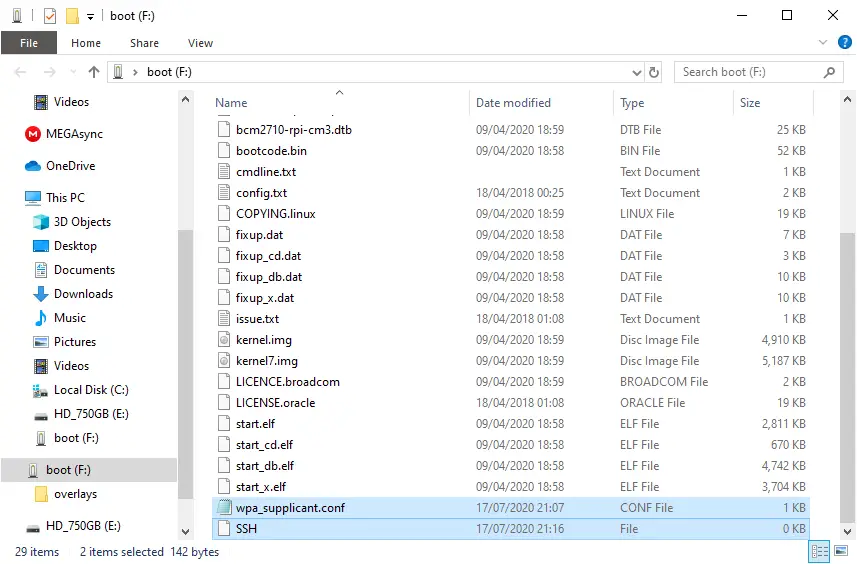
Double-check you have selected the right drive and click write. Once the write has finished we are going to want to add a file to enable a wireless internet connection to our Pi.
In a text editor like notepad or notepad++ create a new file called ‘wpa_supplicant.conf’ inside this file we need to put in the following information: –
ctrl_interface=DIR=/var/run/wpa_supplicant GROUP=netdev
update_config=1
country=US
network={
ssid=”<SSID>”
psk=”<PASSWORD>”
}
We need to change a few things, where it says country=US, change it whatever region you are from (a full list can be found here). As I am currently based in the UK I enter ‘GB’
Next after ssid= you need to put in your SSID (Your Wifi signals name). psk would be the wifi password.
It should like this: –
ssid=”YOUR SSID”
psk=”YOUR PASSWORD”
Once this is all entered, save this file making sure you select ‘All types’ and copy this over to the root of your sd card.
Also, make a blank file called ‘ssh’ and put this on the root along with wpa_supplicant.conf
Once finished, eject the Micro SD card and insert it into your Pi. Plug your hook up your Pi via HDMI and power it on, it will start to load. This first boot will be much longer than usual as the Linux distribution will be expanding itself and connecting to your WiFi etc.
During the install, your Pi’s IP will be displayed, be sure to take note of that as we will be needing it shortly.
Once we get the prompt that says ‘smbshare login:’ we can use SSH to issue commands. This allows us to use our Pi headless (without a screen). The easiest way to do this is with a program called PuTTY.
Download and install PuTTY from here.
Load PuTTY and type in the IP address of your Pi where it says Host Name and be sure SSH is selected under connection type.
Click open and we will be connected to the Pi. You be asked for credentials, Use ‘pi’ as the login and ‘raspberry’ as the password. This will allow use to login into our Pi and send commands to it.
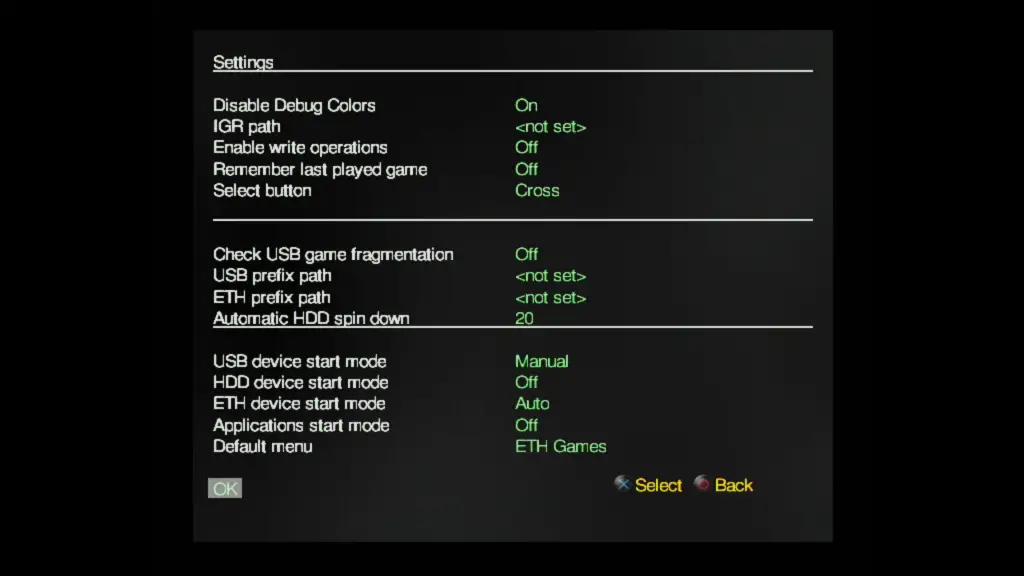
Connect an ethernet cable between your Pi and your PS2, turn on your pi and then your PS2. From here load up OPL. Head into OPL’s settings and set ‘ETH device start mode’ to auto, you can also set the default menu to ‘ETH Games’ and press OK at the bottom. This will allow us to automatically load our games on starting OPL.
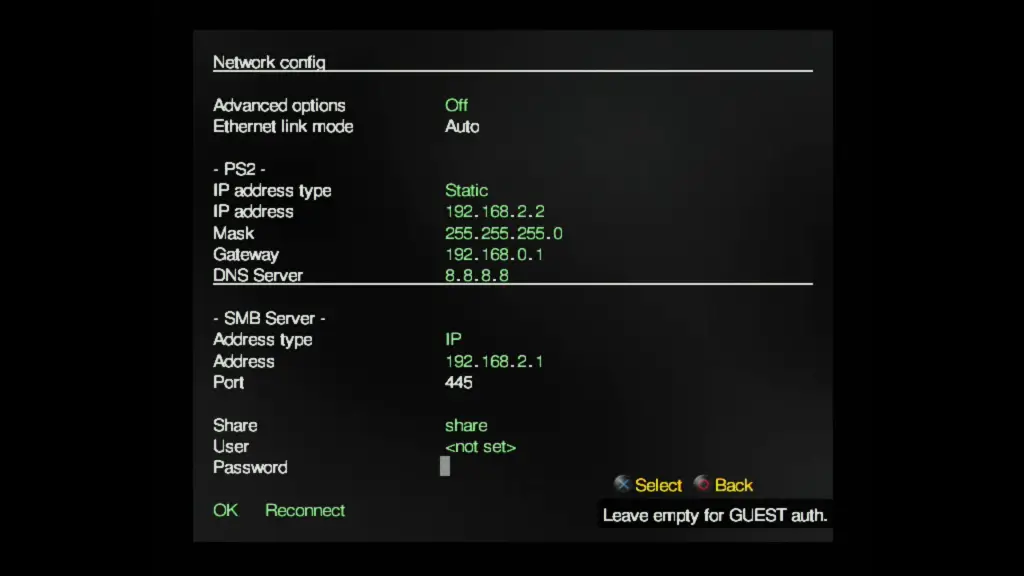
Next, head into network settings and change your settings to match mine below, this will allow OPL to connect to your Pi via SMB:
Head down to the bottom and select OK and press X. Head down to save changes and press X.
Now you can connect your USB loaded with your games to your Raspberry Pi. (You can use any if the four USB ports)
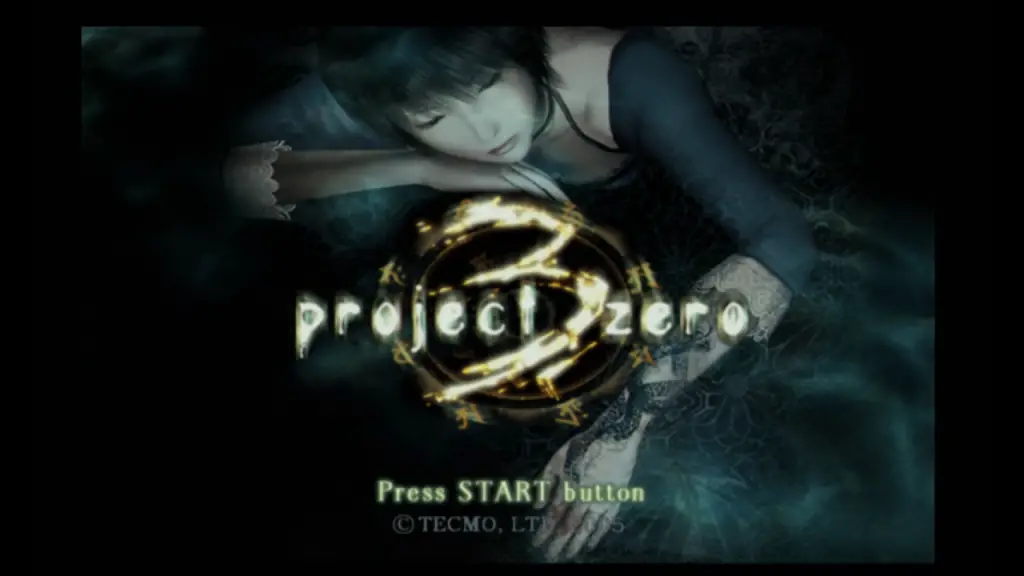
Afterwards, press O to load your games list. You may need to use your D-pad to select ‘ETH Games’. Your games should appear, I’ve added Project Zero 3 to my DVD folder.

Press X to load the game you want, Loading will be much faster than USB. All FMV’s will play at full speed and loading will be much faster!
Now, to shut down your Pi once you are done playing you games, send the following command to the Pi to avoid corrupting any files from pulling the power cable while it is on. Enter ‘sudo shutdown -h now’, just be warned that it’s not as simple as flicking a switch, the Pi will take a minute or two to shut down fully. You’ll be able to tell when it ready to be disconnected as the green data activity led will stop flashing.
Where’d your pictures go?
Hi Sean,
This should be fixed now 🙂
I don’t have a DVD drive; do you know of a good external DVD/burner?
If I have a memory card with Mc Boot pre installed I can play downloaded games burnt into DVDs without following the rest of the steps you’ve mentioned?
+the images are still missing.
Thanks for the thorough and detailed guide! You’ve covered every single step and everything is super coherent and easy to follow. Cheers!
instead of a pi, could a nas drive be used instead?
For loading iso’s via the network?
Hi Miguel, yes this should be possible. You’ll need to set up the NAS and enable SMB sharing.
Thank you for the guide, btw.
Its an interesting read.
Thank you for this tutorial.
After setting this up on 2x PS2 Slims with Pi 2b’s each, I added one thing to them that will be useful to everyone.
Add a Power Switch to the Pi, to turn it on and off(standby mode), instead of using a pc via ssh.
Details on how to do it is here: https://github.com/Howchoo/pi-power-button
I didn’t bother logging in via ssh to add this though, just did it directly on the Pi.
Also, for best performance, I found the Pi2b or higher(no performance gain, but it works) to be the better choice cost wise.
Using a Pi 1/1b, the single core takes a long time to be ready, too long for opl to see it – forcing you to do a reconnect several times for it to work.
Can gave saves be stored on boot card?
yes, you can use it to save games onto also 🙂
Hello, where would the games be stored?
What is faster, HDD or network?
Obviously HDD
Hi there is a problem i get the cannot read disc error, its not from the ps2 i checked with other disc, could it be the speed it was written at the lowest my pc optical drive could go was x6, or could there be other issues
Yep it could be that mate. I find that writable media nowadays is very poor quality – even Verbatim which is still the best brand to use of the widely-available ones.
But do look into loading games from an internal hard drive, easily the best way to play games on the PS2.
You might need to play around with the write speed for the discs a little in ImgBurn. My PS2 failed to read a 1x write on 16x DVD+R Verbatim discs. ImgBurn said the discs supported 6x as the lowest write speed so I tried that and got it working. Check for warnings and errors as well as the supported write speeds of the discs in ImgBurn. I left another comment with notes but wanted to update here as well.
opl settings, i don have default menu – usb games options at all. Cant see any game on gamelist
Hi, does the network method work when using a Raspberry Pi 400? Do any modifications to the method need to be used?
Thanks
Great tutorial! Just did this today. A few notes:
1. The link for OPL has changed and you need to get it from their github release section. OPNPS2LD-v1.1.0 is what I used.
2. I tried writing to a 16x Verbatim disc with 1x write speed and it failed to read disc in the PS2. ImgBurn said the disc supported 6x write so I tried that as well and got it working contrary to another comment.
3. FAT32 filetype (for the USB) has a limit of 32gb in windows. Seems like you may be able to get around this but I didnt want to risk it.
4. Games over 4.3gb (which is most of them) need to be broken up into multiple smaller iso files for the FAT32 file system. You can google a video for this, I used the tool USBUtil to do this.
Can games be stored onto a 2tb memory bank via USB?
I don’t have a DVD drive; can you recommend a good external DVD drive/burner?
I don’t have a DVD drive; can you recommend a good external DVD/burner?
Do you know of a good external DVD/burner?