GameCube Modding Guide
In this GameCube modding guide, I will show you how to softmod your GameCube to play game backups and load homebrew.
Why Mod Your GameCube?
With a modded GameCube you can run games from different regions, back up your games and run them from SD card, force your GameCube to output certain resolutions that make the console look a lot better on modern TVs, run emulators from your GameCube and use other custom homebrews such as the brilliant Game Boy Player software replacement, Game Boy Interface.
How to Mod Your GameCube
To mod your GameCube, you need to find a way of running unsigned code. There are a few ways we can achieve this. I will outline the three most popular ways and show you how I soft modded my GameCube: –
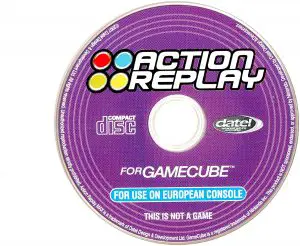
Action Replay and SD Gecko Method: Probably one of the easiest methods. For this, you will need to purchase a copy of Datel’s Action Replay, an SD to Gamecube memory card adapter, commonly known as an SD Gecko and a suitable SD card.
It’s quite easy to make your own SD Gecko adapter (Guide here), however, it’s probably easier to just order one online.
The action replay disc allows you to boot homebrew right out of the box. You can load your Homebrew files in the .dol format, copy them over to your SD card and boot up your action replay. With the memory card in your SD gecko, you can easily launch homebrew such as Swiss, however, this will, unfortunately, take up one your memory card slots. It’s an easy method to use however will require that purchase of the Action replay.
Using this method does not permanently mod your console and is completely reversible.
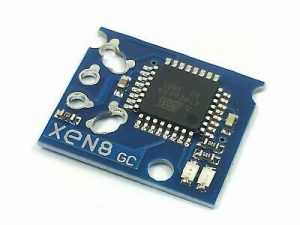
Xeno Chip and Swiss Disc Method: This is a preferred method for a lot of people, as, after the initial setup, Swiss is loads just how a regular GameCube game DVD does. From Swiss, you can launch all your additional homebrews and backups.
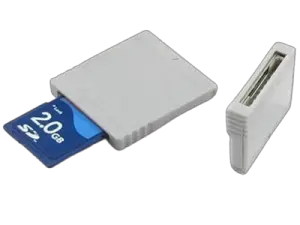
This mod will require a hard mod to your GameCube, it’s actually quite easy to and involves soldering a chip, the Xeno chip, which bypasses security checks and allows for your GameCube to load burned DVDs. You can burn a mini-DVD-R with the latest version of Swiss and you’re good to go. To load backup’s, you’ll still need a method of connecting an SD card like the SD Gecko or this can be used in conjunction with what I used personally, the SD2SP2 adapter…
SD2SP2 adapter and a Save game exploit method: This is the method I use personally, this way of modding your GameCube will keep your Memory Card slots clear and it quite straight forward once all set up.
Preparation – What do we need: –
A GameCube
(Modded WII)
PC to copy files

Method: How to Use SD2SP2 with No SD Gecko or Action Replay
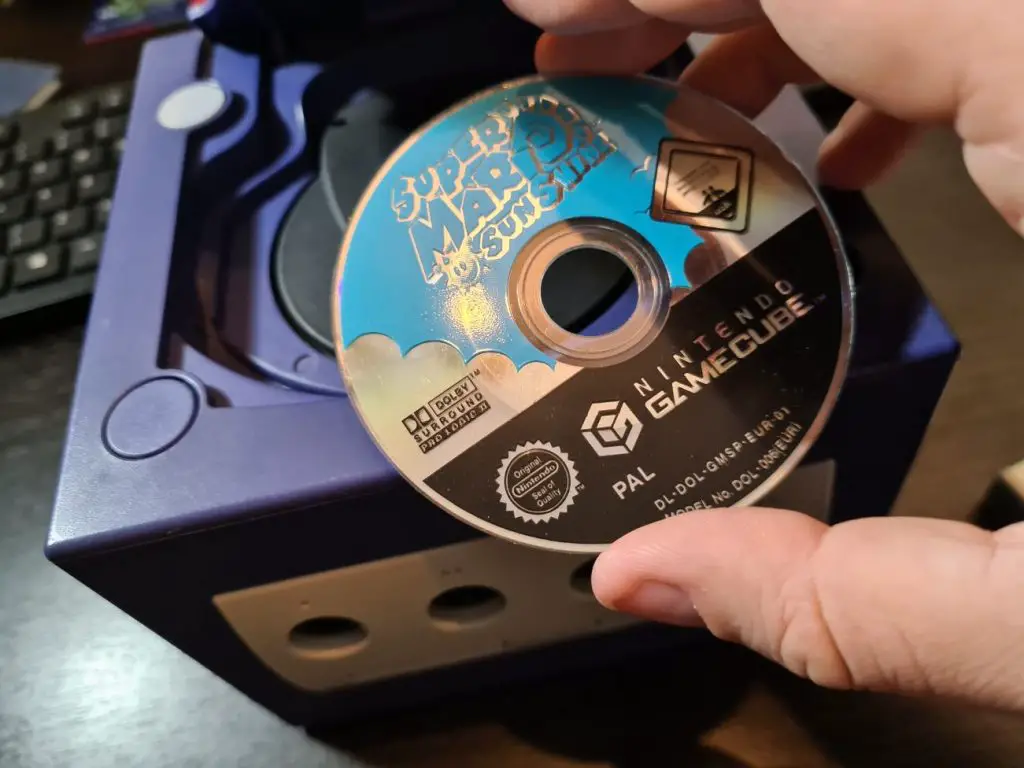
For this guide, I will be showing you how to soft mod your GameCube using a Save game exploit. I will be using an exploit in the game Super Mario Sunshine (PAL Version).
I will be using a Game save exploit to run unsigned code from the memory card which will allow me to access a Micro SD card installed into the SD2SP2 adapter.
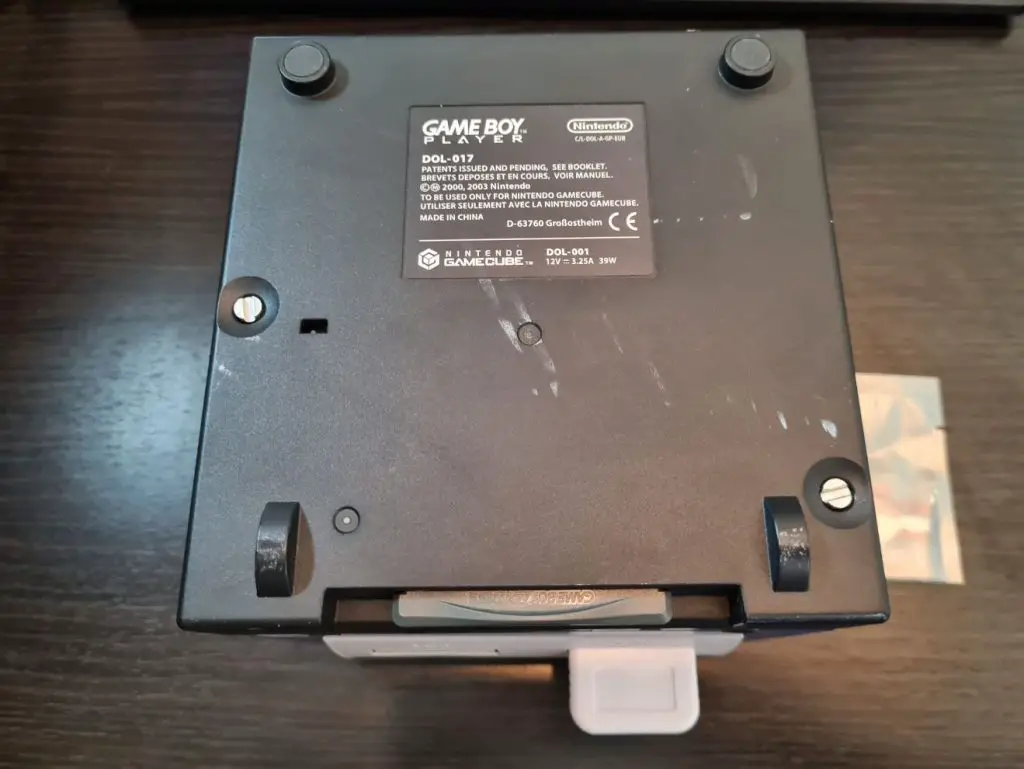
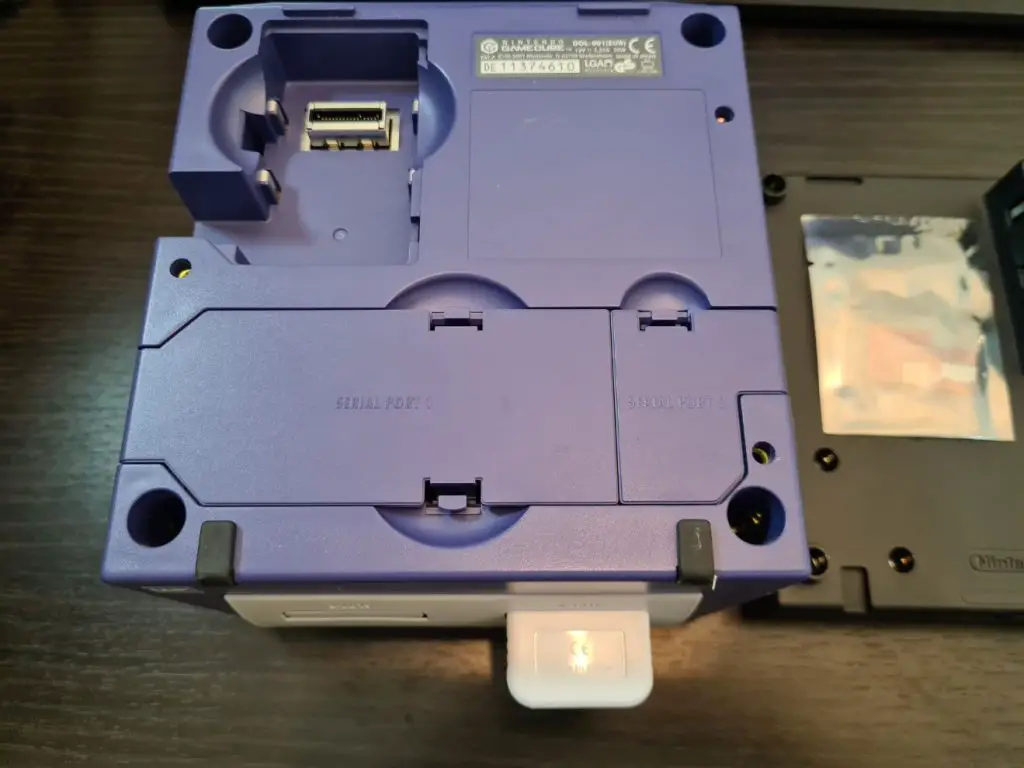
First, we will need to identify if our GameCube has a Serial Port 2, as not all GameCubes have these. If you don’t have a Serial Port 2, then you’ll have to use the SD Gecko or Xeno chip method listed above.
Turn over your GameCube and remove the Game Boy Player if you have one. Under here you should be able to see if you have a second serial port.
Now we know we have a serial port 2 (SP2) we need to find a way of copying our exploit files to our GameCube’s memory card. Luckily for me, I happened to have a modded Wii which has backwards compatibility with the GameCube.
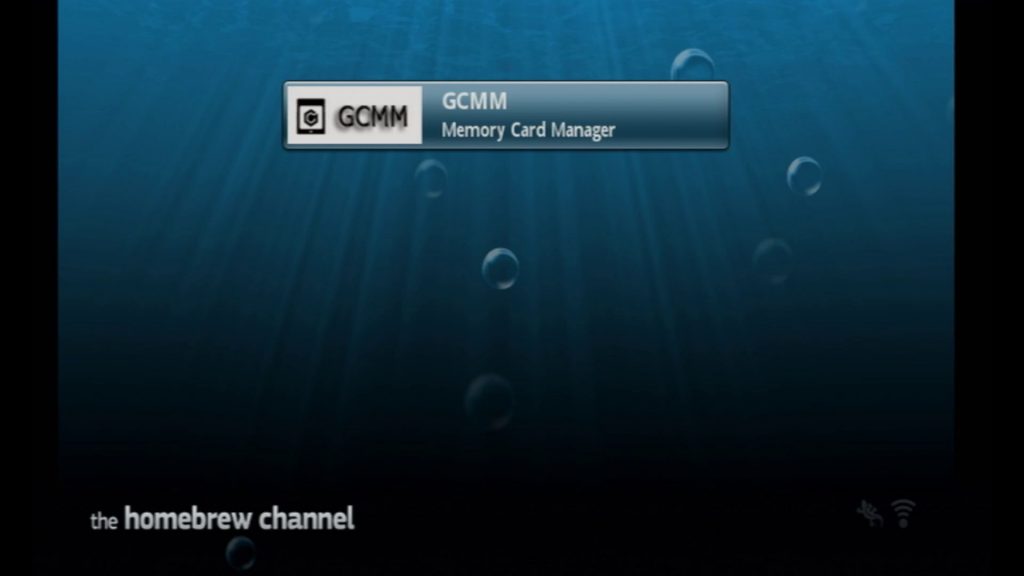
I will be using homebrew called GCMM (GameCube Memory card Manager). This homebrew can be used both on GameCube and Wii and will copy a save file containing the exploit over to our Memory Card.
First, we want to decide what kind of save game exploit we shall be using. As I mentioned earlier, I will be using my copy of Super Mario Sunshine to mod my GameCube. Games with save game exploits include: –
Animal Crossing
BMX XXX
F-Zero GX
James Bond 007: Agent Under Fire
The Legend of Zelda: Twilight Princess
The Legend of Zelda: The Wind Waker
Pokémon Colosseum
Pokémon XD: Gale of Darkness
Super Mario Sunshine (PAL version only)
Super Smash Bros. Melee
Tom Clancy’s Ghost Recon 2
Tom Clancy’s Splinter Cell
Tom Clancy’s Splinter Cell: Pandora Tomorrow
You can find a full list over at gc-forever.com
No matter what exploit you choose, we still load them to our memory card the same way. First up, connect your SD card to your PC as we need to copy over a few files.
Make sure your SD card is formatted as FAT32 and created a folder on the root of the card ‘MCBACKUP’

Download your game exploit and copy the .gci file to your MCBACKUP folder.
Next, download Nihusu SD2SD2 compiled files from here.
Extract the .zip file and move the ‘boot.gci’ to the MCBACKUP folder.

Download the latest version of GCMM from here. Inside the .zip file, you will find an ‘apps’ folder. Copy this over to the root of your SD card, this will allow your Wii to be able to launch GCMM.
Finally, download the latest version of Swiss. extract the swiss_rXXX.7z compressed file to your computer. Head inside the ‘DOL’ folder and copy ‘swiss_rXXX.dol’ to the root of your SD card.
Rename it ‘autoexec.dol’, which will allow your exploit to load this as the default homebrew. Your SD card should now look like this:

Insert your SD card into your modded Wii, head to the homebrew channel and launch GCMM.
Press ‘+’ on your Wii Mote or ‘X’ if you are using your GameCube controller with your Wii to use GCMM restore function.
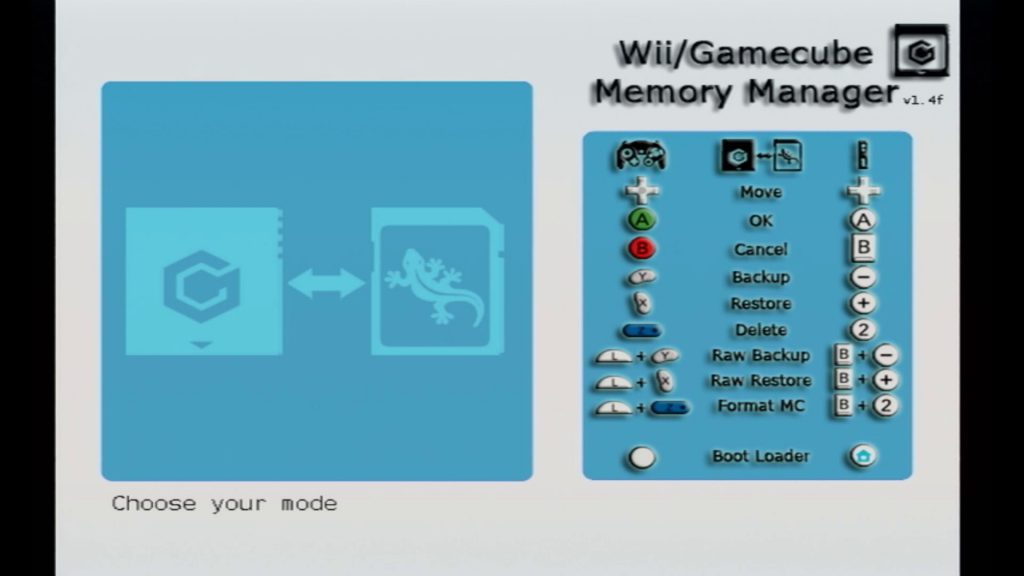
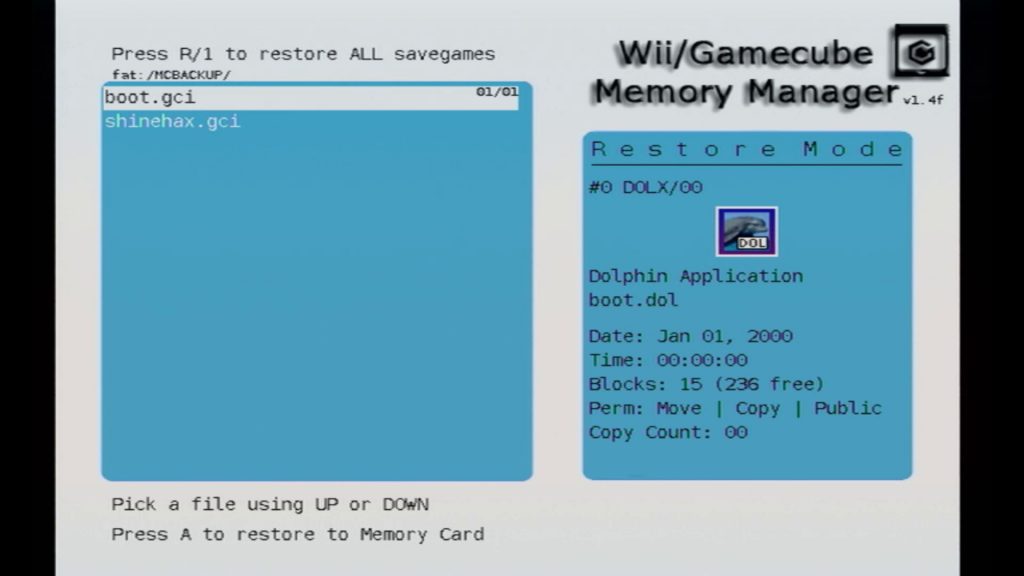
Select ‘A’ to load Slot A memory card, from here press ‘A’ to copy over our files to our memory card. Once done you can turn off your Wii and take your memory card out. We are now done with the Wii.
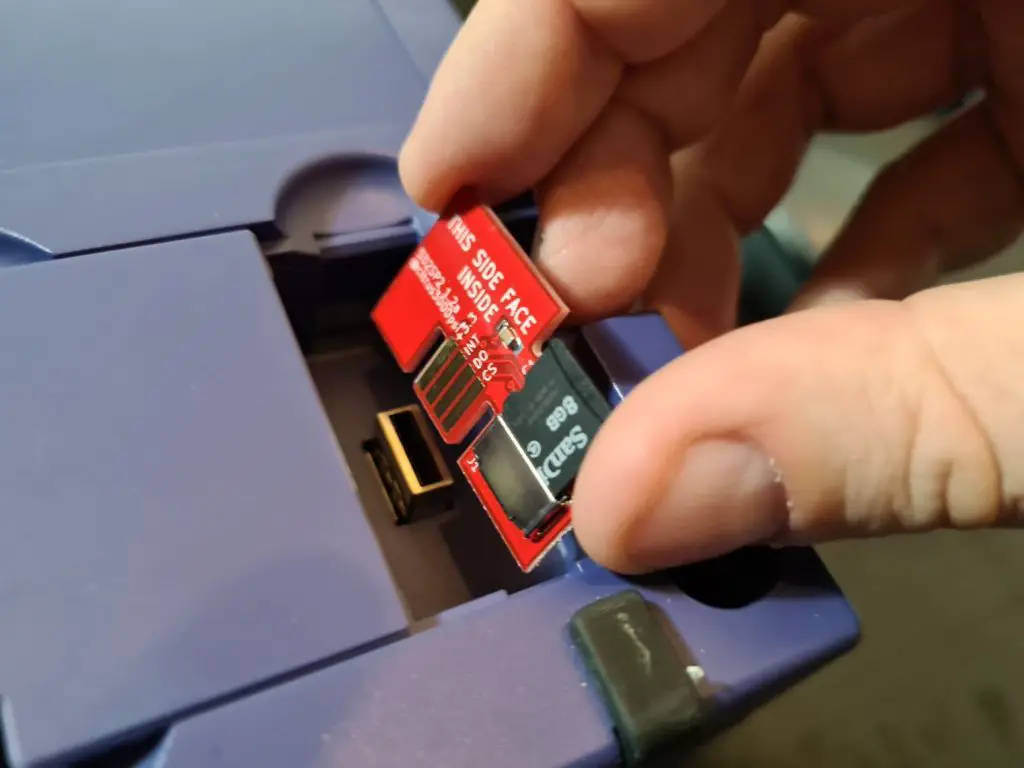
Now, remove the SD card from the Wii and insert it into the SD2SP2 adapter. You can then insert this adapter into Serial Port 2 on your GameCube.

How to Load Your GameCube Exploit
Now we have our files ready and SD2SP2 in place, insert your memory card back into your GameCube. Boot up your GameCube with no game inserted and head to your memory card settings. Check to make sure your exploit files have been copied across.
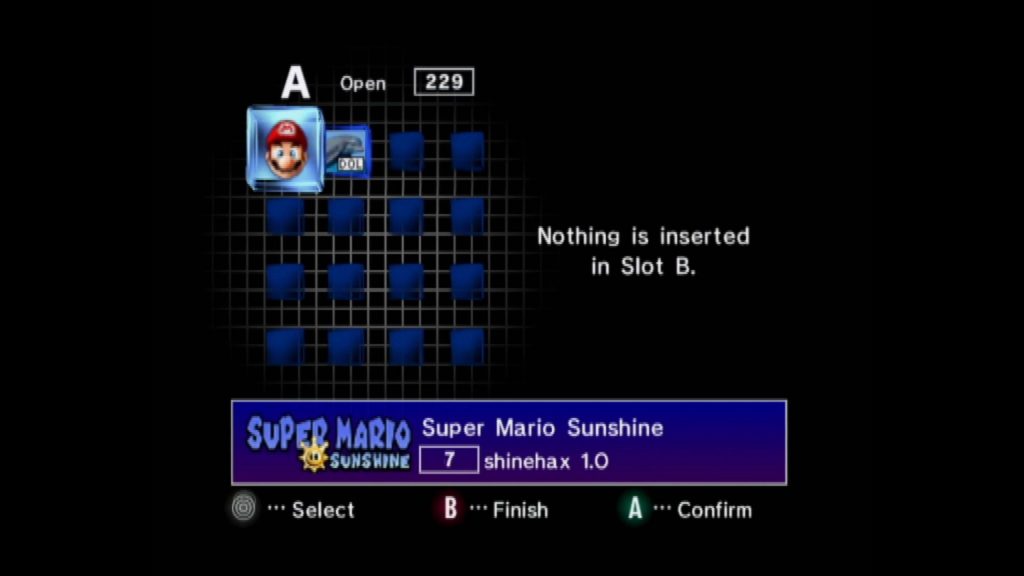
Now we have confirmed our exploit has successfully copied across to our memory card, its time to launch the game exploit, each one is launched slightly different, for mine, I have to let the Nintendo Logo load and choose 50hz mode, then I am booted into Swiss (autoexec.dol).
How to Load Backups on Your Gamecube
Using the homebrew swiss, we can load backups of GameCube games with a high level of compatibility. With Swiss, we can force games to run in certain video modes and bypass region protections.
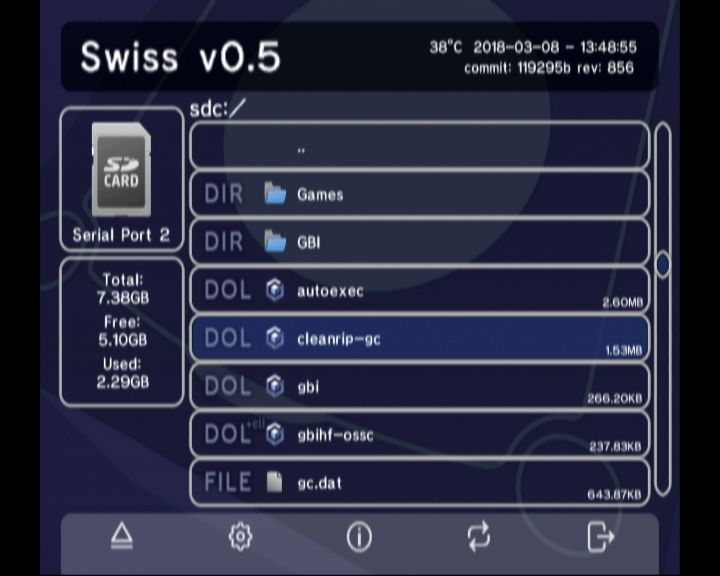
To load GameCube backups, we will first need the game in an ISO format. The easiest way to make an ISO is with some Homebrew called CleanRip.
Download the latest version of CleanRip and extract the .DOL file from the zip file and put this on the root of your SD card, also download the GC.dat file and put this on the root of your SD.
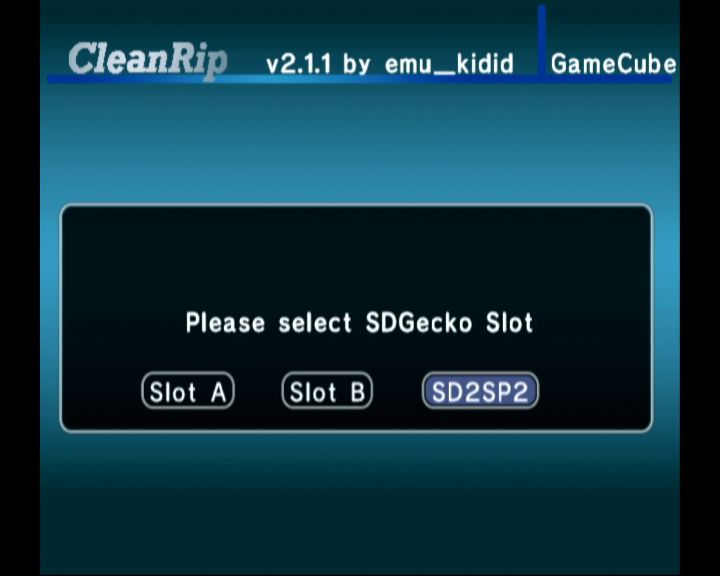
Use your preferred method of loading Swiss and launch the CleanRip .DOL file.
Once CleanRip is loaded read the disclaimer and then press ‘A’ to continue. Select ‘No’ when it asks about enabling checksum calculations and press ‘A’. One this next screen you’ll want to select where ever you have your SD card loaded, for me it’s in the SP2 so I choose SD2SDP, if you have an SD gecko in a memory card, then choose whatever slot you have it in.
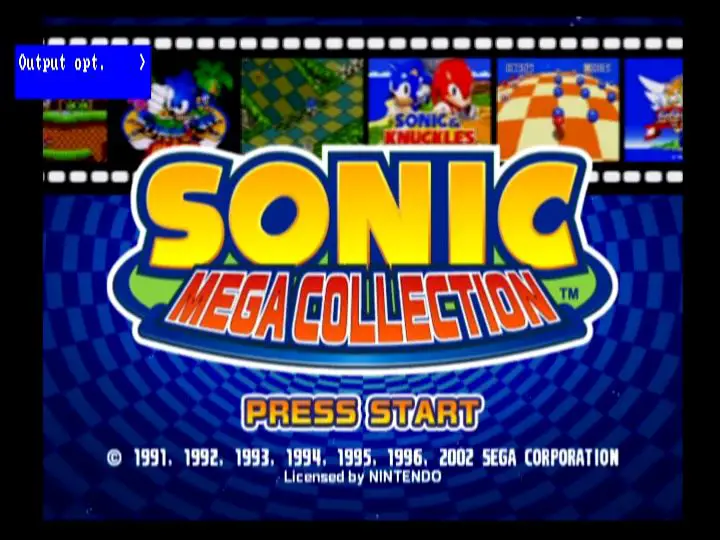
You may be prompted to insert your card, if its already in then press ‘A’ to continue and you’ll be prompted to insert the GameCube game DVD you want to back up. I will be making a backup of Sonic Mega Collection.

Insert your game and select No if asked if it’s a datel disc, now select ‘Yes’ to remember your settings next time and your game will begin to back up to the SD card.

This backup took just over 20 minutes to complete but this will vary from game to game. Once completed you can either press ‘A’ twice to dump another disc or press ‘B’ to exit. Your game ISO will now be on the root of your SD card.
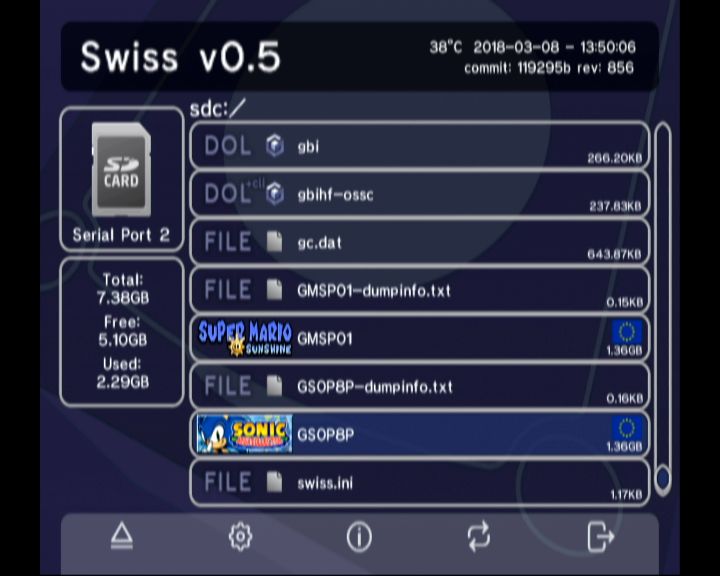
To launch your game backup, head into swiss and you’ll see the game ISO in the main menu, you can organize this into folders if you like.
To run the game, select it in swiss and you’ll be given a few choices, you can press ‘X’ to open settings where you can force the game resolution, widescreen etc. Pressing ‘Y’ allows you to apply cheats to the current game and pressing ‘A’ will boot the game.

How to Load Homebrew and the Game Boy Interface
Loading Homebrew is as simple as copying a .dol file across to your SD card and launching it through Swiss. In my opinion, the best homebrew for the GameCube is the Game Boy Interface by Extrems.
The Game Boy Player itself is actual GBA hardware squished into for that sits on the bottom of your GameCube. This means it has 100% compatibility with all Game Boy Advance, Color and regular Game Boy games. However, there is a problem… The software.
The official Game Boy Player software is frankly quite bad, there’s noticeable delay, lag and very limited customization options. The software has two filters which both give a very bad image, especially on modern TVs.
As this is purely a software issue, Extrems was able to fix a lot of Nintendo’s wrongs and the results are outstanding, coming close to the presentation of a MiSTer core or Emulation.
You can download the latest version of Game Boy Interface here.
Once downloaded, you’ll notice there are quite a few versions to choose from. Here is a rough outline of the three different types included: –
The main version of GBI
With GBI and Swiss in conjunction, you can set resolution, aspect ratio and have access to an on-screen display that allows you to zoom your image and adjust it to just how you want.
HF version (high-fidelity)
This version is a low latency version designed primarily to run with upscalers like the OSSC and the Framemeister.
SR version (for SpeedRunners)
The most stripped-down version of GBI, the SR version is geared towards Speedrunning. Very low latency and even features an inbuilt TAS timer function.
Here’s a couple of captures from my set up to give you an idea, unfortunately, some of these images may automatically get compressed, but trust me, they look great!

OSSC Settings for Game Boy Interface
If you are using the OSSC like I am you will want to download the high-fidelity version (gbihf-ossc.gci).
This will allow you to get a 2x scaled image @ 360p60. I’m connected via RGB Scart which is composite as sync, so I set the following settings: –
Under ‘settings opt’, I set ‘Auto AV1 Y/Gs’ to YPbPr
In ‘Output opt’ I set ‘384p/400p proc’ to ‘either Line2x 240×360 or Line3x 240×360’
In the ‘sampling opt’ go to ‘Adv. Timing’ and set the H.Sample rate’ to 301, I find this is the best setting for me, yours may vary.
If you enjoyed reading my GameCube modding guide, I also wrote a guide on how to mod the Wii U. With a modded Wii U you can run GameCube games in HD and even use your Wii U gamepad as a controller, please consider checking it out!

I am using the smash bros melee savegame exploit, but I only have 1 memory card. So when I save the game, will it destroy my savegame exploit, and I will need a second memory card instead?
If you overwrite the save, you’ll lose your exploit. I would either, get a second memory card or use a different region of the game.
Just a quick follow up to this, there’s a new version of Swiss which allows memory card emulation. Check it out!
Hi. I followed this guide using Splinter Cell 1 exploit but it will not work. The game just reboots the Gamecube every time I load Splinter Cell save. I am completely stumped.