The Sega Saturn is a great console with a ton of games, many of which are exclusive to the platform and have never been ported to other consoles. In this guide, I will show you how to replace your Sega Saturn’s laser assembly for the Fenrir ODE (Optical Drive Emulator). With a Fenrir ODE mod, it’s possible to keep all of your games stored on a micro SD card

Why you should install the Fenrir ODE in your Sega Saturn
The Fenrir ODE makes playing Sega Saturn games a lot easier, especially fan translations and region-locked games as it bypasses all region locking. With the Fenrir installed, you’ll easily have quick access to your Saturn collection, while preserving your discs, not having to worry about your CD drives laser failing and if you have your games backed up, you’ll be future-proofing your collection against disc rot.
With Fenrir ODE installed, you’ll be able to back up your save data to an SD card which is a great feature and compatibility is currently very high. Every game I have thrown at it has worked flawlessly.
Speaking of Save data, if you want to future-proof your saves, you might want to consider installing a FRAM mod into your Saturn while your Saturn is open.
What you need: -
Micro SD card (The bigger the better!)
Phillips head screwdriver
Optional: 3D Printed mount tray
Optional: Electrical tape
Different models of Saturn
There were many revisions of the Sega Saturn which all have different board revisions starting at board number VA0 and go as high as VA15. The VA0 & VA1 model Sega Saturns are compatible with the current 20-pin Fenrir ODE. For all other models, you’ll have to wait until the 21-pin variant is released.
*The Fenrir has recently been updated to the Fenrir Duo which is now works with all revisions of Sega Saturn :)*
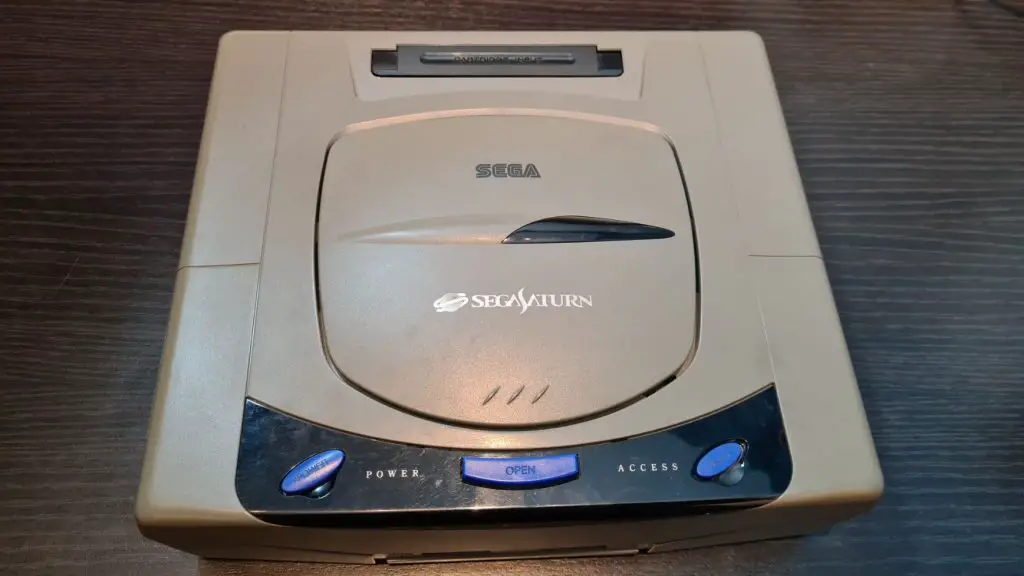
20-pin Saturns are the revision known as model 1. Model 1 Sega Saturn consoles are easily recognizable as they have oval-shaped power and reset buttons unlike the round buttons used in all model 2 consoles. Do be warned, not all model 1 consoles are guaranteed to have a 20-pin drive, some of the later model 1’s had 21-pin drives installed. The best bet to be sure you are getting a 20-pin console is to either open up the console and count the pins on the connector or purchase model number HST-3200. The HST-3200 consoles all use VA0 boards and have 20-pin connectors. You can find out more information about different types of Saturn here.
Personally, I would import a model HST-3200 Saturn. This model is still very easy to come across on auction sites like eBay or through a brokerage like Buyee. If you intended to play your console in the UK or Europe you’ll need to purchase a step-down power converter, I use this one to drop 240v to 110v and it works great.
So, now that we have made sure we have the right type of Saturn we can begin the installation process. Thankfully, the Fenrir ODE is incredibly simple to install and requires no soldering whatsoever. We will be opening up our console and removing the CD disc drive. We’ll then replace it with the Fenrir ODE.
First, make sure your console is unplugged and there’s no game or 4MB ram card inserted into your Saturn. I would also recommend removing the door for the MPEG card expansion of the back of the console. Next, flip your console over, on the bottom you’ll need to remove the 5 x phillips head screws, set these aside.
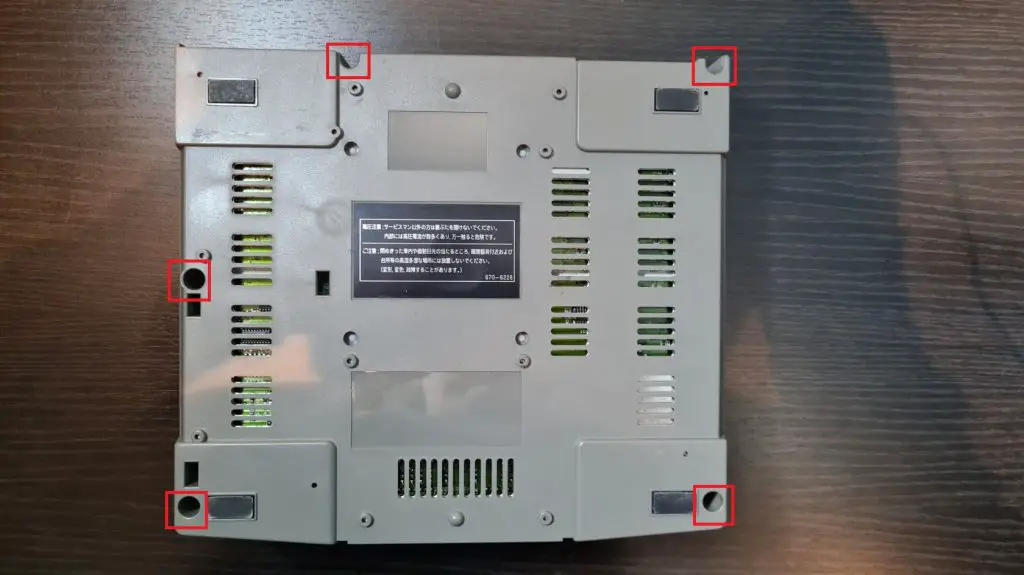
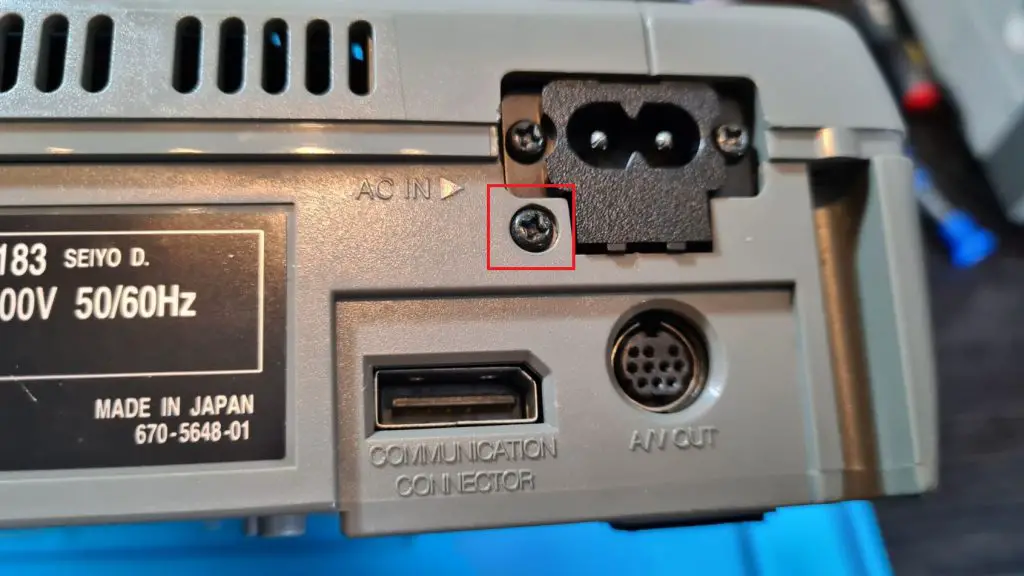
On the model HST-3200, you also find one final screw near AC input but later models may not have this screw. Once all the screws are out slowly separate the two halves of your shell, be careful as the console is connected by a few cables from the power supply.
Wiggle out the 5 pin connector and disconnect it. This should give you enough slack to be able to set down both halves of the Saturn shell flat.
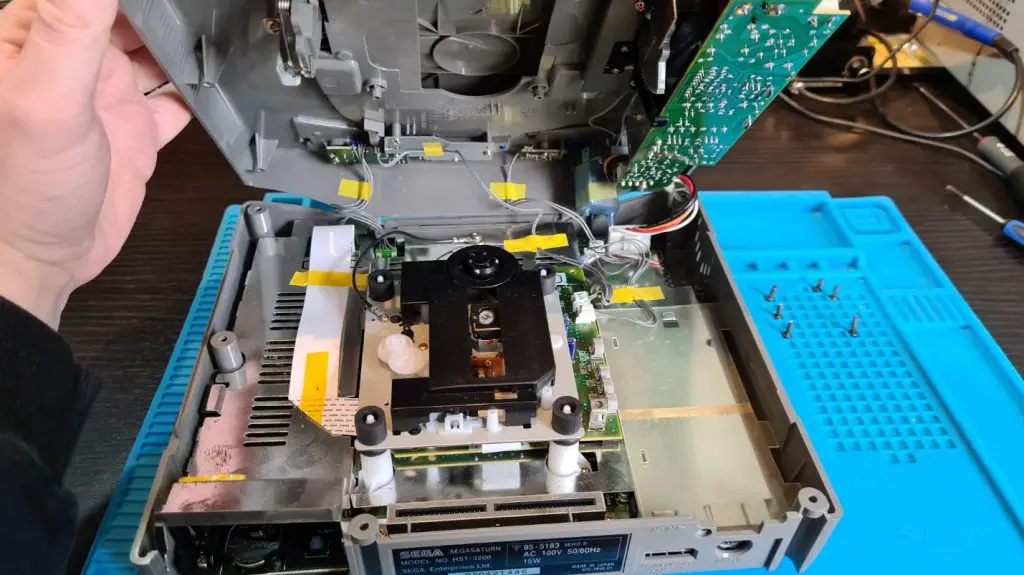
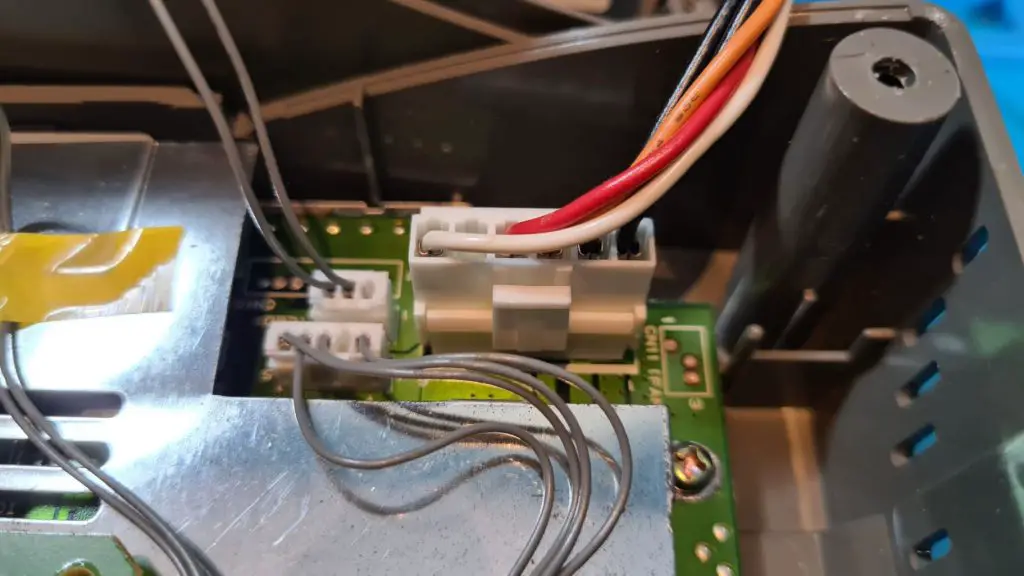

From here you’ll be able to remove the two connectors to the CD Drive, labelled J103 and J104. Gently pull back and these connectors will come loose from the board.


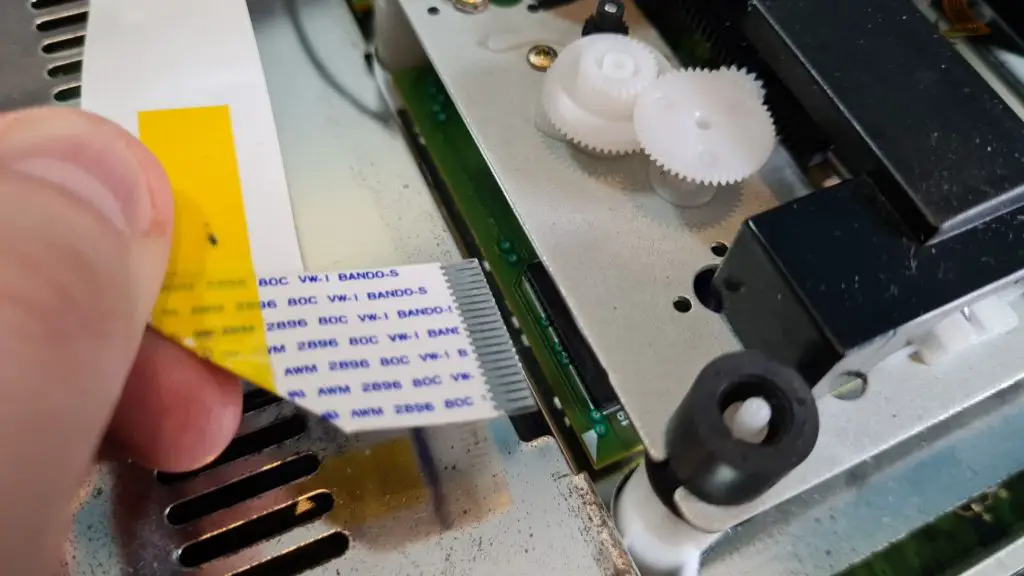
On the other side of the CD Drive, you’ll find the ribbon cable, we need to remove this by gently prying it outwards, these ribbon cables are very old and can be a little brittle. Inside the Fenrir package, you’ll find a replacement ribbon cable in case you manage to damage yours. I was able to use the original.
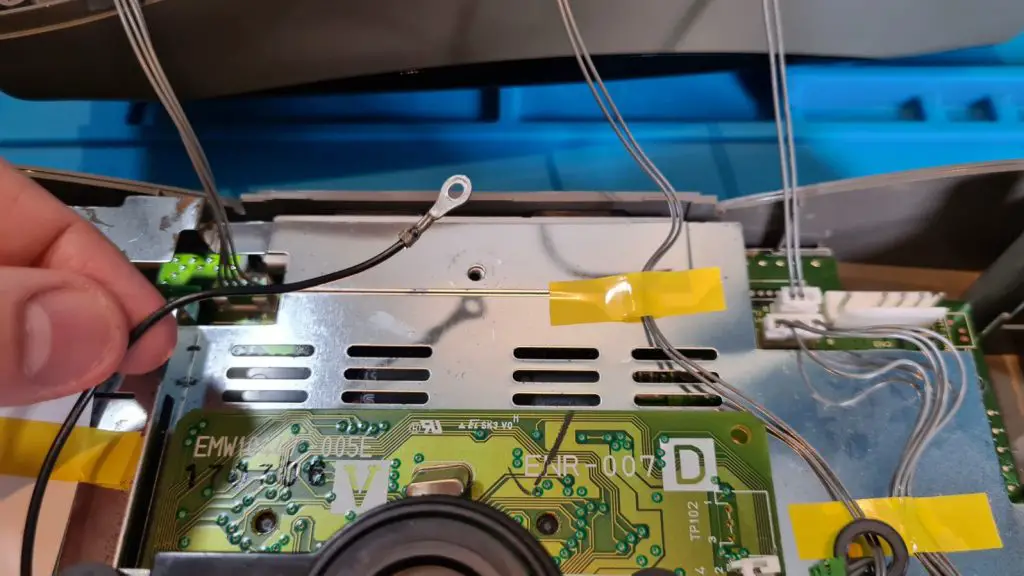
With the ribbon cable out, we need to remove the final screw and washer from above the CD Drive.

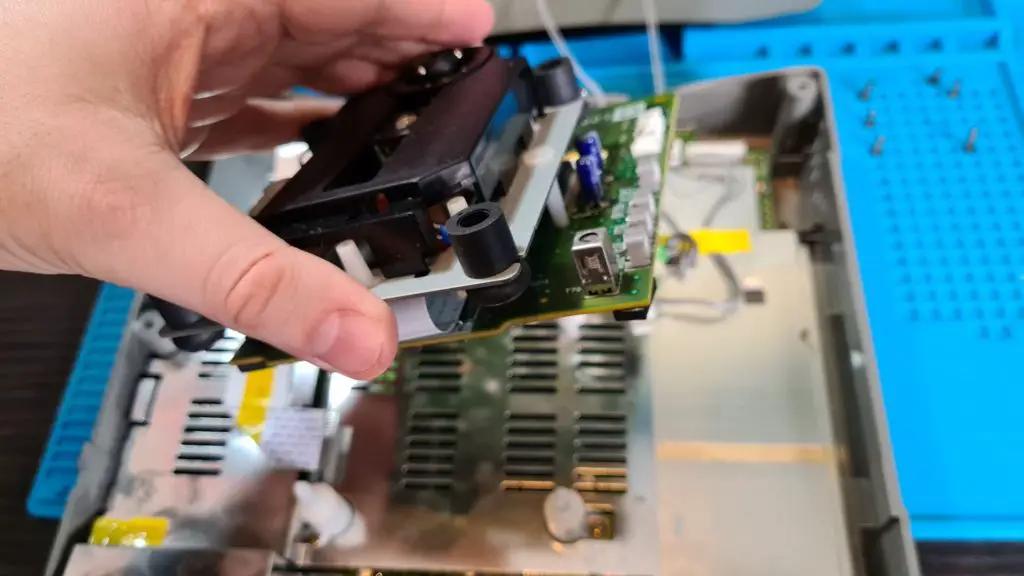
Now, the CD Drive will be able to lift directly from the Saturn. Keep this aside as a spare if you ever need one, or if you ever want to reinstall the drive back into your Saturn.
With the CD Drive out, it’s time to install the Fenrir. Inside the Fenrir box, you’ll find the ODE and a 3D printed bracket.

This attaches to the end of the Fenrir ODE and gives the board a little more stability while installed in your console.

Next, using the two white mounting points, line the up Fenrir and drop it into place. These two points are plastic, so if one needs to be adjusted slightly it does have some flexibility and can be slightly bent.

Now the Fenrir ODE is in place, locate the 4 pin power connector we removed from the CD Drive earlier. We will be connecting this 4-pin power connector to the 4-pin receiver on the Fenrir ODE. I had to remove some of the yellow tape that was holding the cable down to the Saturn, this gave me enough reach to plug in the connector without any tension on the cable or connector. You can use some electrical tape to tape the cable back into position if you want to. I was able to reuse the yellow tape that was already holding it in place.

On the other side of the Fenrir, we’ll now need to install our ribbon cable, to do this, gently fold the cable over as we want the blue stripe on the original cable to facing upwards. Slide this into the connector and press down on the tab to secure this in place.


As far as the install goes, that’s about it! Re-plug in the Power connector to the main board and screw the unit back together.

Plug your console in and open the CD Tray. Power on the console and you should see the Blue LED turn on if everything is installed correctly.

Now, your Fenrir ODE is installed there are a few things we need to prepare. First, insert your Micro SD card into your PC. I recommend going with a Micro SD from Sandisk, Sandisk tend to have the most reliable cards from my experience but any brand should work.

We need to format the card as either ExFAT or FAT32. I would suggest going with FAT32. To do this I used a program called Rufus which you can download from here.
Use the following settings:

Click ‘start’, read the warning and press OK. This will format your card correctly for use with the Fenrir. Once that is done, we’ll want to update the Fenrir to the latest firmware. This is very simple to do, head over to https://www.fenrir-ode.fr/firmware/ and click download on the latest firmware to download.

This will download the ‘update.bin’ file which needs to put on the root of your Micro SD card.

With this copied, eject the card from your PC and insert it into your Fenrir ODE. Power on your console and the firmware will automatically update to the latest version.
From here we’ll be greeted with the Fenrir ODE screen. As you can see, the Fenrir menu is very simplistic and easy to use. You’ll notice our list is currently blank. We need to add some games!

You can either, back up your current Sega Saturn CD’s by using a program like IMGBurn to create an image of your game or you could use download a version of the game that has already been ripped. If you head over to Archive.org you’ll quite easily be able to find the ‘Redump’ collection of Saturn games which work very well with the Fenrir.
I use my games in the Bin/Cue format, so copy the folder of the game you want to the root of your Micro SD card with the .cue and .Bin files inside it.
Once your games are copied over the SD card, reinsert your card to the Fenrir and boot up your Saturn, you’ll notice the menu is still empty, Press ‘Start’ and select Refresh SD Content. This will add your games to the Fenrir’s menu.

From here you can press ‘A’ to launch your game and it will boot up just like a real CD. You’ll also have the added benefit of slightly faster loading times in some games, Region free gaming and the ability to easily apply translations which will help with playing some of the fantastic Japanese only Sega Saturn games like Akumajou Dracula X.

If you want to return to the main menu you can hold ABC+START together to soft reset the game and once again to return to the Fenrir ODE’s menu, meaning you can switch games on the fly.

So, there you have it! Fenrir ODE installation is complete. Pretty much every game I have thrown at it has been compatible, however, there is currently no support for multi-disc games that require in-game switching. This is such a small percentage of the library and can hopefully be a feature that is added via a future firmware update.

Overall, the Fenrir is great and well worth the money, it’s not as expensive as Terraonion’s MODE and is nowhere near as expensive as Professor Abrasives Satiator which currently requires you to re-mortgage your house to afford one. I will see if I can pick up both a MODE and a Satiator for comparison’s sake in a future article.
You can pick up your own Fenrir Duo ODE from Stone Age Gamer, they ship worldwide and stock the Fenrir DUO ODE, so no need to worry if you have a 20 or 21 pin model Saturn.
On the whole, this seems a good guide, however, when I get to downloading the Firmware from the Fenrir website, I clicked on the “update.v21” download link which then appeared, only to be hit with the “How do you want to open this file?” prompt. I’ve absolutely no idea what to do next, so I’m not sure if you’ve got any ideas? The card is formatted etc, so I’ll be absolutely gutted if I’ve got to send the Fenrir ODE back because it doesn’t work!
Hi Ben,
Right-click the link and choose ‘save link as’ to download the file to your machine. From there you can copy over to the root of your SD card.