How to reshell a Nintendo 3DS
In this guide I will show you how to reshell your Nintendo 3DS. This guide is for the original 3DS and will not be applicable to any of the ‘New’ 3DS models.
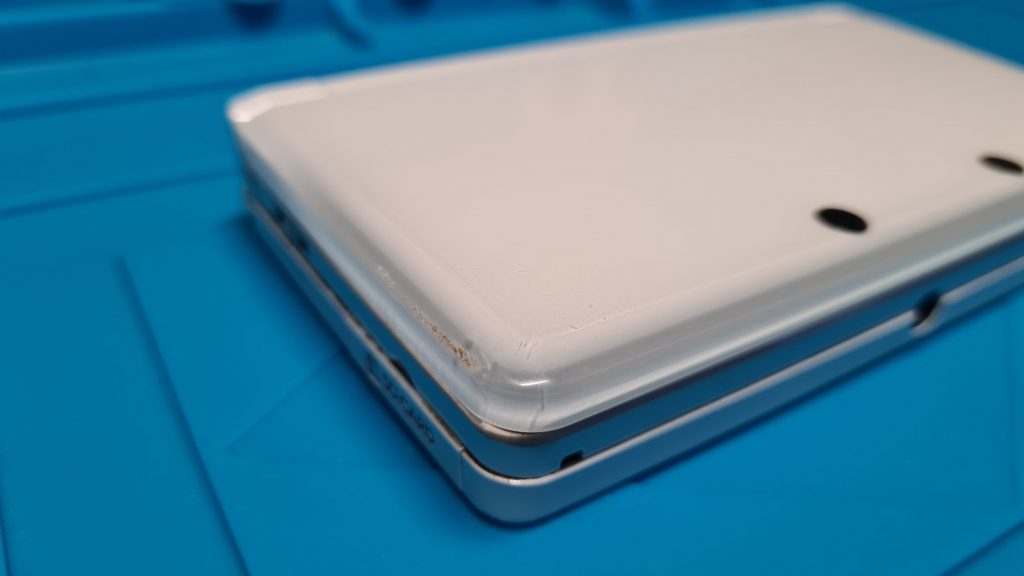
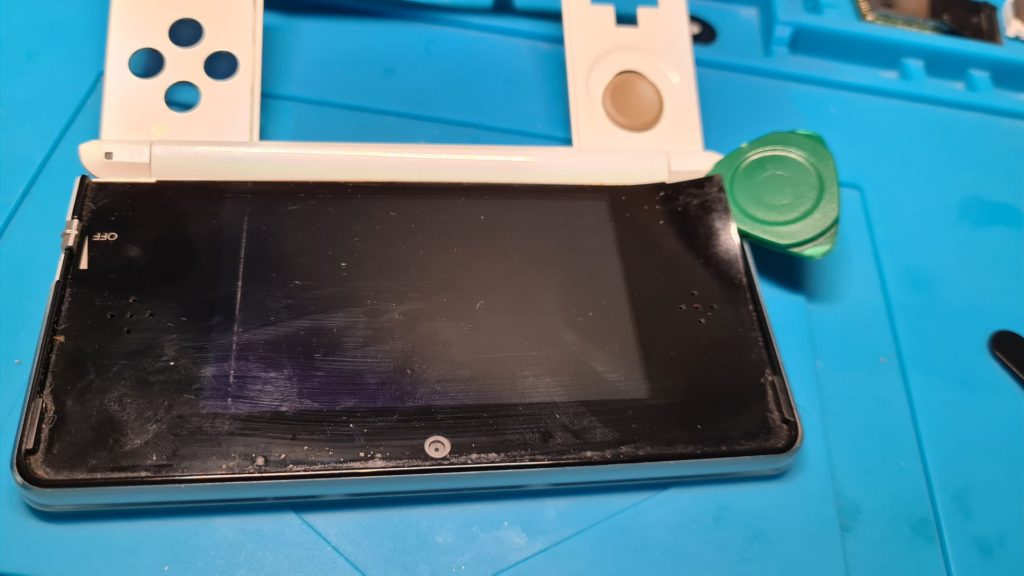
I recently stumbled upon a great deal for a 3DS console on eBay. I managed to pickup an Ice White original 3DS which the seller said was in overall good condition, however, the console could not read games.
The console arrived a few days later and I would say the ‘good condition’ was definitely wishful thinking, this unit was in horrible condition and smelt really bad.


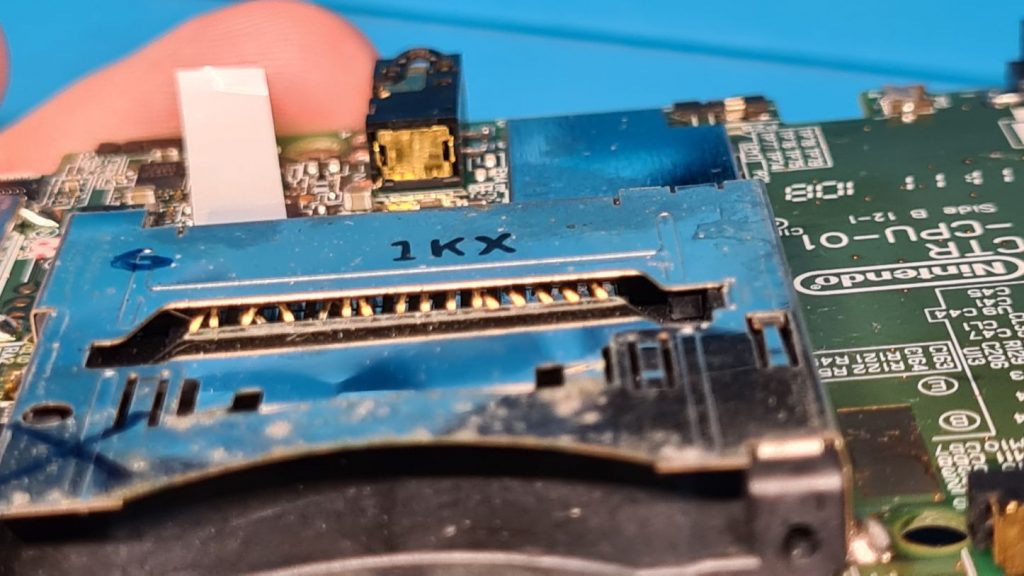
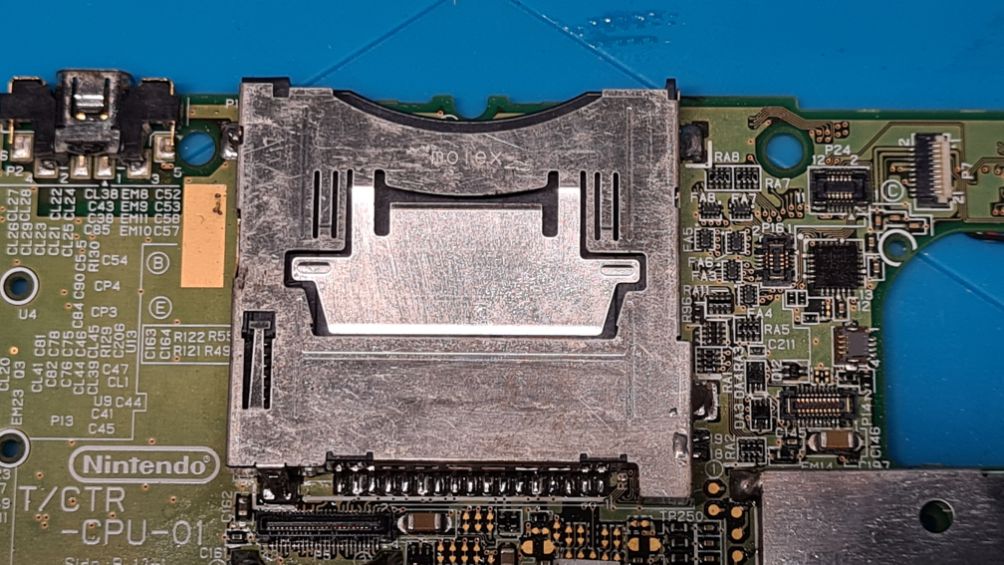
I think I can see why the console is not reading 3DS or DS games, it seems there’s quite a few bent pins inside the card slot.

Unfortunately, no amount of cleaning will be able to restore this console and I am going to have to completely replace the console’s shell and 3DS cart reader.
Resetting the 3DS Parent Controls without an email (Optional)
If you are unlucky, your 3DS may have a parental lock enabled, if you don’t then feel free to skip this part. The 3DS’s parental controls are pretty robust and will essentially lock you out of any of the consoles more advanced settings such as connecting to the internet etc and using the eShop.
As I purchased this 3DS from private seller on eBay, the easiest way to reset the 3DS parent controls was to click I forgot, this will then prompt the 3DS to attempt to send an email, which required an internet connection to be set-up, which is something we cannot do with these controls enabled.
In your 3DS’s settings menu choose Parental controls and tap Forgot Pin and the tap on I forgot at the bottom.
The 3DS will give you a 10-digit unique Inquiry Number which can be used to obtain a master code to unlock the parental settings.
Take a note of your 3DS’ current date and head over to https://mkey.salthax.org/

From the dropdown box choose 3DS, then input the date as displayed on your 3DS. Finally, input your Inquiry Number with no space in between. Click go and this will generate the Master Key needed for your unit. Input the Master Key on your 3DS and you’ll be able to remove the parent controls.
3DS Disassembly
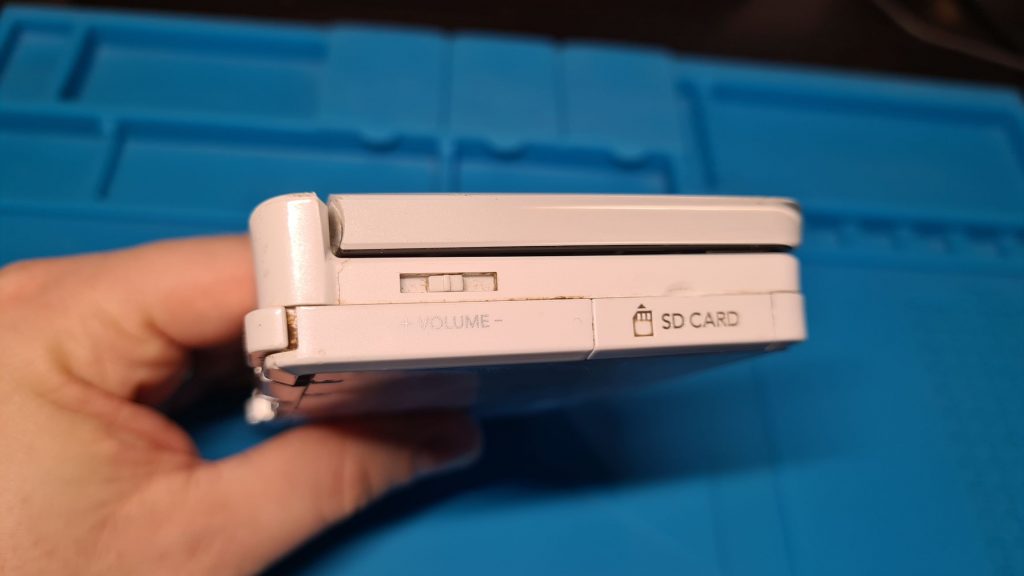
First of all, make sure your 3DS console is turned off and remove any inserted SD card, game and stylus.
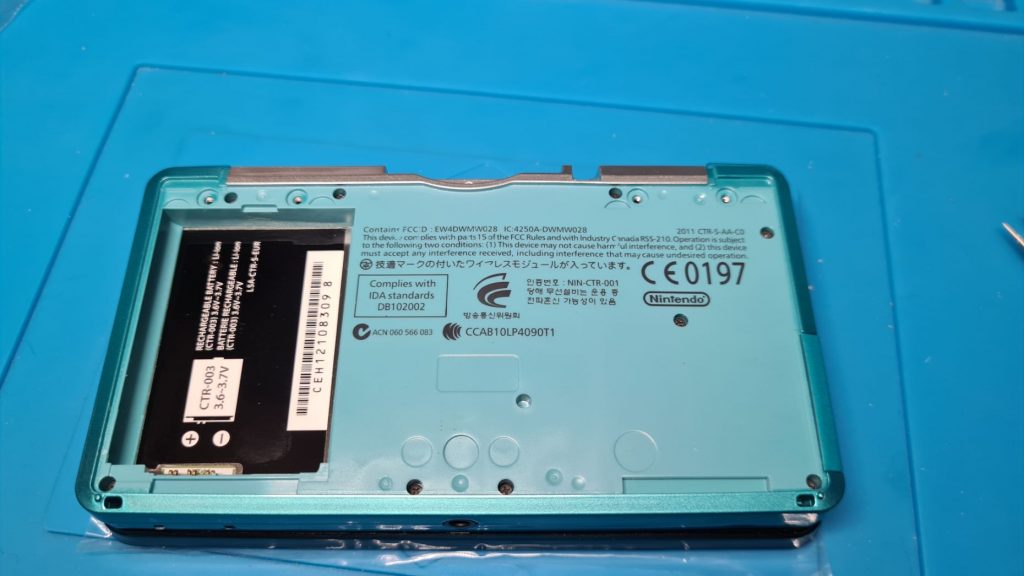
Turn your 3DS over and loosen 4 screws on the back of the 3DS, this won’t come out, they just need to be loosened up.

Once they are loose, you’ll be able to pry the back panel off which will reveal the battery compartment.
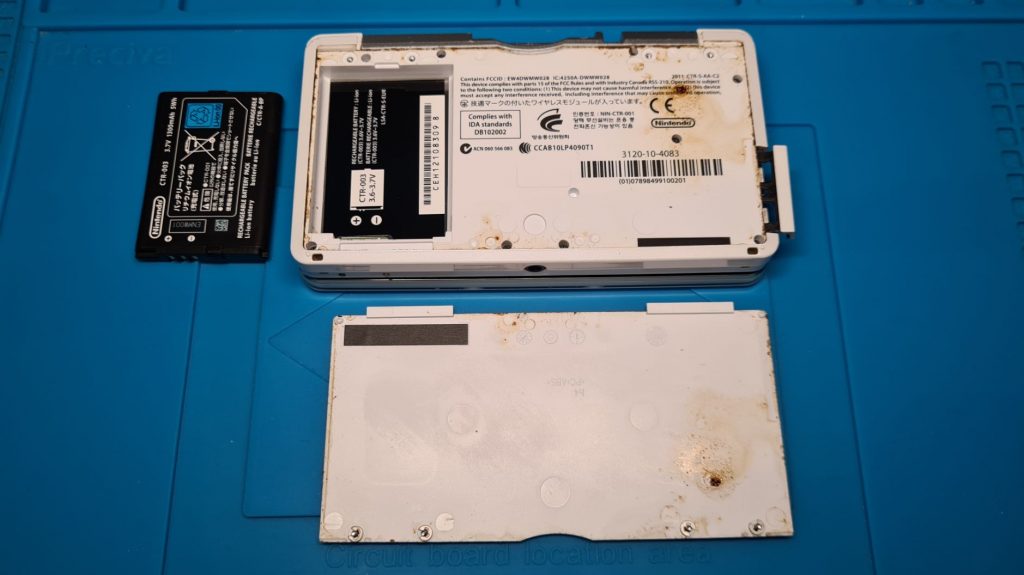
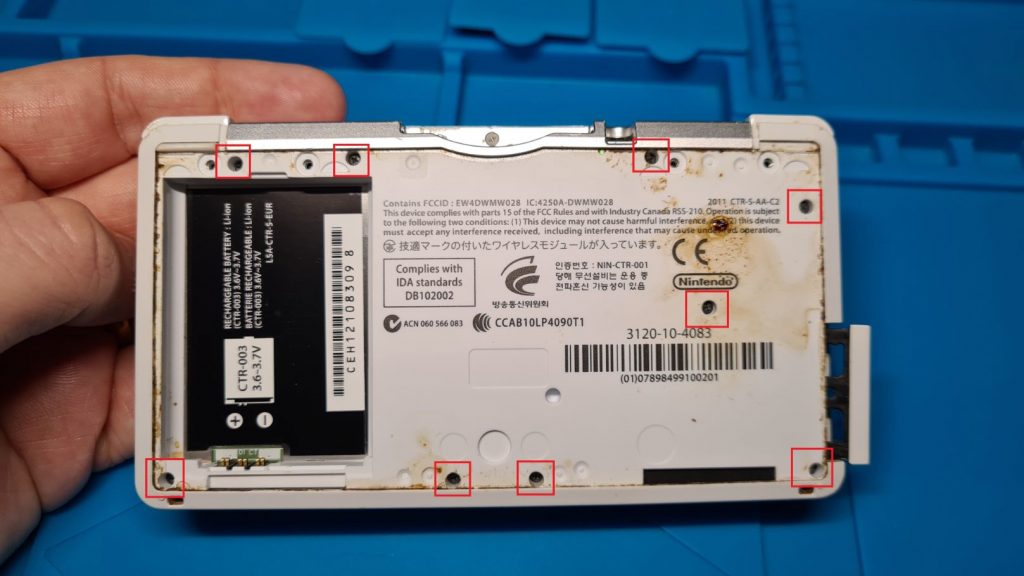
Remove the battery, then will need to remove 10 screws in total to get access to the 3DS’s internals. There’s a small screw just near the cartridge slot, and 9 additional screws around the console. These will need to be removed so we can access the inside of the 3DS.
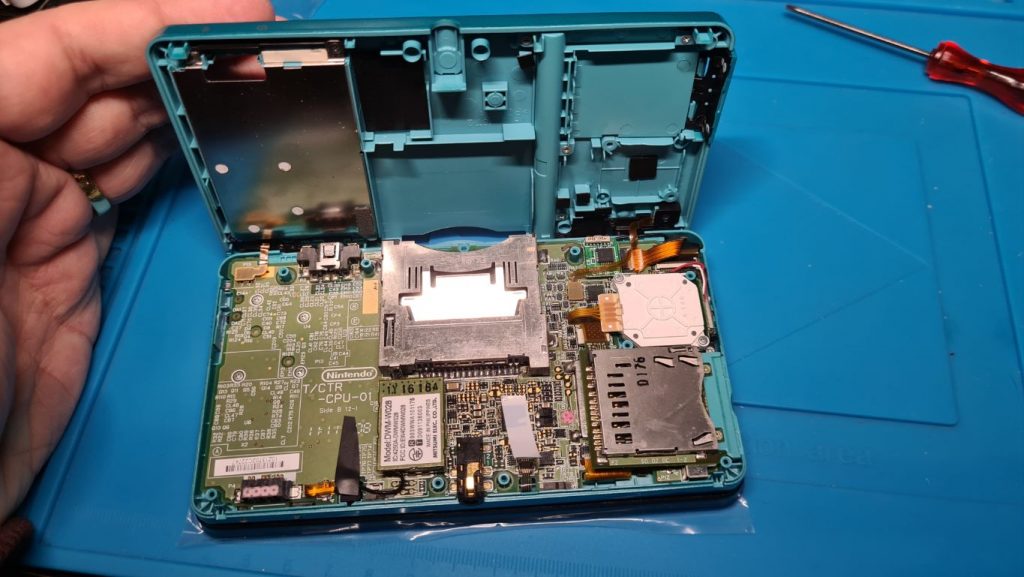
With all the screws removed, gently separate the back by lifting the back of the 3DS’s housing. This is connected to the 3DS’s motherboard by two ribbon cables, so be careful to pull hard.
Disconnect the two ribbon cables by gently pulling up on the connectors on the motherboard, they just pop out. With the ribbon cables removed we can now separate the back of the housing from the motherboard.


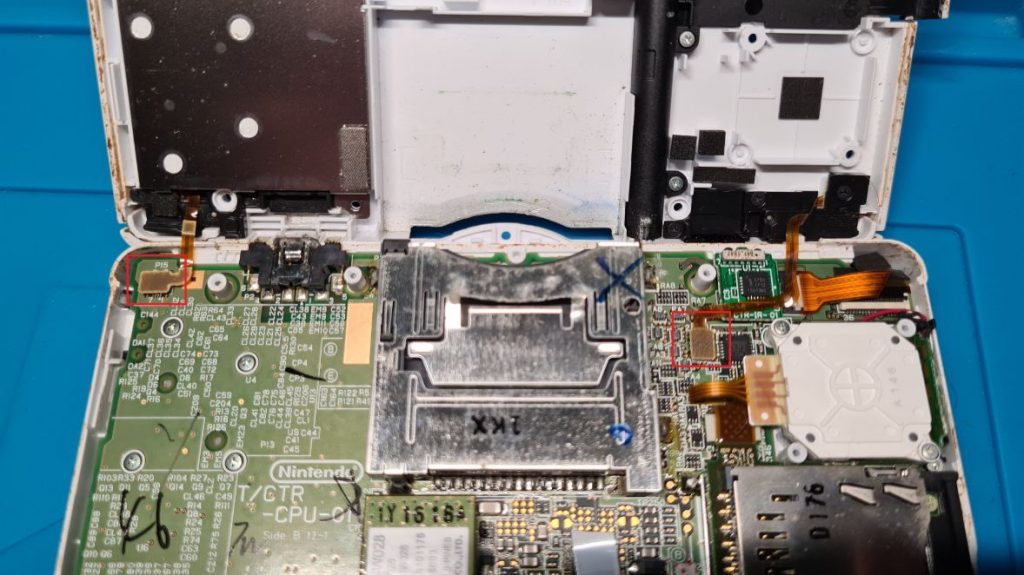
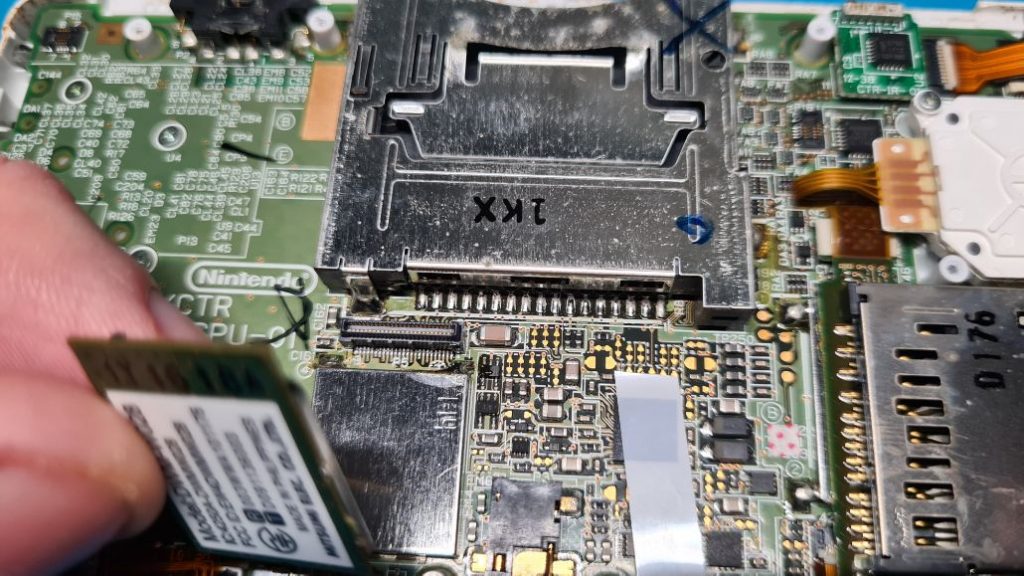
Next, we’ll remove the 3DS’s Wi-Fi module. Luckily, the 3DS is quite the modular system so find the Wi-Fi module just under the card reader and gently pull upwards to separate this board from the 3DS’s motherboard.
There is a small connector for the Wi-Fi antenna on the bottom side of the Wi-Fi Module. You can gently pull this away to remove the board. Set the Wi-Fi board aside.

Next up is the IR receiver, this tiny board also just pops off with a little prying. It’s located just to the top right of the cartridge reader. Gently pull upwards to free it and set it aside.

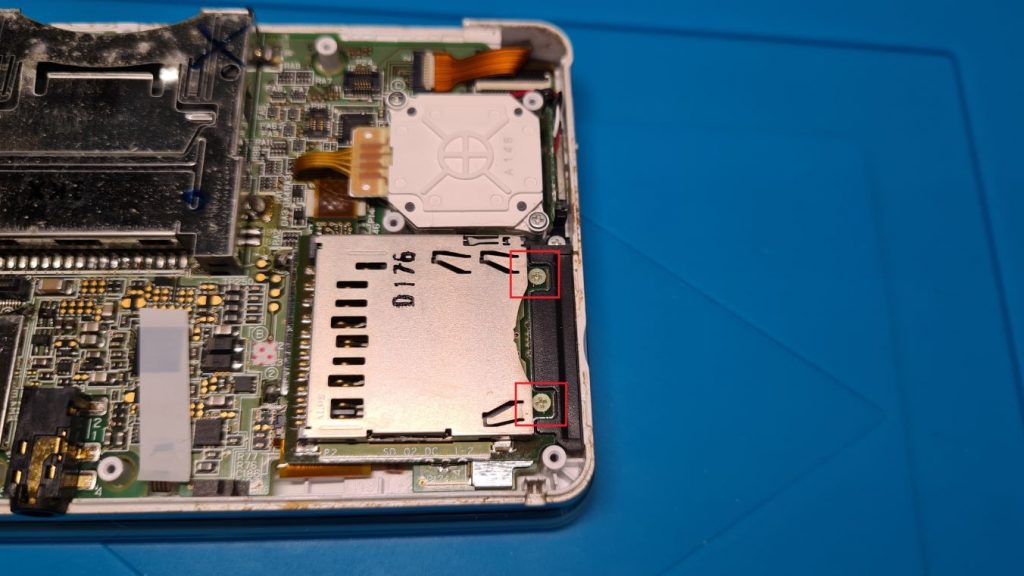
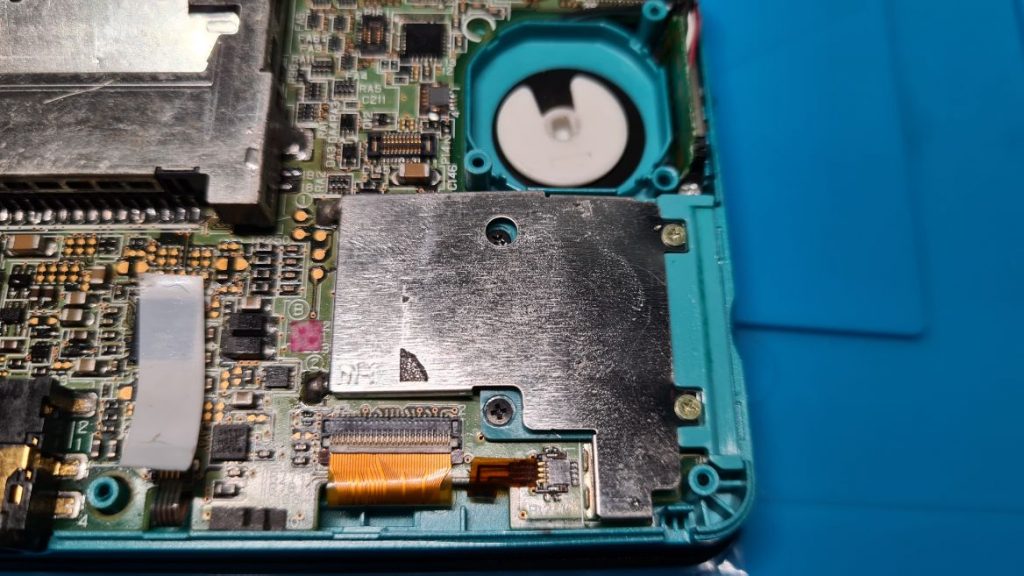
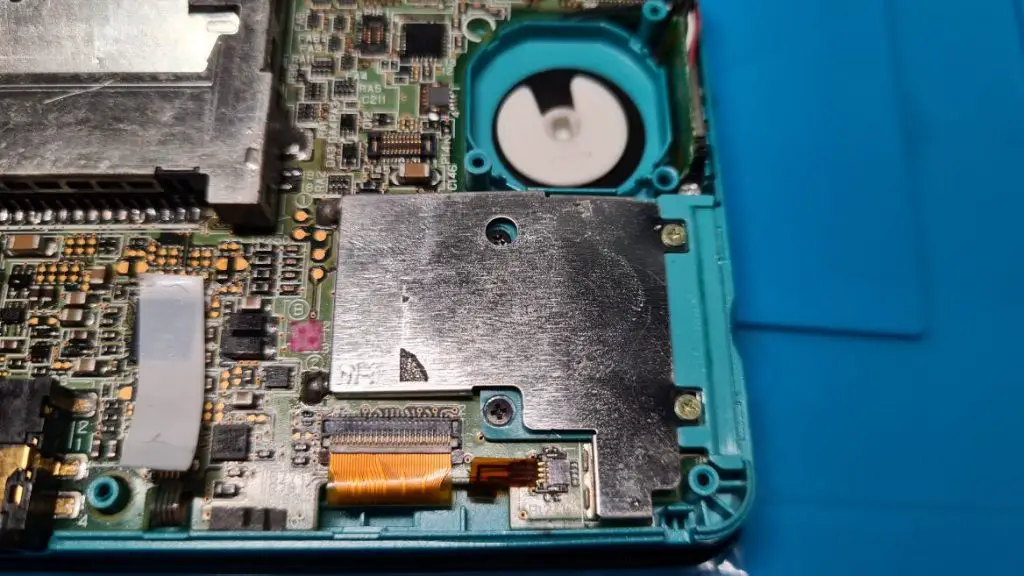
Moving our attention over to the SD card reader we need to remove two screws and lift up the connector attached to the motherboard.
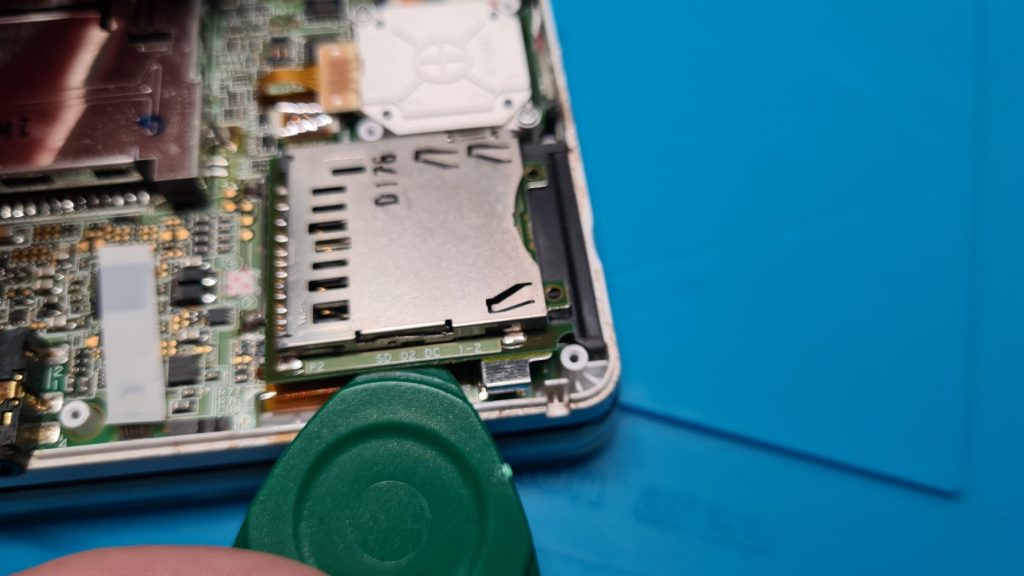
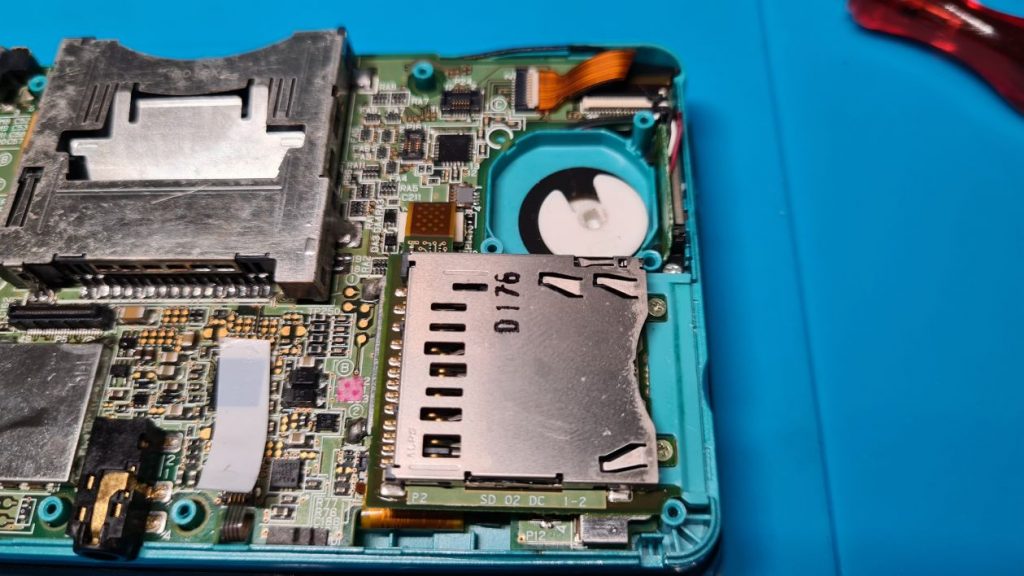
The SD card slot just won’t ‘pop’ off as it is securely held down with a layer of adhesive tape. This tape can be pretty strong, but you should be able to use a plastic tool to slowly pry the board off. If it feels too firmly attached, you can heat up the area using a heat gun or hairdryer to help loosen the adhesive, this is non-essential but will make things easier for you. Mine came off fine using a plastic spudger.

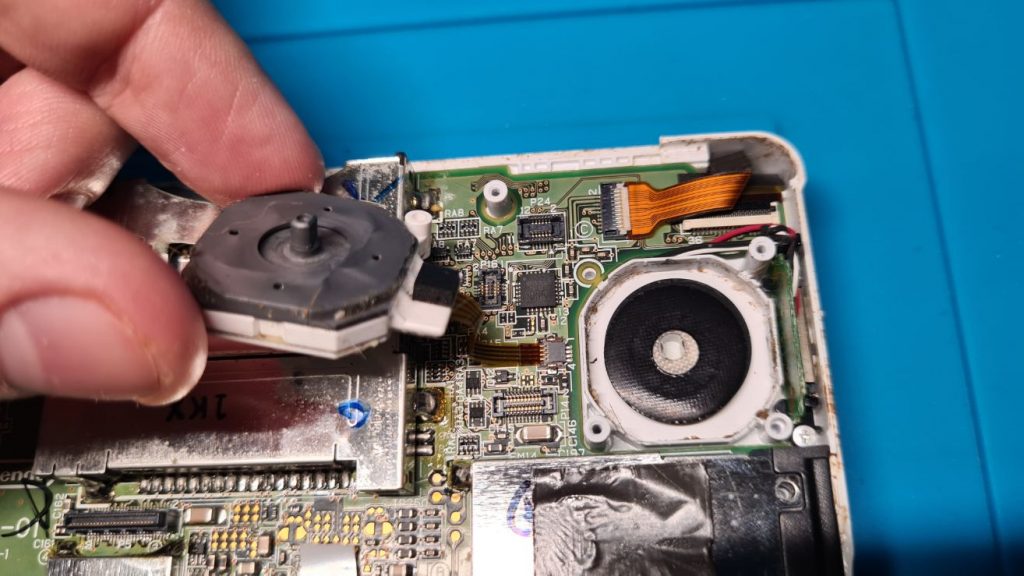
Next, we’ll remove the 3DS circle pad. To do this we need to unscrew the two screws holding the circle pad in place.

Set the screws aside and gently lift up the pad, be careful as this is still connected by a fragile ribbon cable to the motherboard. To remove it, pry upwards on the small grey tab on the connector and it should come free.
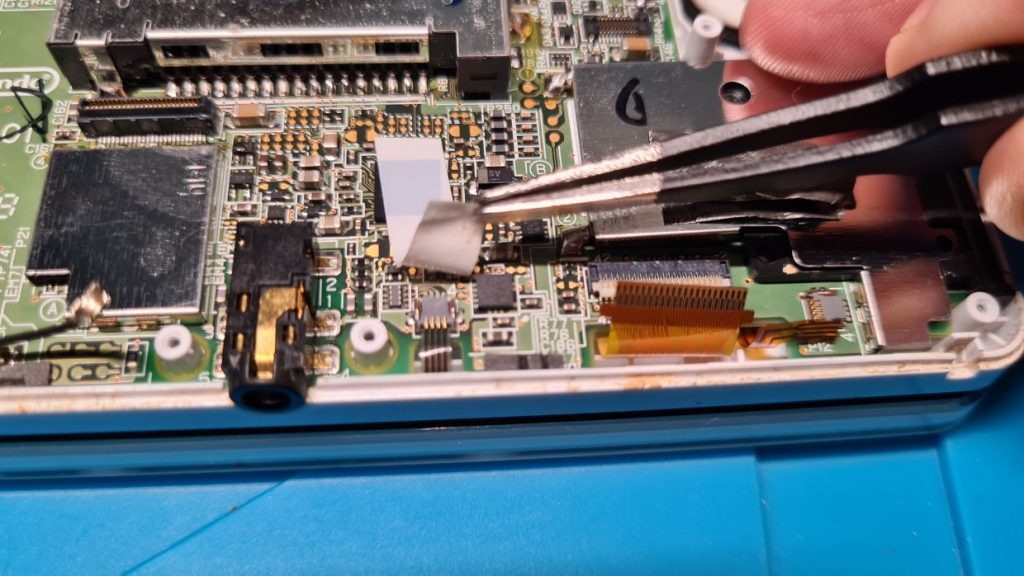
Next, we want to free up the two ribbon cables just underneath where the SD card reader was mounted. Lift the small grey tab to free the smaller one and do the same with the white tab on the wider ribbon cable for the screen.

Afterwards, there’s another small ribbon cable which may be hidden under some tape. Remove the ribbon cable from this tab.
Just above where the circle pad was installed, there are another two ribbon cables to be removed. You’ll need to lift the white tab to free the cable on the top left then gently pry up on the black tab to remove the second cable.
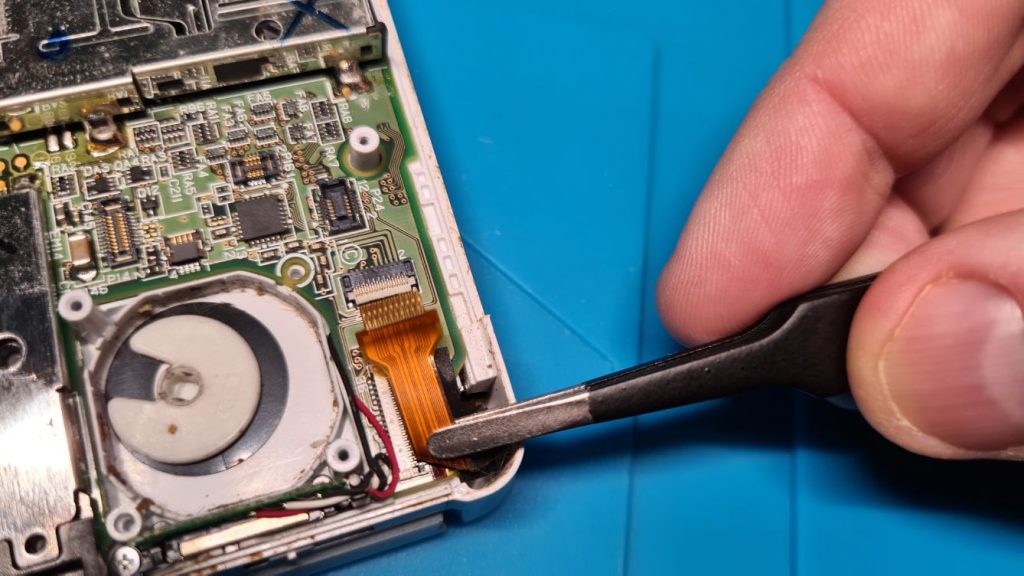
From here, you’ll be able to lift up the volume slider which should come out with minimal resistance.

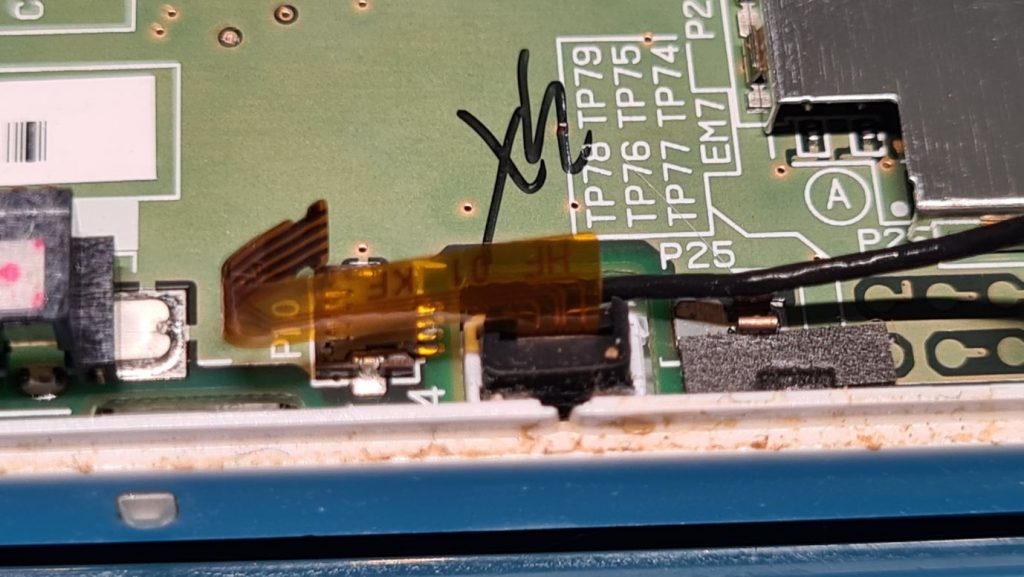
The last cable we need to remove on this side of the motherboard is for the microphone. To do this, just lift up the grey tab. This can be completely removed and set aside.
On the left side, four screws need to be removed. Take these out and set them aside. This will allow us to free the motherboard.

Gently lift the motherboard upwards, taking care to not damage the ribbon cable still attached to the underside of the board. While holding the 3DS’s motherboard up, gently disconnect the final ribbon cable.

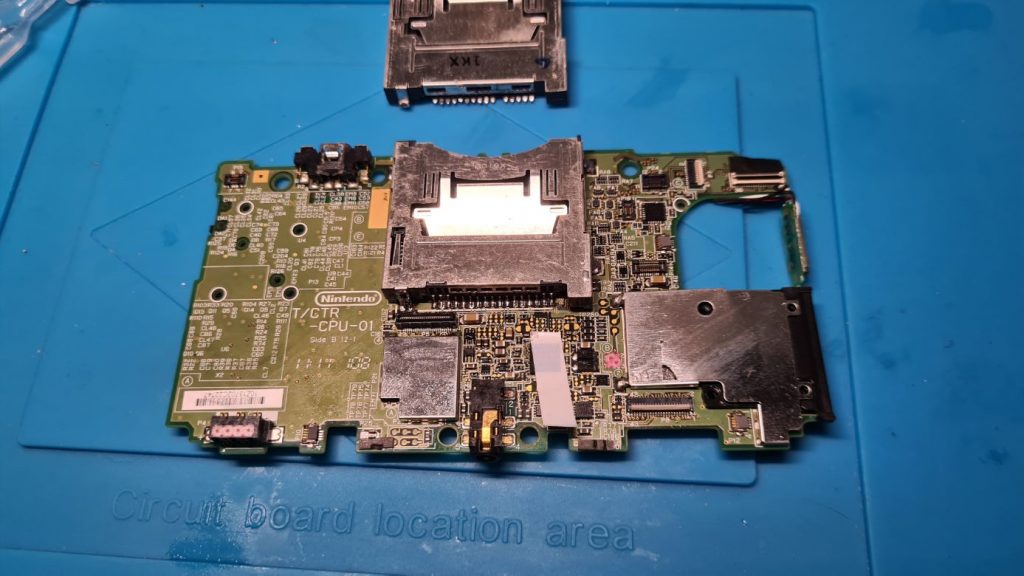
We can now put all the housing aside and focus solely on the motherboard.
This motherboard is particularly dirty, so I have cleaned it using some 99% Isopropyl alcohol and a toothbrush. This will help to remove any dirt and grime that has somehow found its way inside the console.

With the motherboard free, I can see just how badly damaged the 3DS pins are. Someone must have jammed a screwdriver in there or something. This will definitely need to be replaced.
3DS Game Card Reader Replacement
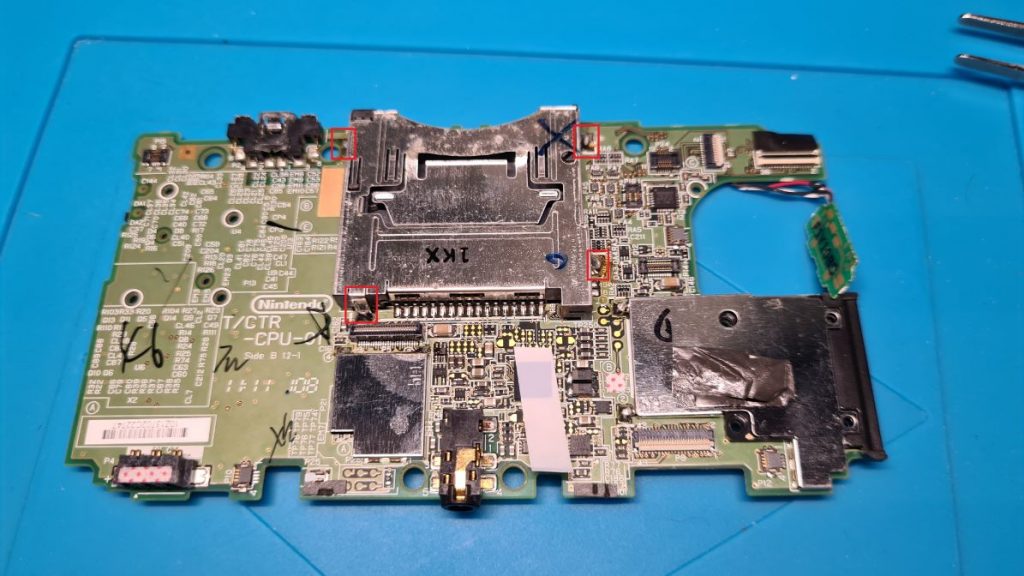
I ordered a cheap replacement online which arrived a couple of days later. The 3DS game card reader is secured to the motherboard via four large-ish blobs of solder and the actual pins of the reader itself.

To remove something like the game card reader I would usually use my hot air rework station, however, the 3DS motherboard has several plastic connectors that I do not want to melt, and I find Kapton heat resistant tape is quite hard to apply to the raised connectors such as the Wi-Fi module connector. With this in mind, I opted to simply use my soldering iron and some solder wick.
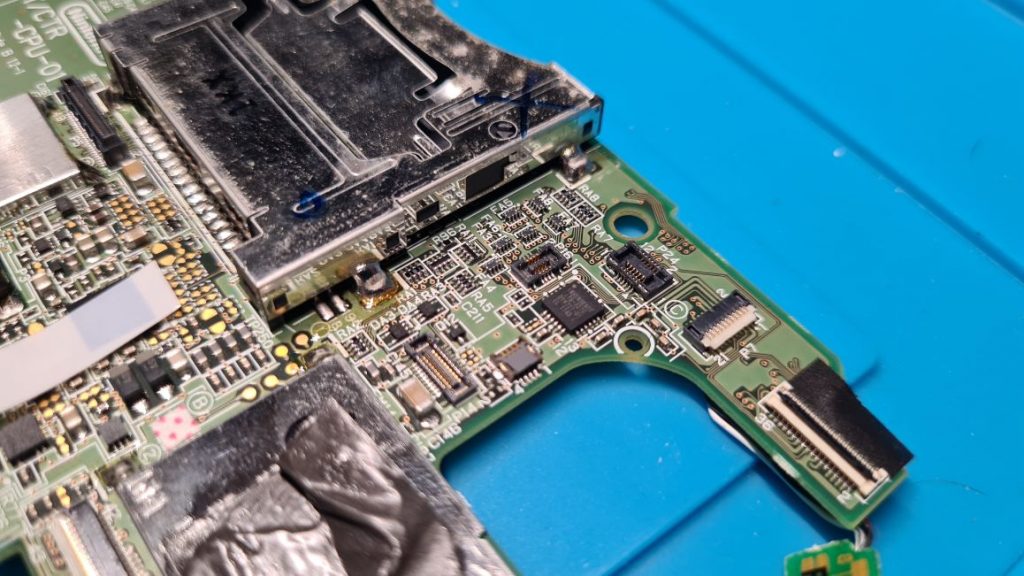
First, heat up each of the four anchoring pads around the old card slot. I worked anti-clockwise starting in the top left corner. I like to use a K series soldering tip, but any slightly larger tips will make your job a lot easier. With solder wick placed over the pad, introduce your soldering iron to the top of the wick, this will allow the solder to flow into the wick and away from the pad itself. You may wish to add additional flux to your wick if you want which will help make for a cleaner job.
Repeat this for all pads, being especially careful not to melt the Wi-Fi connector while desoldering the pad just above it. The Wi-Fi module is very finicky, if it can’t be read, your console will boot but as soon as it tries to connect to Wi-Fi it will lock up your whole system so be careful here.
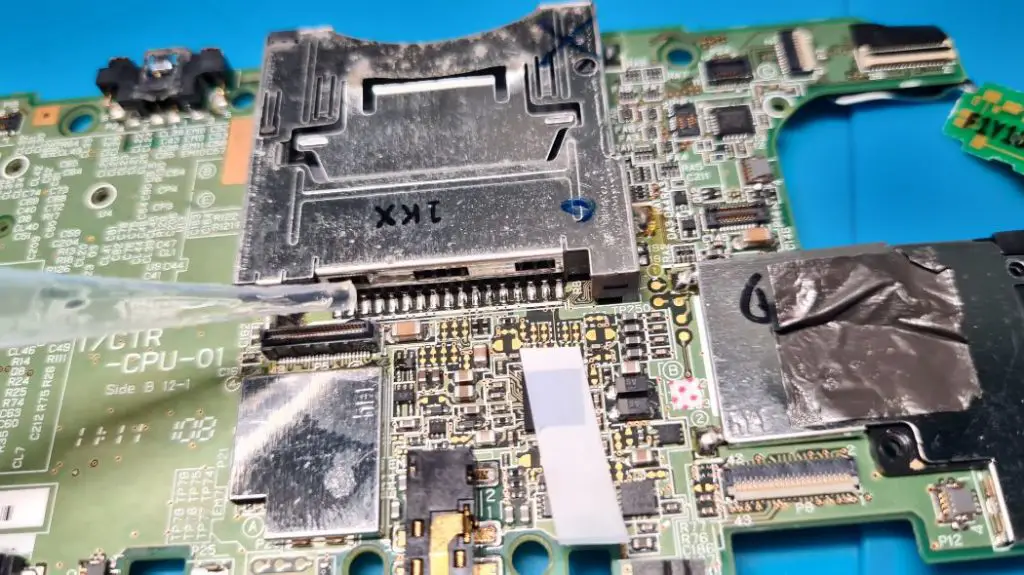
With the pads removed, add a little liquid flux to the pins of the 3DS cartridge reader and once again, use your solder wick and iron to remove the solder away from the pads. Slowly run your iron from left to right across the solder wick.

Repeat to process for the two final pins on the bottom right-hand side of the card reader, this is just below one of the pads we previously desoldered.

With all the solder removed, our old 3DS cartridge slot should be free and able to be set aside. Gently pull upwards on it to remove and If you feel the slightest bit of resistance stop and be sure to check for remaining solder.
It’s a good idea at this point to use some more solder wick to remove any remaining solder on both the anchoring and pin pads. Afterwards, use some isopropyl alcohol to clean up the motherboard and any residual flux.
To install your replacement 3DS game cart reader, first dry fit your replacement to make sure all the pads and pins line up. Add flux to the anchoring pads and introduce some hot solder, the flux will make the solder adhere to the pad.
For the pins, the same principle applies. Apply flux to both the pads and pins then load up the tip of your soldering iron with some solder. I recommend using a soldering tip with a flat surface like the K series tip. Take this solder loaded tip and drag it gently across the pins. The solder should flow from the tip and transfer to the pins.
If you get any bridges or blobs, clean your tip and give it another pass. A sweeping motion downwards can help to remove stubborn bridges, just be careful to not melt that WiFi connector!
Inspect your work to make sure each pin has a uniform amount of solder on it and that the solder is shiny in appearance.
Using a small brush, such as a toothbrush and some more IPA 99% you can clean away any residual flux left around our solder joints and continue with the rest of the reshell.
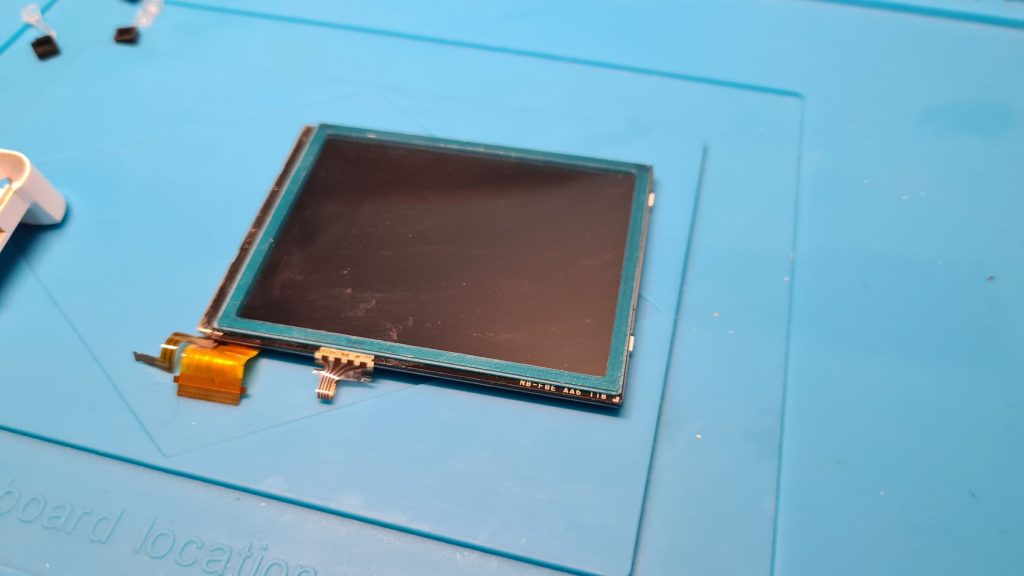
We can now set the 3DS’s motherboard aside and begin to look at the shell assembly. We need to strip the old shell of both screens, buttons etc. We’ll first start with the bottom touchscreen, to remove this, gently push upwards from the touchscreen side and it should just lift out with no real issues, just be careful to not apply too much force.
With the screen out, we next want to remove the microphone which is very simple to remove and only requires you to pull up on the ribbon cable gently to free it from the 3DS shell.
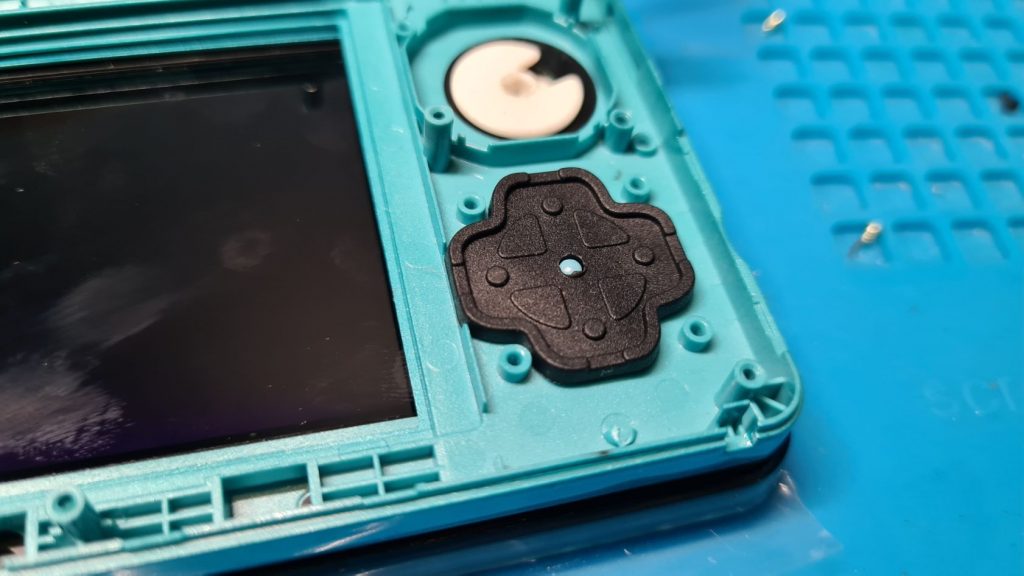
Next, remove all the rubber membranes and buttons. If you are changing the whole shell, it’s worth keeping the original rubber membranes. I find the third-party replacements provided tend to be of lesser quality and should only be used if your original ones are in very bad shape. There’s something about these membranes that just make your buttons feel ‘off’.
To clean your existing membranes, throw them into a cup with some hot (not boiling) water and give them a gentle scrub with a toothbrush. The hot water will not only help remove dirt and grime but will also help restore some of the elasticity to the old membranes which will make for a nicer feel when you press your 3DS buttons.


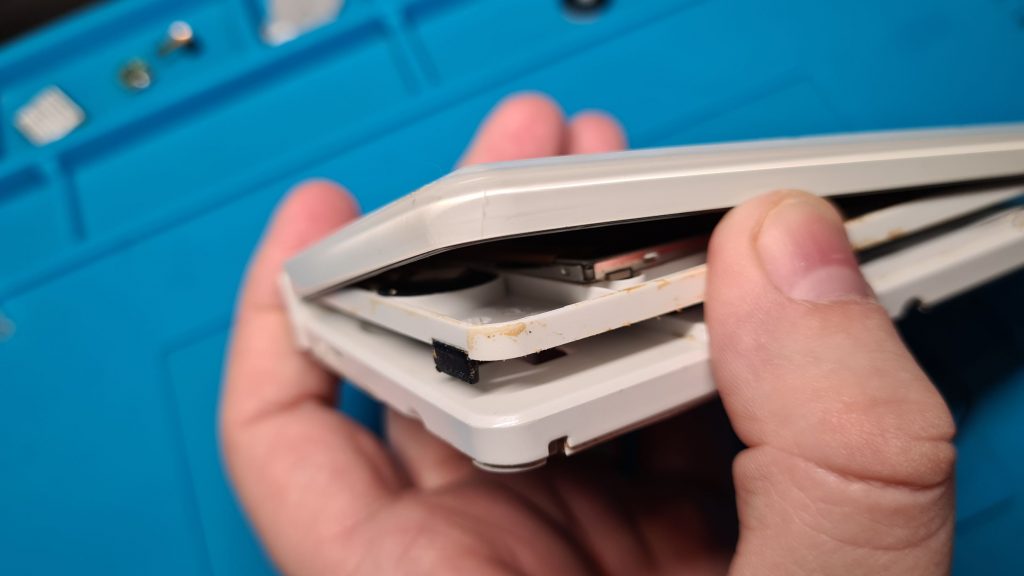
To get access to the rest of the console’s innards we need to remove the bezel that protects the top 3DS screen. This is arguably the most annoying part of tearing down an original 3DS. This is held in place with a strong glue and the best way to remove loosen it up is with heat. A hot air station, heat gun or hair dryer will help here. Heat the bezel area and you’ll be able to pry the plastic sheet right off.
Once removed, you’ll likely be unable to use that exact part again due to it being bent. Most replacement 3DS housing kits come with a replacement which I would recommend using.
We now have access to the 6 phillips head screws that hold the top screen assembly in place. Remove these screws, close the lid and we can then separate the two halves.

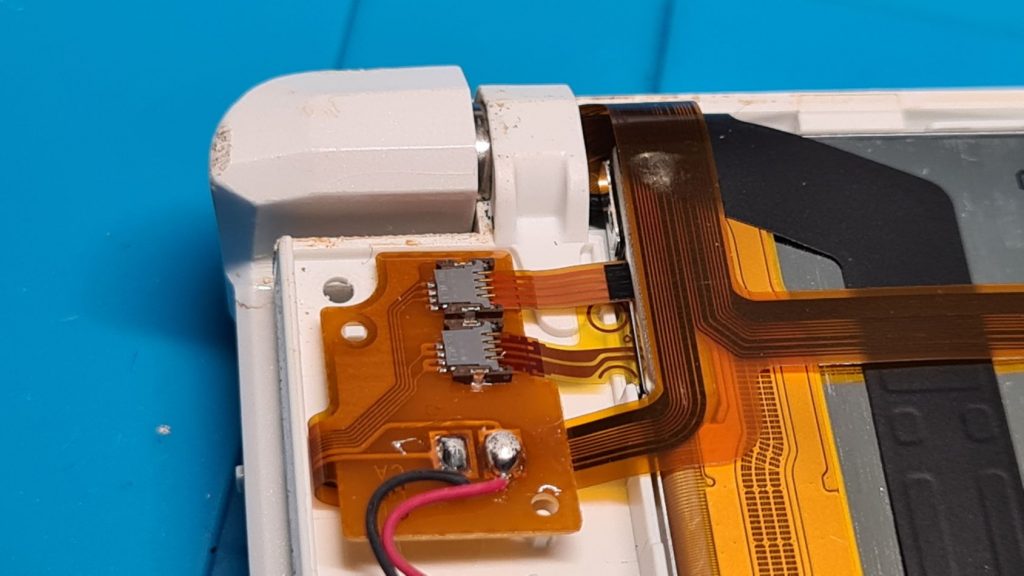
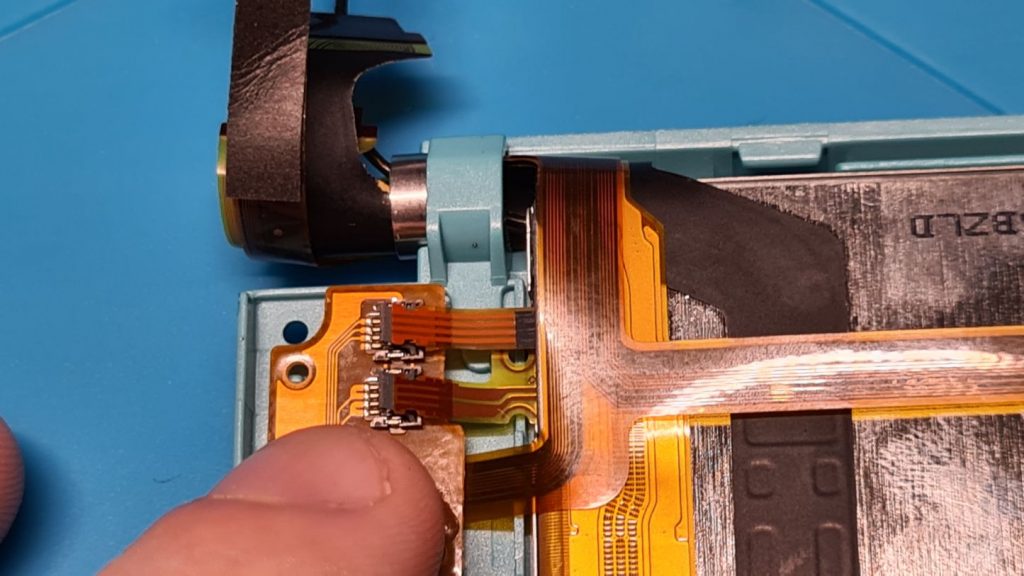
As you can see, there’s not a lot going on this side which makes things a lot easier than the other half of the 3DS. The first thing we need to do is disconnect the two ribbon connectors on the top left side. Just gently pry up the latch to release the cables.

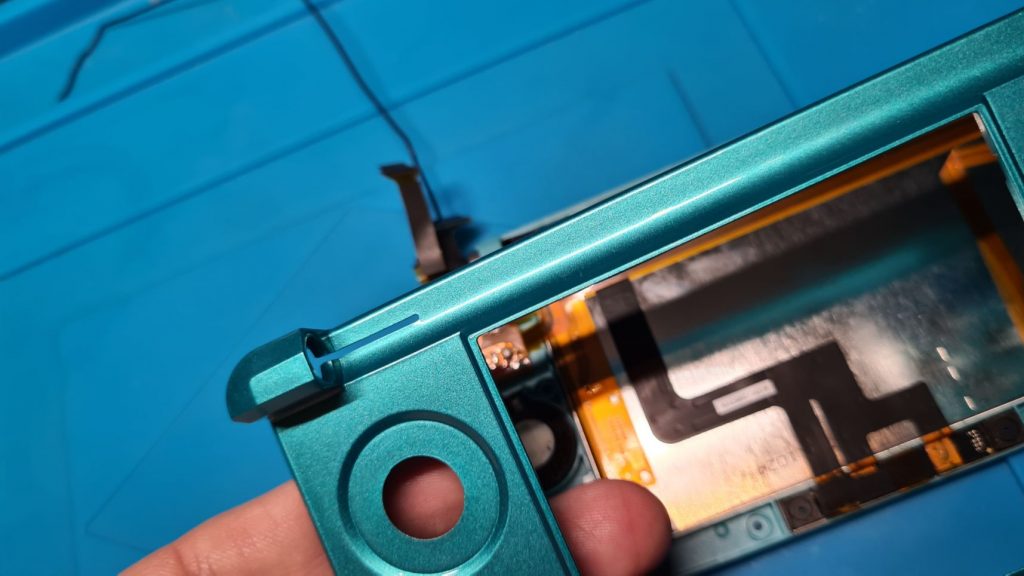
Next, we need to remove the hinge for the lid. If you have ever reshelled a GBA SP, it’s the same principle but a lot easier thankfully.
Flip your 3DS over and remove the small piece of plastic inside that covers the metal side of the hinge. With a small screwdriver and some force, push the hinge inwards and it should ‘pop’ out.
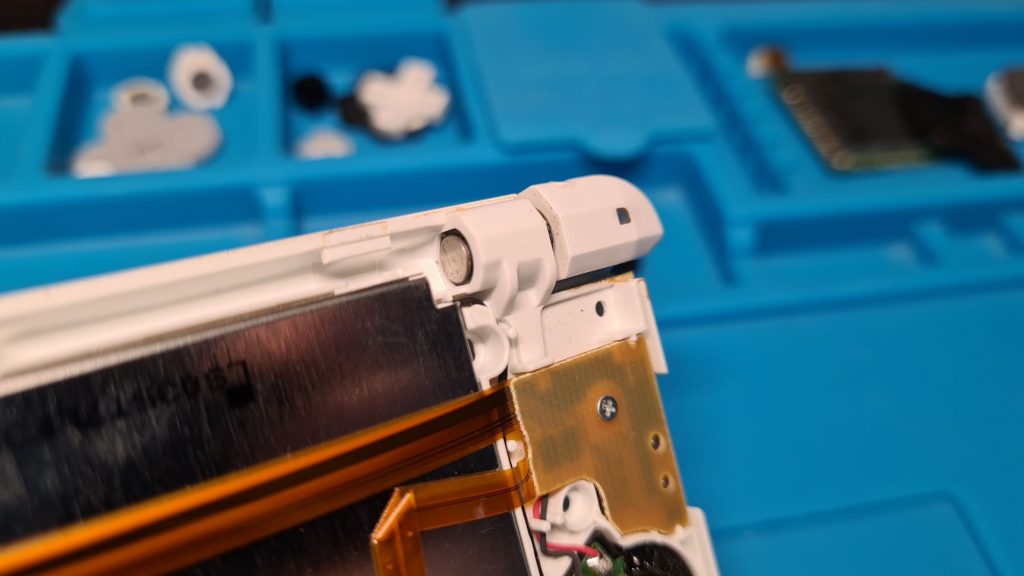

From here turn your console over and you should see the hinge is now clear of the plastic shell.
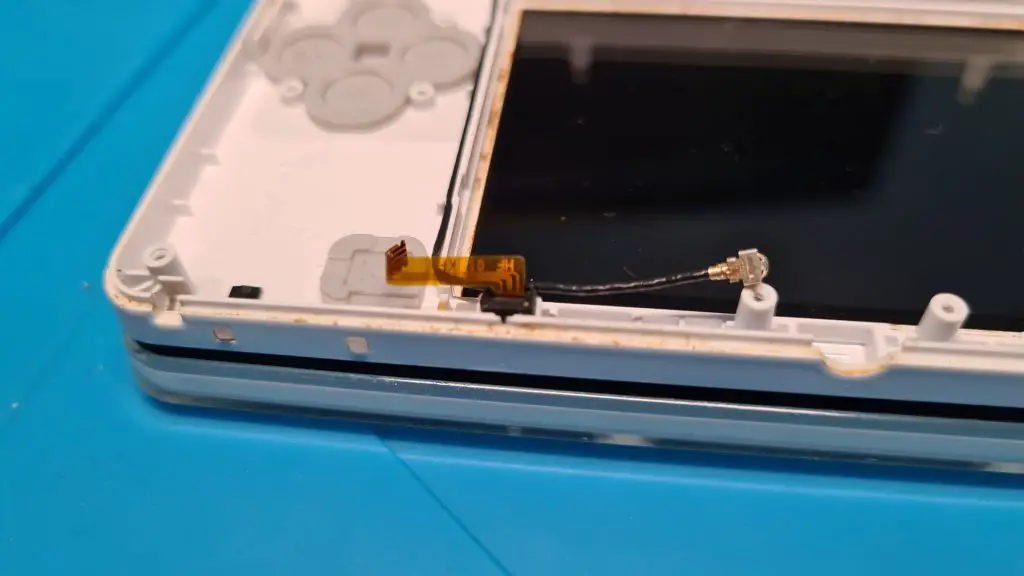
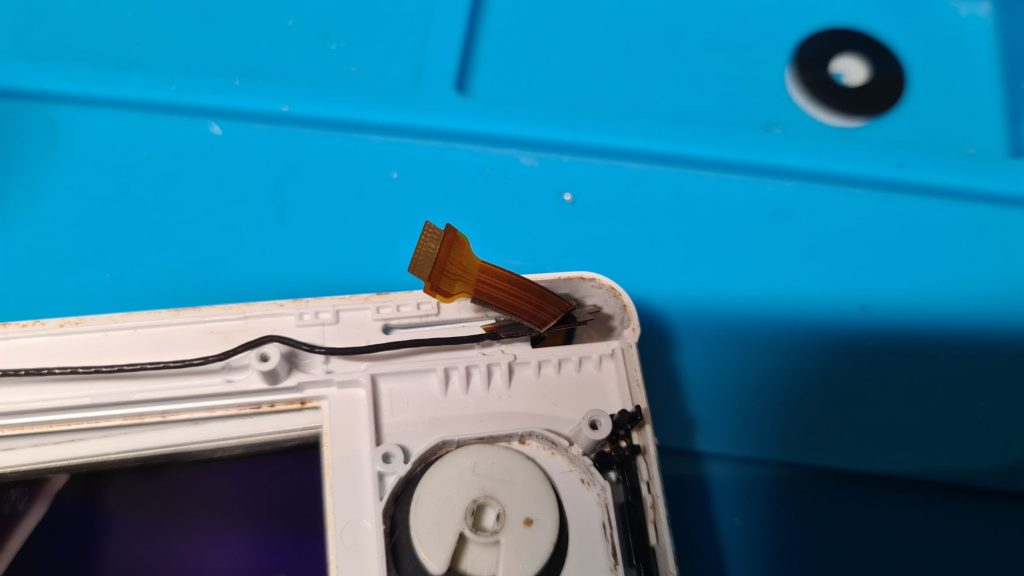
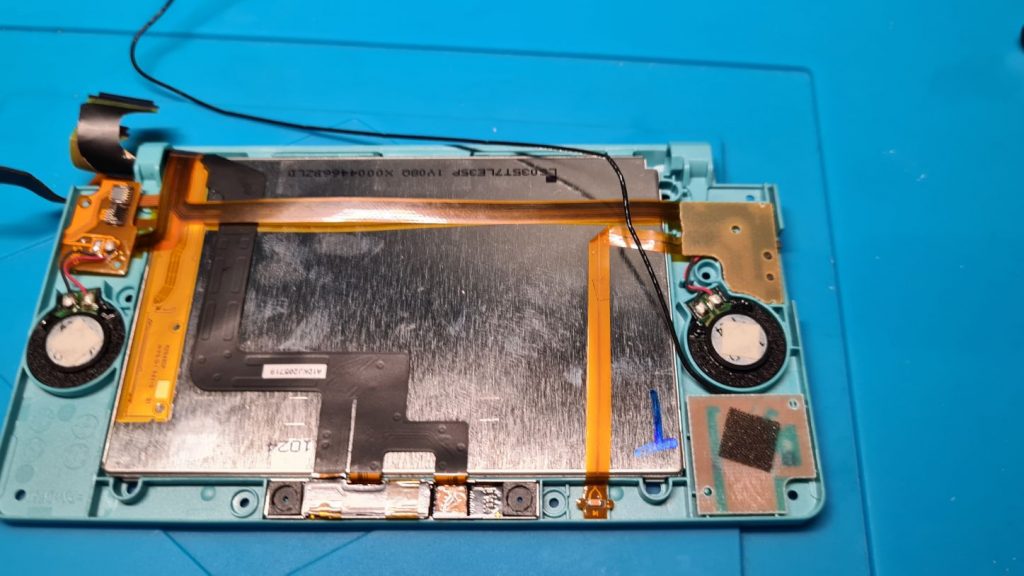
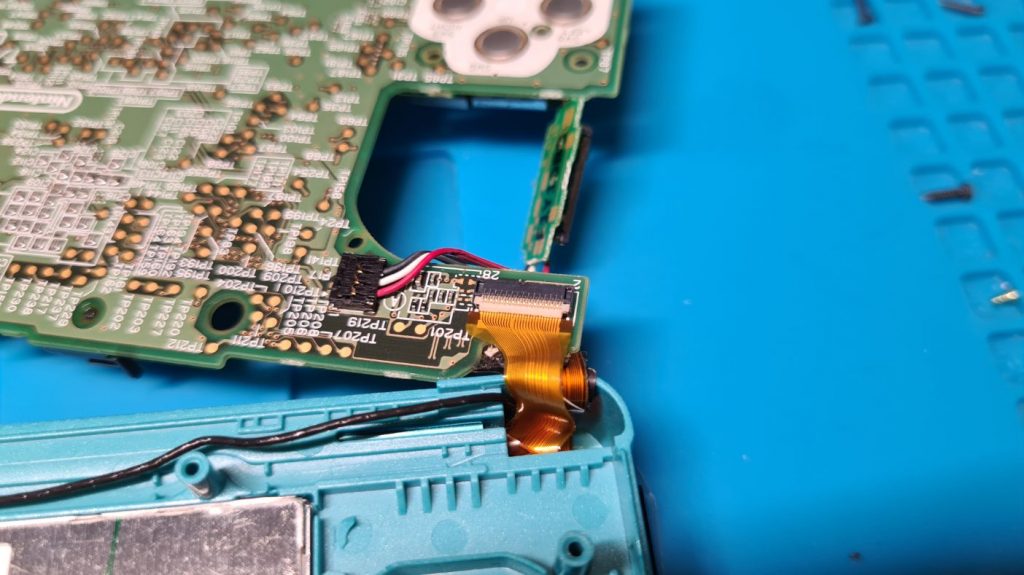
On the other side, we still have all of our ribbon cables for the top screen along with the antenna. You’ll notice the housing has a slot/groove, this is to help remove the ribbon cable connectors. Straighten the cables out and you should be able to thread them through the slot, the same goes for the antenna.
With these ribbon cables free and the hinge removed we can remove the front side of the shell and set it aside.

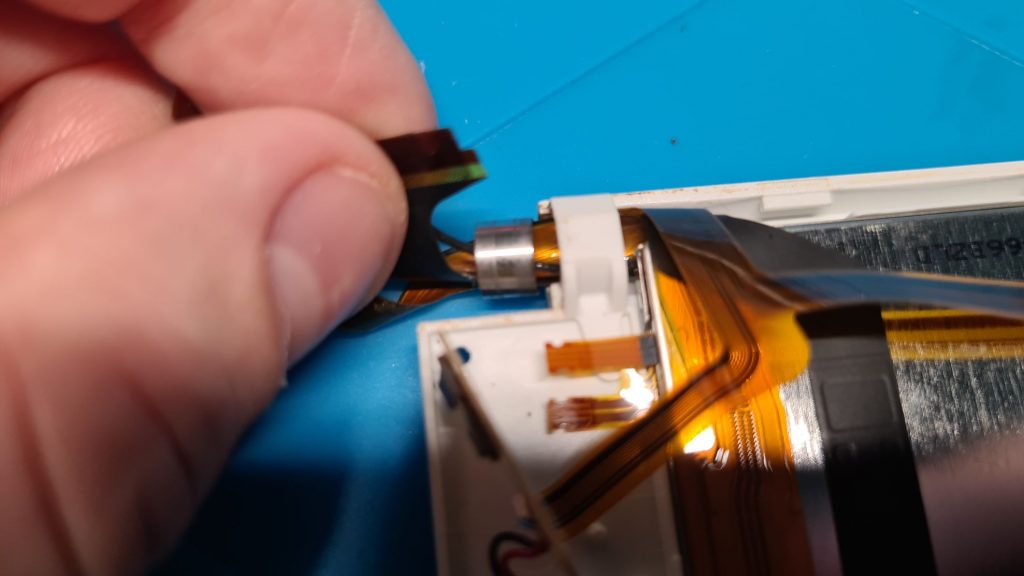
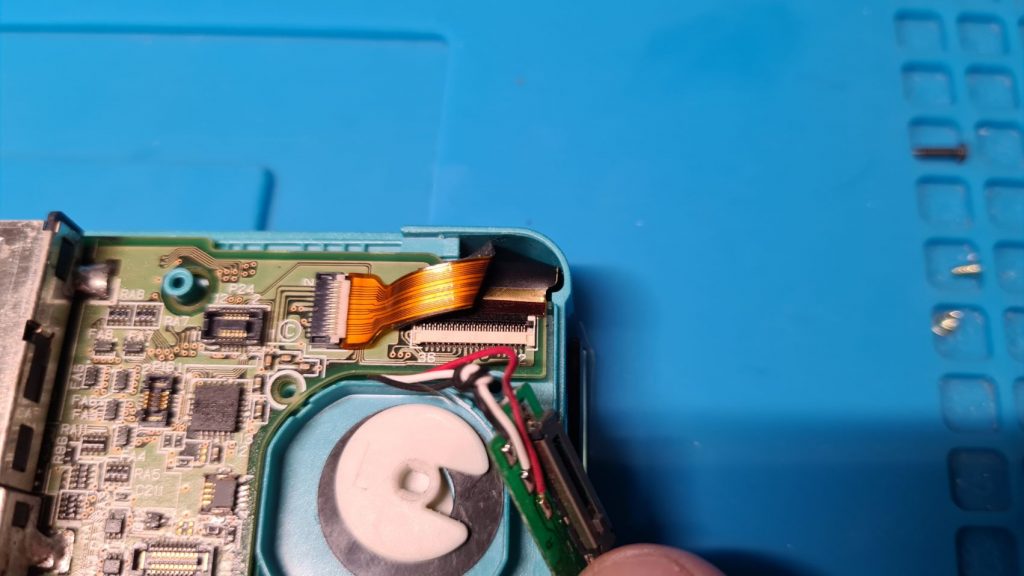
Can you remember earlier in the guide where I said removing the screen bezel is the most annoying part of this process? Well, I was wrong, this next part may test your patience. Be warned!
We need to thread the ribbon cables and antenna through the metal ring you see on the top left of the image above. This took me a solid 15 minutes. You want to be careful not to damage or tear the ribbon cables, they can be bent somewhat but be careful. I found the best way to do this, in the end, was to curl them and eventually I managed to get them free! Thankfully, putting them back through on reassembly is a lot easier!
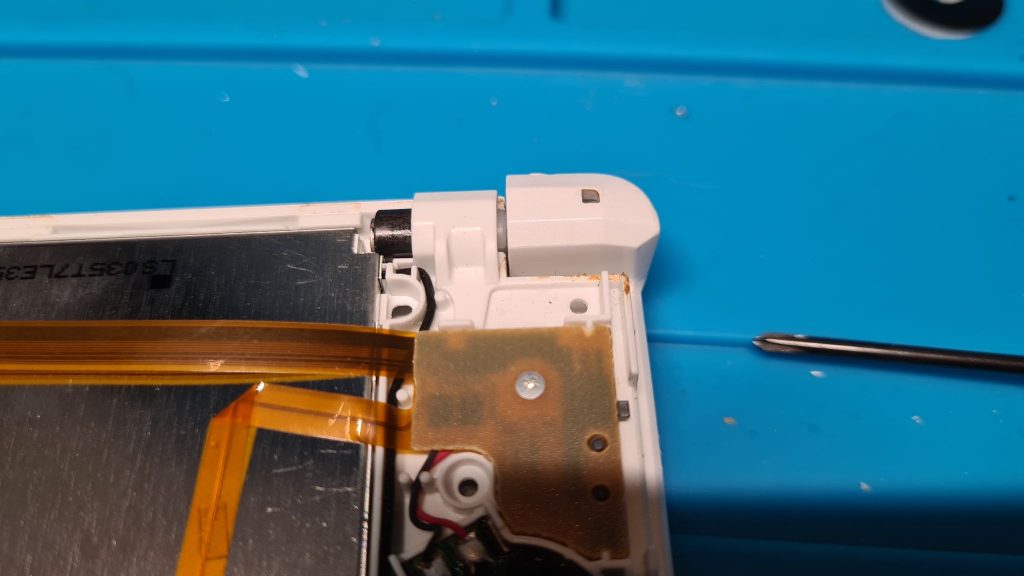
On the right-hand side, remove the screw from the small board that has a speaker attached and the 3D slider.
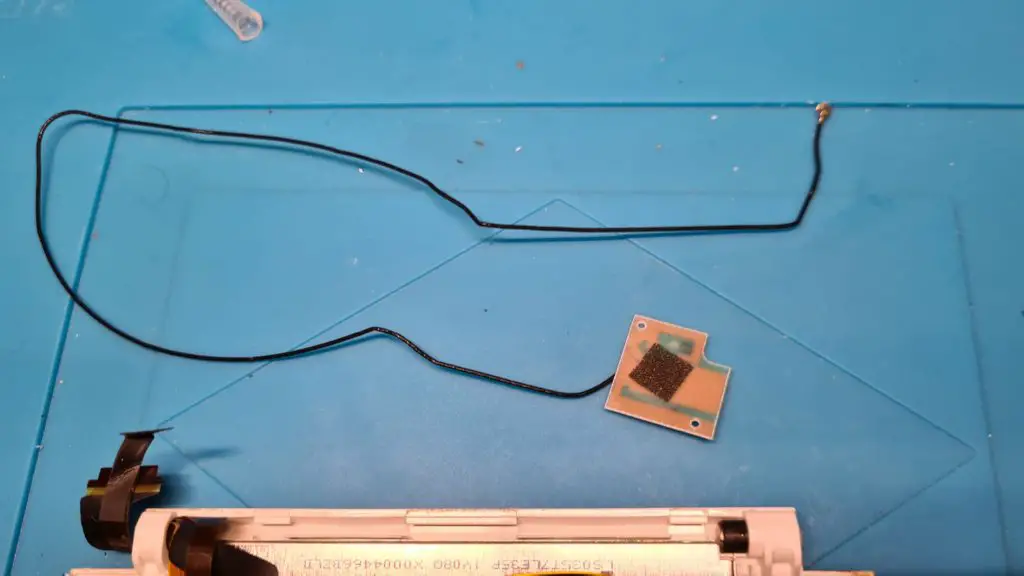
Then we want able to take out the antenna and board that holds it in place. This is not held down and should easily lift out.
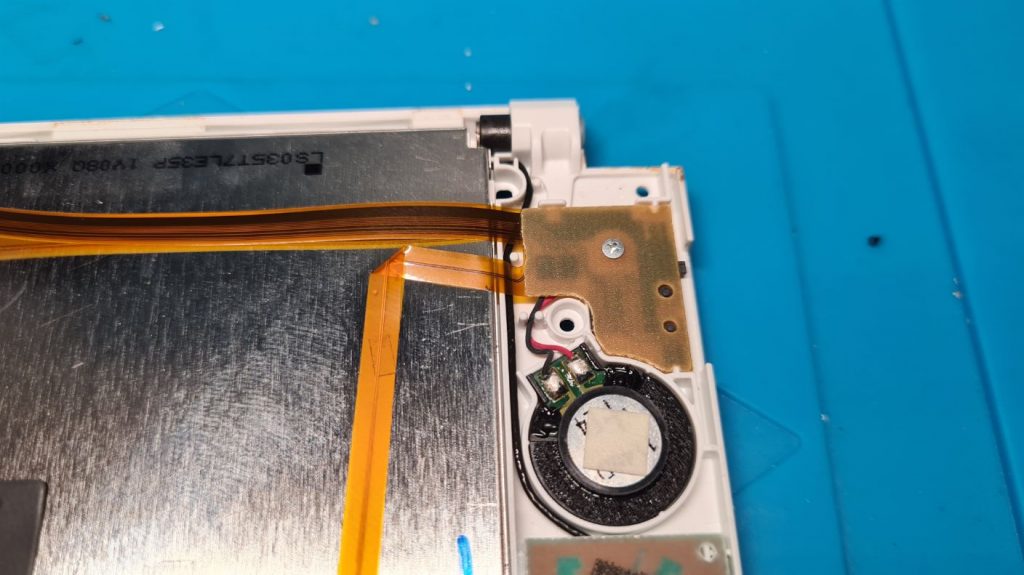
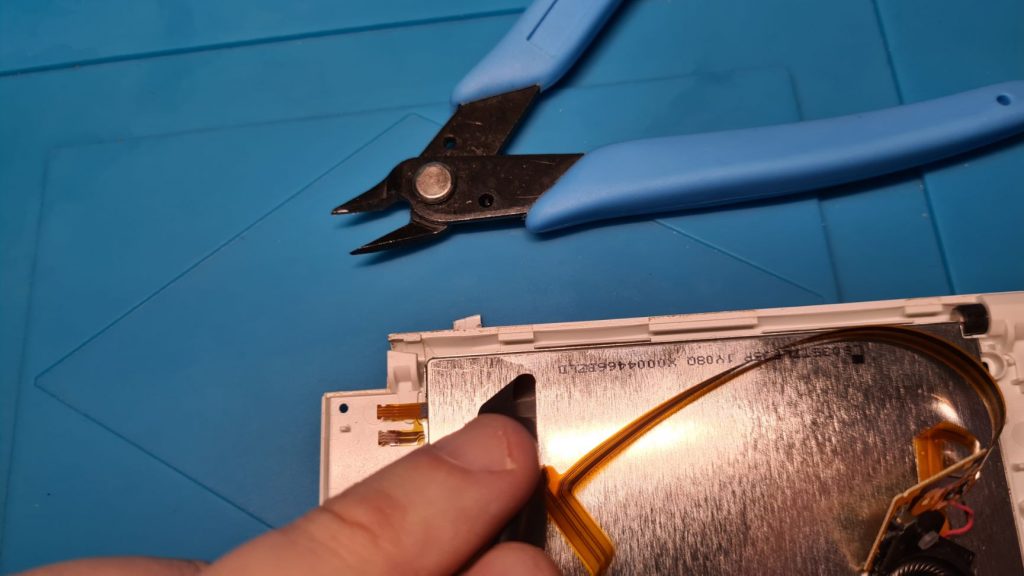
Next. We want to free the ribbon cables, as I am not reusing this shell, I decided to cut a notch out of the shell using flush cutters, but you could simply thread it through like with did with the metal ring earlier.
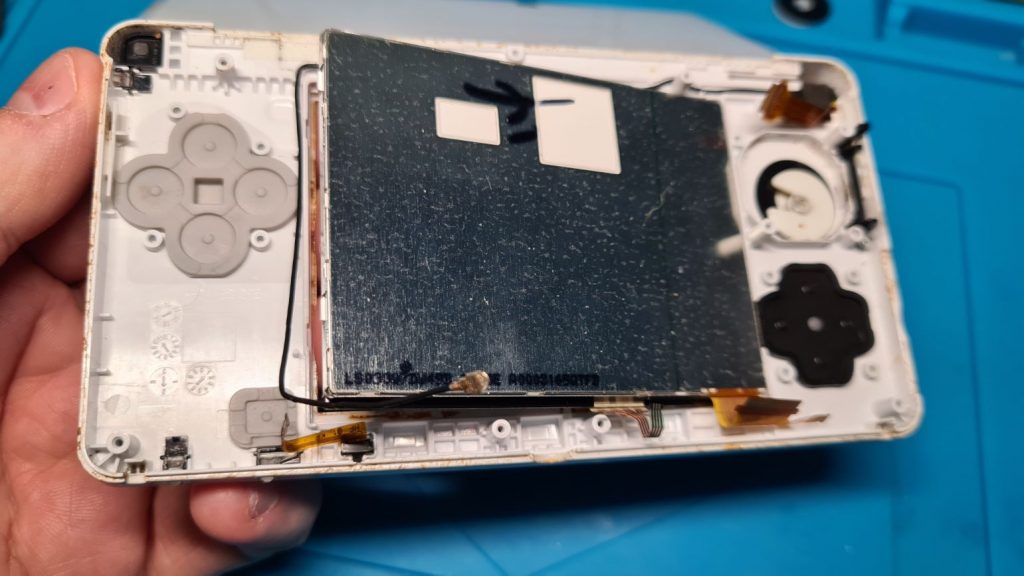
With the cables free, we should be able to completely remove the speakers, camera and screen from the housing. You may need to push gently on the underside of the screen to remove it. Mine came out with minimal resistance.
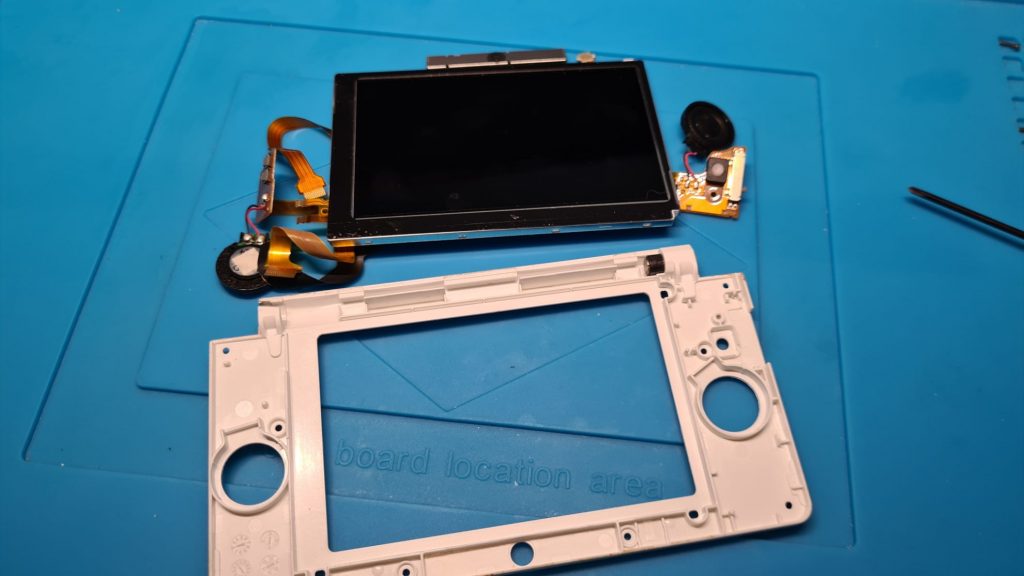
One thing to note is most replacement housings for your 3DS do NOT come with the hinge, so you will want to push the original one out fully which should be quite easy now everything is removed.

The last thing we need to do before transferring everything back into its new housing is to remove the circle pad from the housing of the 3DS. This is somewhat akin to a puzzle; you need to angle the circle pad so part of it is under the housing and then twist it to remove it. The following picture explains it better than I can in words:

Now the 3DS is fully dismantled, we pretty much do the reverse. We will still need to remove the L & R buttons for the original 3DS housing but that will be done a little later for now follow the steps in reverse as below
Putting the 3DS back together
Put the top screen in place along with the board for the 3d slider along with the speakers.

Thread through the ribbon cables
Put in place the Antenna board and feed the cable through with the cables, you will want to run this under the two ribbon cables and around the top of the console.
Screw in the board with the slider and connect the two ribbon cables

Insert the hinge back into the new housing

Thread the ribbon cables back through the metal ring and then slide the ribbon cables and antenna
through the slot on the new housing, slide the cables and antenna and then you’ll be able to attach the top part of the new 3DS shell to the hinge.
From here, you can open the 3DS hinge and install the 6 x screws to hold the top half of the shell together.
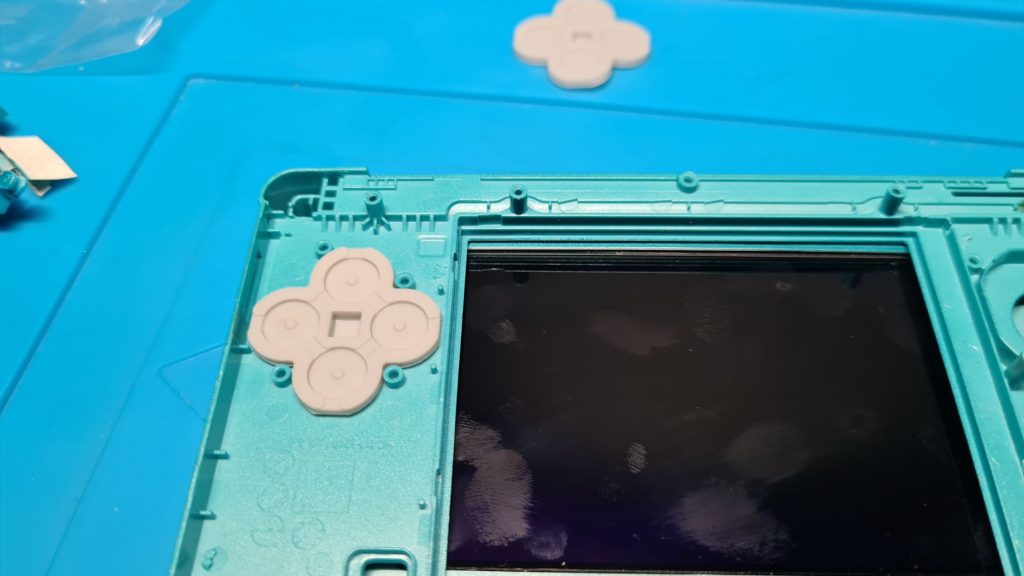
Close the 3DS’s shell and we’ll be able to install the 3DS’s buttons, membranes and all of the transparent plastic pieces for the LED indicators. These should still be attached to your old 3DS shell, however, all aftermarket housing all seem to have replacements.
On the bottom screen we removed earlier, you will notice we still have a bezel around the screen, this is easily removed by prying up on the edges. Your replacement housing will have a self-adhesive bezel with a colour to match. Clean off any residue from the old bezel using a small amount of IPA 99%.
Route the antenna around the inside of the new housing and drop the screen into position. You’ll be able to screw back in the 3DS’s circle pad back into place.

Install the microphone by pushing it into place.

Reconnect the ribbon cable on the underside of the motherboard then flip the board and slide it in place. Make sure that no ribbon cables are caught underneath.
Reconnect the two ribbon cables to the top righthand side.
Screw in the black holder for the slider switch and push it into place

Make sure that the Switch is located in the correct position on the left-hand side, it can slip a little below.

Connect the microphone to the motherboard.
Connect the three ribbon cables around the bottom right-hand side of the motherboard.
Double-check all your ribbon cable connections and screw in the 4 x screws that hold the motherboard in place.
Screw-in the mount for the SD card holder and reattach the metal shielding followed by the SD reader itself.
Push the white connector back into place on the motherboard, it should just clip in place.

Reattach the WiFi Module being sure to attach the antenna.

Push in place the IR module.

On the back half of the old housing, you notice the L & R buttons a still connected. Unscrew these and refit them into your new shell.
Once they are in place, reinstall the circle pad by screwing in the 2 x screws and connecting the ribbon cable.
We can now put the back half of the housing on the 3DS. Connect the newly installed L & R buttons via the ribbon cables to the motherboard. They just pop in place.
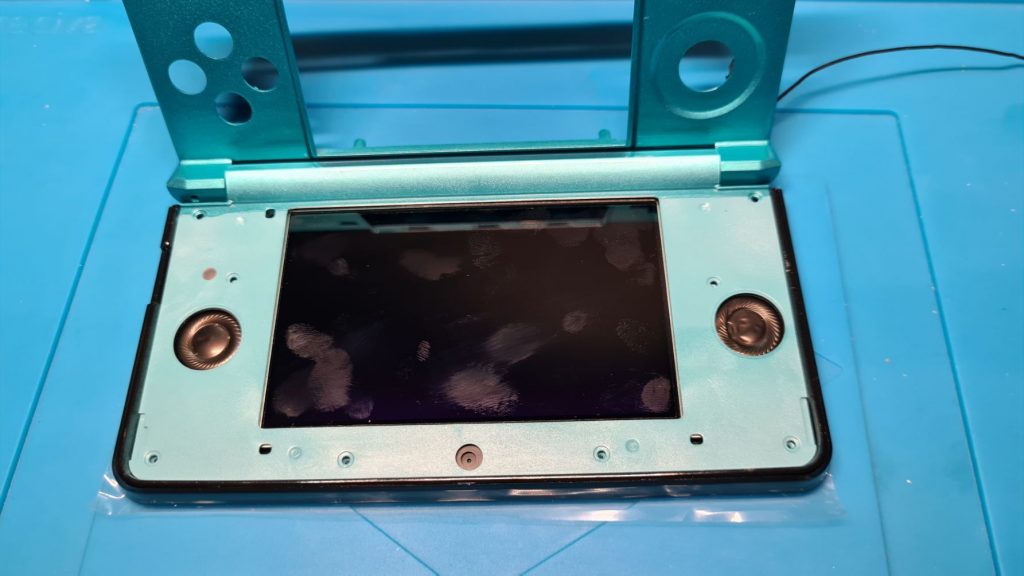
Close the housing and reinstall the 9 x screws to hold everything together.

Clean the top screen thoroughly, make sure there’s no dust, fingerprints or grime underneath. Once this is installed, it’s a pain to adjust (as you know!).

Locate the self-adhesive bezel, peel off the layer and quickly install it before any dirt or dust will get caught under it.
Install the two self-adhesive rubber stoppers into the sides of the bezel.
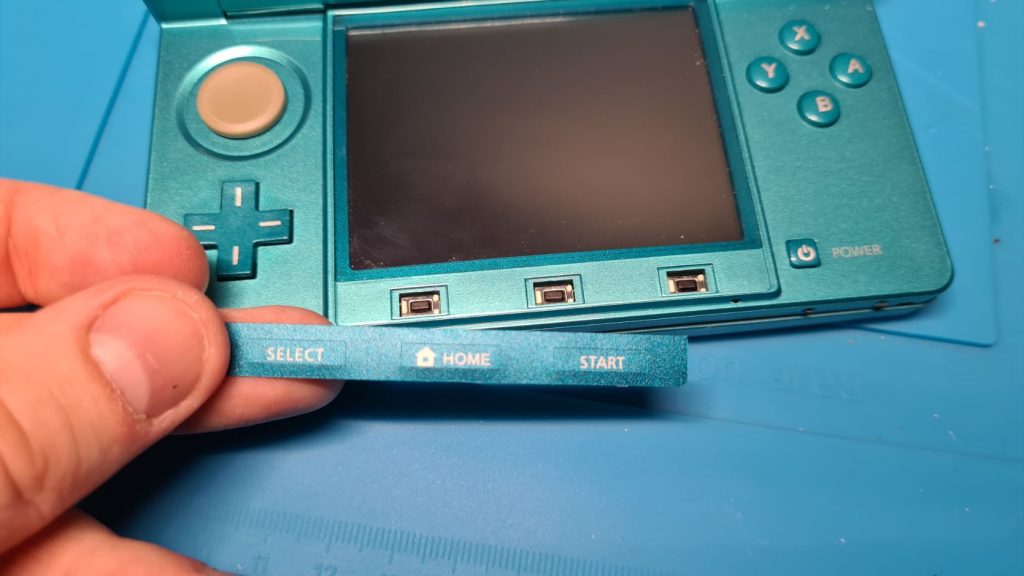
Finally, peel off and install the self-adhesive buttons for the start, select and home.
Install your battery and test that everything works.
I am relieved to see my repair of the 3DS cart slot has been successful.

I hope this guide has helped you, if there’s anything you need to know, feel free to reach out and I will try and help you.