
In this guide, I will show you how to install a Xeno GC chip into your GameCube. This mod will allow you to play out of region games, load homebrew and game backups without the need for an exploitable game. This makes loading into a program such as Swiss or the GameBoy Interface as fast as loading a regular GameCube game.
To install this mod you will need the following: –
Optional: Isopropyl Alcohol
Optional: Mini-DVD R / Different Region Game (For testing)
Optional: Digital Multimeter
To install the Xeno GC modchip we need to take the GameCube apart to access the DVD drive.
First, Remove any game disc’s & accessories. I have a GameBoy Player attached to my GameCube and an SD2SP2 installed so I will remove those first.


With the GameBoy Player detached we can access the bottom of the GameCube. To open the GameCube up we need to use a 4.5mm Gamebit screwdriver to remove the four screws that hold the shell in place.

Once the screws are out, put them to the side and turn your GameCube back over. You should now be able to lift the top of the GameCube off.


Put your top half of the shell to the side and remove the backplate, this is done by pulling up on it.

Next, we want to remove the front where the controller ports are. To do this gently pull up on the part while being careful of the ribbon cable that attaches this part to the mainboard. You need to remove the ribbon cable by gently pulling it away from the mainboard, afterwards put the board to the side.


Optional: Now is a great time to replace the internal battery inside your GameCube. This keeps your time and date ticking along even when the GameCube is turned off. The GameCube uses a tabbed CR2032 battery, to access it you will need to remove the board which is held in place with 2 x Phillips head screws. Ince the board is off you will want to remove the battery using your soldering iron and replace the battery. Once that is done, put the screws back into the board.

Next, we want to remove the fan. This is down by disconnecting the fan from the mainboard by removing its power cable.

Now, we need to remove the two Phillips head screws which hold the fan in place. With these out, the fan should just lift out.


Next, we need to remove the screws holding DVD drive to the motherboard. For, some reason Nintendo decided to use 16 screws! Remove these Phillips head screws and set them aside. There are twelve larger screws and four smaller screws (well, longer technically!) which are located on top of the memory card slots. Make sure you keep these separate. Also, you’ll need to lift off the two plates that sit on top of the memory card slots.
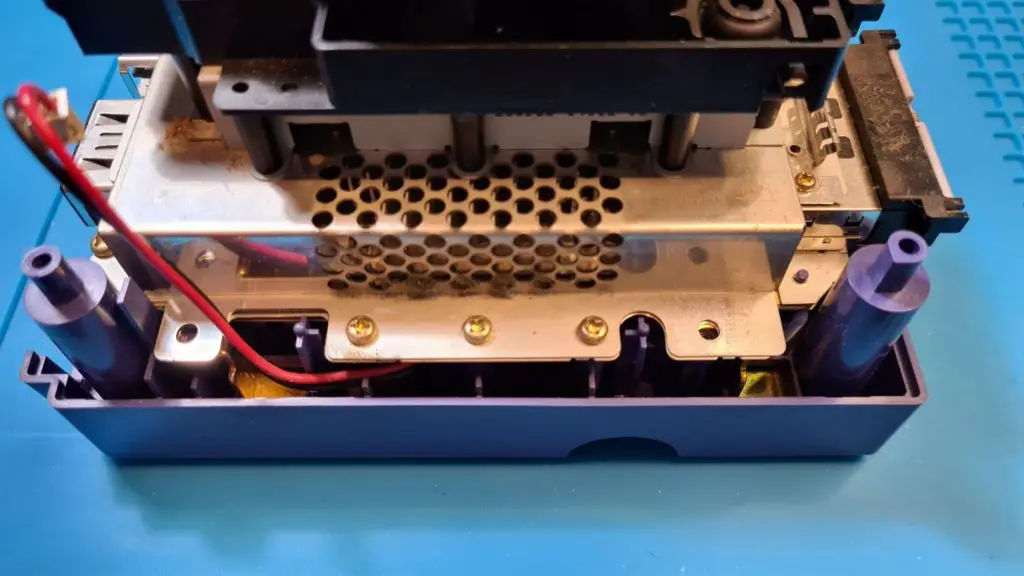


With these removed we can now completely remove the DVD drive from the motherboard. Do this by simply lifting up. Now, might be a great time to clean out any dust and dirt that has got inside your console over the years.

Set the bottom half with the motherboard aside, we won’t need that until putting everything back together.

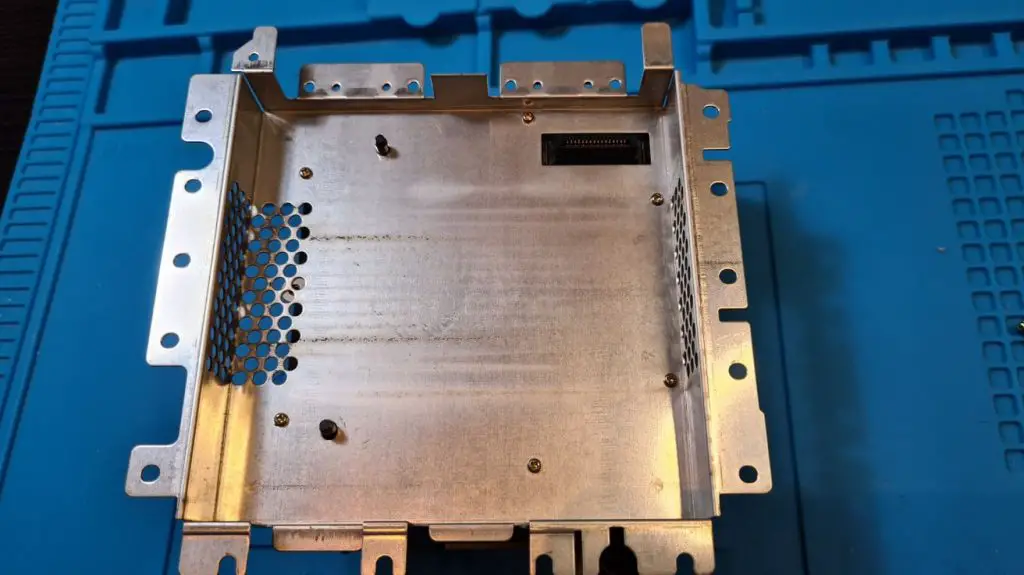
We need to remove the metal shielding on the bottom of the DVD drive. To do this remove the 6 additional screws that hold it in place and it should just lift off.
Now we have the DVD Drive’s board exposed we can locate where to install our GameCube modchip.

This is the area you need to install you Xeno GC modchip.


Now, its worth mentioning that this chip requires 6 points to be soldered. The 2 points at the top of the chip you will want to fill with solder, while the two larger blob looking points need to be soldered on both sides of each point. Please do flood the whole thing with solder and bridge these connections, you will notice that they have quick solder pads on each side, use these.
Before soldering, I recommend adding some no-clean flux to all the pads, both on the chip and the DVD drive board. This will ensure we get a nicer join. You may also want to consider temporarily tacking down your Xeno GC modchip into place before soldering with some electrical tape.


Note: You can install this chip using wires. Just put your chip into place and take note of what needs to be wired and where. Once your cables are soldered into place insulate your board with some electrical tape. I have another GameCube somewhere around here which I will install a Xeno GC chip using wires, I will update this guide when I get around to it.
After your board is soldered, you may want to clean off any residual flux using some Isopropyl alcohol. We now will want to see if our board is installed correctly. To do this We will partially put the console back together. Now, please do be careful when handling exposed boards!

Put the shielding back into place and sit the DVD driver back on top of the motherboard.

Locate your fan and switch we removed earlier and reconnect the power cable.

Lastly, plug your controller port board back in using the ribbon cable and sit it back in place.

We will now be able to test if our chip has been installed successfully. Grab an out of region disc or Homebrew disc and put it on to the DVD drive. You’ll have to hold down the little button at the back to keep your disc spinning.


If you are using a different region game, it should start up just fine. If you want to use Homebrew, such as swiss burnt to a disc you may need to adjust you GameCube’s DVD drive laser. You see, the GameCube’s laser can be a little picky and might find it hard to read your burnt DVDs. Try your burnt homebrew / Backup disc and if it gets frozen on the GameCube logo you will need to do some tweaking.
If you have no problem with you GameCube reading discs, feel free to jump ahead and start reassembling your GameCube.
To adjust the GameCube’s laser, we need to unplug the power and remove the DVD drive once again. Remove the shielding and locate the potentiometer which can be used to adjust the intensity of the drive’s laser.

This is where a multimeter would come in handy. Using the points below set your multimeter to ohms and take a reading. The ideal range should be roughly between 150 – 250 ohms. I tend to find each GameCube varies massively. My one here is 473 Ohms! We need to lower the number of ohms by turning the potentiometer anti-clockwise. This is very sensitive; you only need to turn it very slightly. Try turning it down 20 ohms at a time to see if it starts reading discs.
**Do NOT go lower than 150 ohms, this could damage your GameCube’s laser**
With your GameCube successfully booting our burnt DVDs we can reassemble our GameCube. Follow all the steps in reverse and do not forget to reattach both the fan power cable and the ribbon cable for the controller board.
With your Xeno GC chip installed you be able to quickly load into homebrew and play your game backups using burnt DVDs or Swiss. If you don’t want to go through the trouble of running Swiss, you can also launch the GameBoy Interface directly by burning this to disc. I hope you found this guide useful.
