Wii unhacking guide: How to reset your Wii back to stock firmware.
In this guide, I will be showing you how to uninstall any custom firmware or homebrew and restore your Wii back to factory settings. Once finished, you’ll be left a Wii which should feel like it’s come from the factory.
Removing your Wii’s soft mod is quite straight forward, however, we will be completely rewriting your Wii’s internal memory and there is a chance you may brick your console. It’s unlikely this will happen to you but there is the chance!
Why unhack your Wii?
There’s no real reason to un mod your Wii. The benefits of a soft modded Wii are greater than that of a stock Wii but if you are like me and you have received a second-hand Wii or have an older Wii that you have forgot what softmods you put onto it, then following this guide will allow you start fresh and reinstall your mods one by one. Apart from starting with a ‘clean slate’, this guide could be useful if you seem to be having with your system stability and crashing caused by bad/corrupted memory issues caused by softmodding.
Things you’ll need: -
A Wii Console
An SD card, ideally 32GB in size. The Wii can only see cards up to 32GB in size, but You can use bigger cards. I used a SanDisk 128GB but had to format a 32GB FAT32 partition onto it for it to work. I used a MicroSD to full SD converter that is included with all SanDisk Micro SD cards.
SD or Micro SD card reader
A PC running windows
A GameCube controller (This is not needed if your console has BootMii installed as BOOT 2, in this guide I do NOT have it installed so I needed a GameCube controller to input a button combo)
Procedure
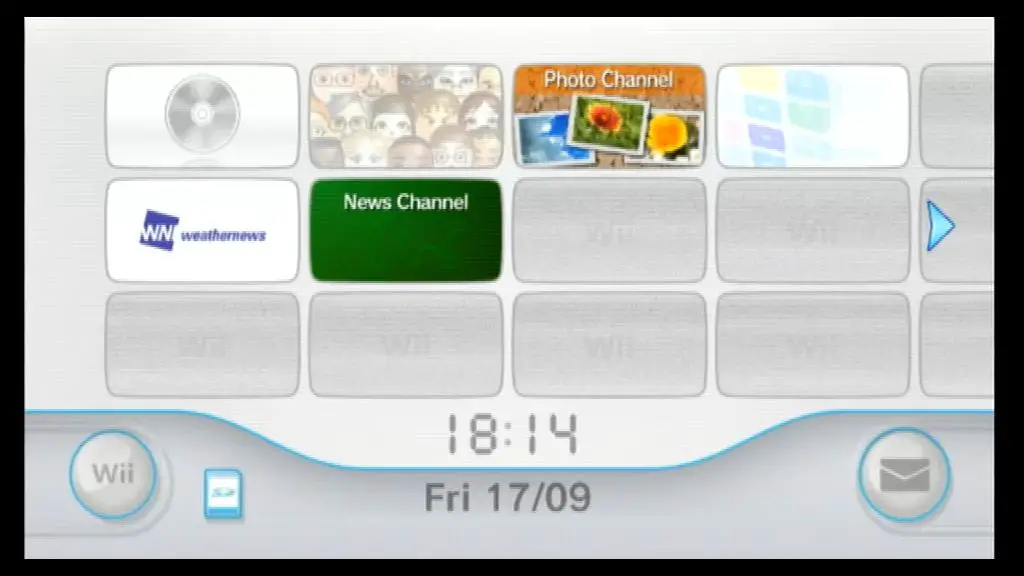
The first thing we need to do is find out the current firmware of our Wii. To do this, turn on your Wii console and click on the Wii button in the bottom left of the screen, from here, select the Wii settings icon on the right. You’ll now be in your Wii’s settings menu, and you notice the current firmware version in the top right corner.


My current Wii’s firmware version is 4.3E with the ‘E’ meaning I have the European version of the 4.3 firmware installed. If you have a US console the firmware will read ‘U’ at the end, with Japan and Korea also having their unique designations. For this to work, we MUST make sure the Wii is flashed with the correct region the hardware shipped with. To check which model number and region, turn your Wii off and flip it upside down. On the sticker, you’ll see what model number and region your Wii console is. My model no. is RVL-001 (EUR).

The next thing we will want to do is backup our Wii’s currently Nand. This is important as it’s what we will be used to reset our Wii back to stock. It’s also good practice to keep a backup of your NAND in case anything goes wrong.
Make sure your SD card is inserted into your Wii and that it has at least 600MB free. The usual size for the NAND backup is around 500MB.
To back up our Wii’s NAND we need to boot up our console and head over to the homebrew channel. Once the homebrew channel is launched press the ‘home’ button and choose to launch ‘BootMii’.

Once inside BootMii you have to navigate the menu using the Wii consoles face buttons. Press the Wii’s power button three times to navigate to the settings option and then press the reset button to enter the settings menu.

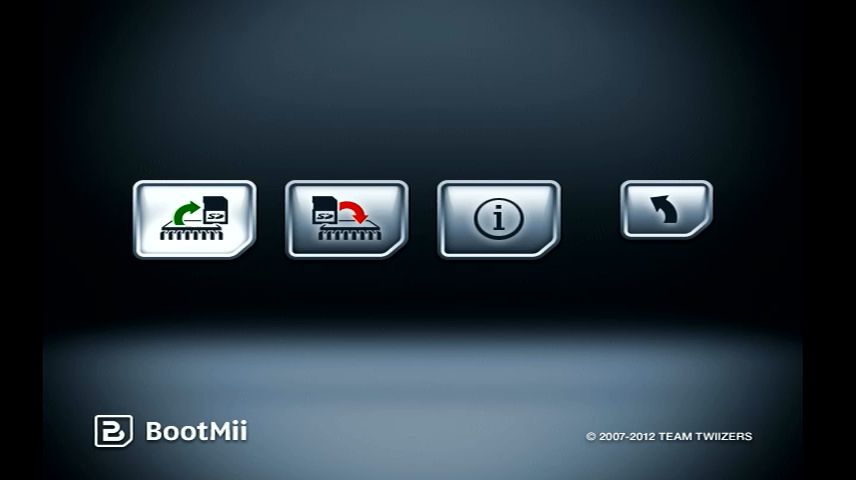
Select the first option with the green arrow and press reset once again to begin dumping your systems NAND to the SD card. This will take a little to complete and don’t be alarmed with there are any bad blocks flagged up while dumping, this is perfectly normal.
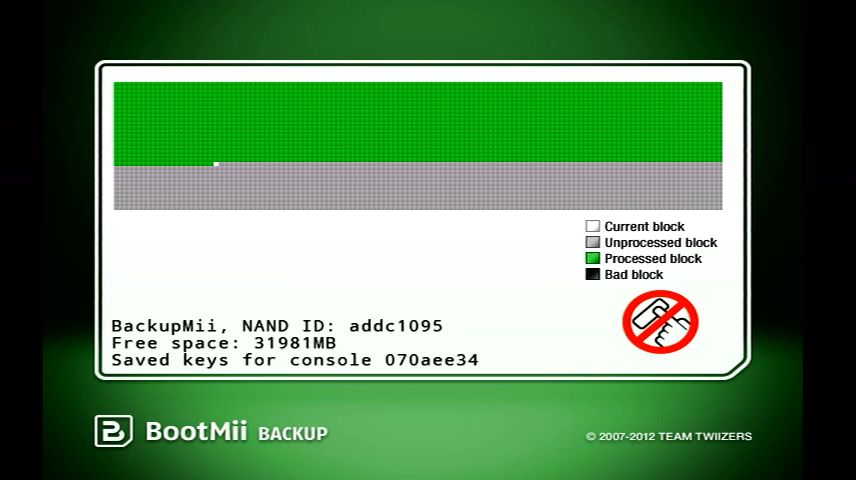
Once it has completed dumping the NAND BootMii will automatically verify the dump, you can skip this if you wish but I highly suggest you let it finish.

Once this is finished, you can press any button on the console to exit, navigate to the back arrow and select the ‘Wii’ option to enter the Wii’s main menu. From here you’ll be able to shut down your Wii as normal.
Next, remove the SD Card from the Wii and head over to your windows machine. Plugin your SD card to your reader of choice, I use a cheap USB to Micro SD card I got from Amazon. On the root of the SD card, you’ll find two newly created files; Nand.bin and Keys.bin, copy these files to a folder on your desktop or somewhere else on your PC and also make another folder elsewhere to save another copy for redundancy. You need to keep a copy of these files are they could come in helpful if anything goes wrong.

With the files copied, we need to download a program called Ohneschwanzenegger (https://wiibrew.org/wiki/Ohneschwanzenegger). This program will allow us to ‘clean’ our current backed up nand and help set it back to stop settings. Download Ohneschwanzenegger from Wiibrew.org and extract it with 7-Zip or Winrar. Once extracted locate ohneschwanzenegger.exe and launch it.
Click ‘Local Cache’ and chose the folder where you made one of your two Nand backups. Click search to open the file explorer and select your nand.bin file then click open.

With the Nand now selected, click on ‘content’ and the format. At this point, double-check you have made a second copy of your nand file elsewhere and click ‘yes’ to continue.
Next, you’ll be prompted to type in some info, this has to match the sticker on the bottom of your Wii. Type in the current firmware, which we found out earlier, so mine here is 4.3e. Remember to input the right region at the end of the firmware (E, U, J etc) then click the ‘Get it!’ button and the firmware will begin to download. This may take some time depending on your internet connection etc.

Once finished you’ll be met with this pop-up form: –
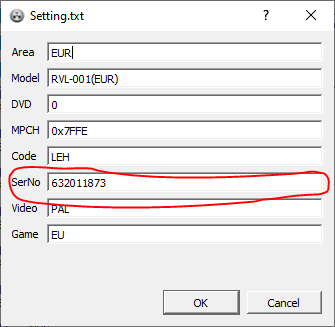
First, make sure your consoles model number matches the one on the bottom of the Wii, this needs to be correct, or you will brick your console. Next, fill in the ‘code’ section of the form with the first two letters from your Wii’s serial number and input the rest of the serial number in the ‘SerNo’, section, this should be 9 digits long then click OK.
We can now close Ohneschwanzenegger and copy the modified Nand file back over your SD card. If you left the original on there, it would need to be overwritten.
Re-insert your SD card back into your Wii console, boot up the system and launch the homebrew channel. Launch BootMii once again and use the consoles face buttons to enter the settings menu. This time we want to be choosing the icon with the red arrow.

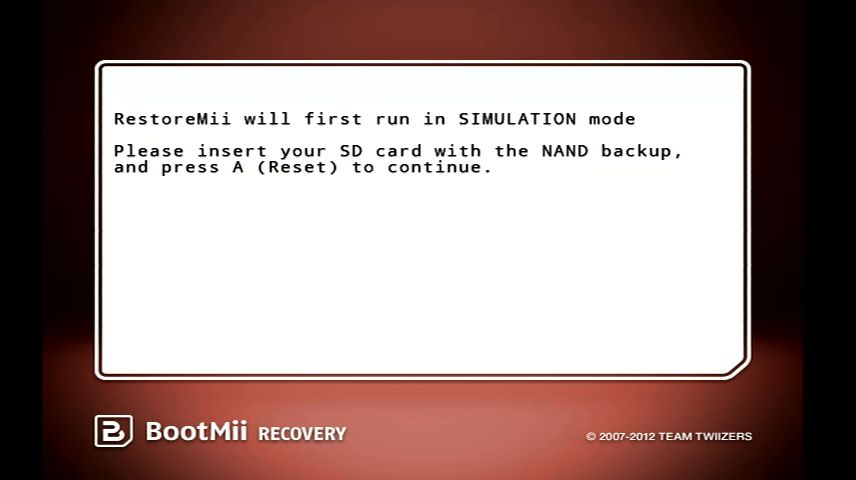
A message will popup, read it and press reset to continue. The system will do a trial run in Simulation mode first. If you get a message about not having BootMii installed as Boot 2 you’ll need to connect a GameCube controller and enter the Konami Code (Up, Up, Down, Down, Left, Right, Left, Right, B, A). This will override the app and allow the Nand to be flashed. Afterwards, press the eject button to write the nand from the SD card to your Wii for real. If there is any time this could mess up, it would be now.

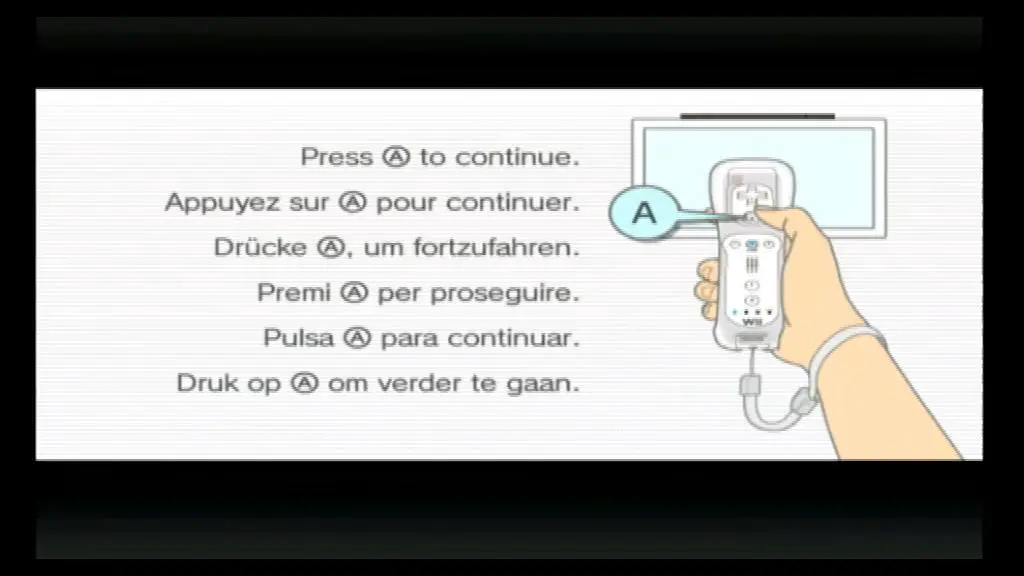
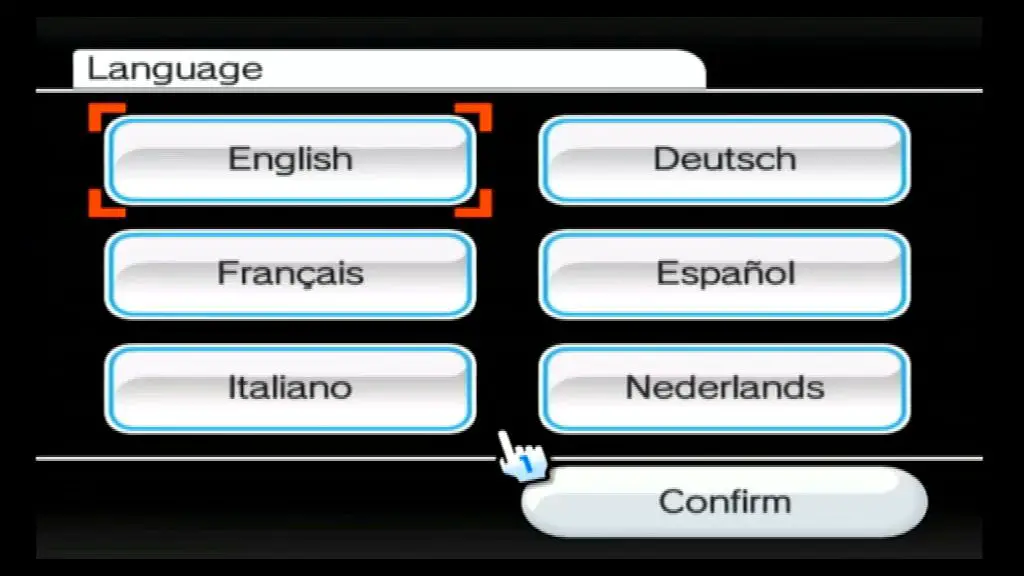
Once complete, press eject again to enter the menu and navigate to the end and press eject to return to the main menu. Now, for the moment of truth, select the ‘wii’ icon. If the flash has been successful after around 20 seconds of a blank screen, you’re Wii will restart and will need to be set up as if it was brand new. You’ll be met with usual system setup instructions just like when the console was first turned on!
If you did not have BootMii installed as Boot 2, then congratulations your Wii is now reset to stock. If you did have BootMii as Boot 2, We’ll need to remove that. To do this, you’ll want to launch the letter bomb exploit to allow homebrew to be run temporarily. Download it here and follow the instructions to copy it to your SD card.
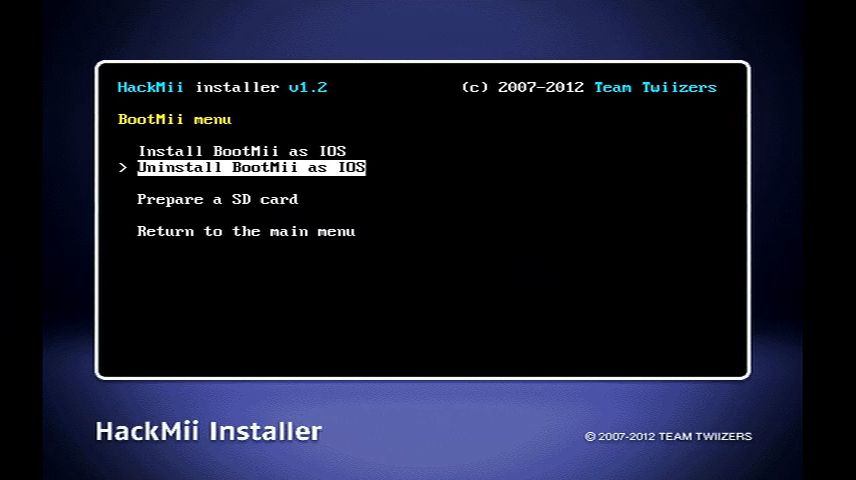
Head over the message board and locate the letter bomb exploit, it should be in yesterday’s activity log. Launch the exploit and read the mandatory message. When prompted press ‘1’. This will launch the HackMii installer, press ‘A’ to continue and select Bootmii. We want to remove BootMii as Boot 2, so select ‘Uninstall BootMii as Boot 2’ then select yes to confirm. This will wipe it from the system’s memory. Afterwards, do the same process for the ‘Uninstall BootMii / IOS’ option.


Congratulations, you now have your Wii back to stock setting and can re-mod it or keep it stock! I hope this helped.
For anyone who is using Australian consoles that shows model code RVL-001(AUS) on the bottom, do NOT use this model code, it will brick. Use RVL-001(EUR). I’ve bricked one console wondering why so I used a hand extractor on my 2nd backup and noticed it stored the RVL-001(EUR), not AUS. Very fortunately this Wii had a boot2 bootmii so I restored it again with the current model code and it worked without issue.